
Appearance: Removing the Exterior Door Trim

Thread Starter
Senior Member
Joined: 12-23-06
Posts: 1,500
Likes: 0
From: York, PA
Removing the Exterior Door Trim
alright first thing is to do this on a nice hot day. it was 82 when i did it. park you car out in the sun and let it get nice and hot.
here's what you will need.
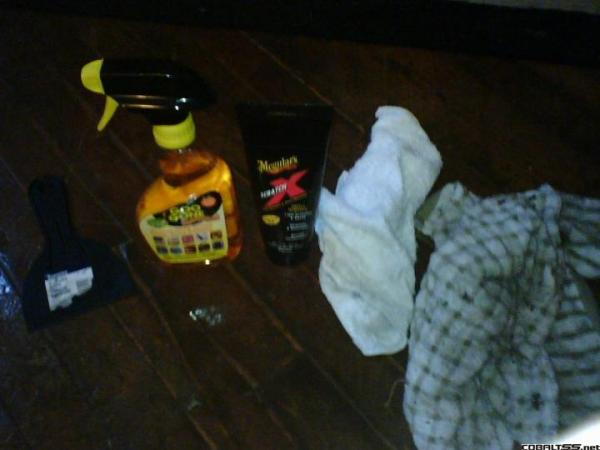
1- clean 100% cotton rag
1- clean 100% cotton towel
1- bottle of Meguir's Scratch X

1- spray bottle of Goo Gone

1- plastic putty knife
-start with the side of the car that is not facing the sun, (trust me i did it the other way around and you will see why)
-start by sprying the Goo Gone gel onto the trim covering every bit of it and make sure to let it drip down between it and the car.
let it set for at least 8min. DON'T RUSH IT. if you want it to be easy and turn out good wait 10min.
-once it has soaked in thoroughly take your plastic putty knife using the towel to cushion it against the car and squeeze it between. i used and up and down motion while pushing forward at the same time.
go slowly and make sure the adhesive is coming off with the trim, and not being left on the car.
should look like this as you take it off.

try to minimize scratches but don't worry to much about small ones.
now if you get the whole trim off with out any residue left then you are done with this step, -but if you left some adhesive behind and it looks like this
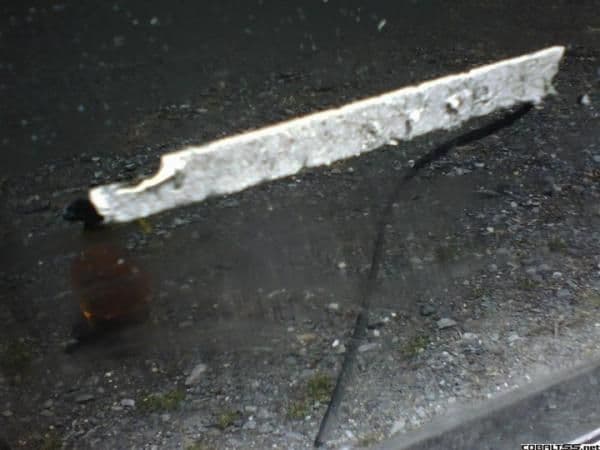
which is what happened when i started on the sunny side of my car.
reapply Goo Gone and get your towel and start to rub, back and forth really hard.
it will eventually come off, but takes awhile. this is exactly why you need to be on the shady side, and take your time.
-so once all that is done either take your car to get it washed or wash it yourself. take extra time to scrub the area where the trim was since you are going to have all kinds of residue form the Goo Gone and the adhesive.
-once your done with washing it take you Meguir's Scratch X and start to work on the scratched areas. this stuff works just like wax and has good instructions on the bottle. work in small areas applying plenty of elbow grease wait til it dries then wipe it off with a clean cloth.
-i would recommend after your done this to clean the area and go ahead and wax your car.
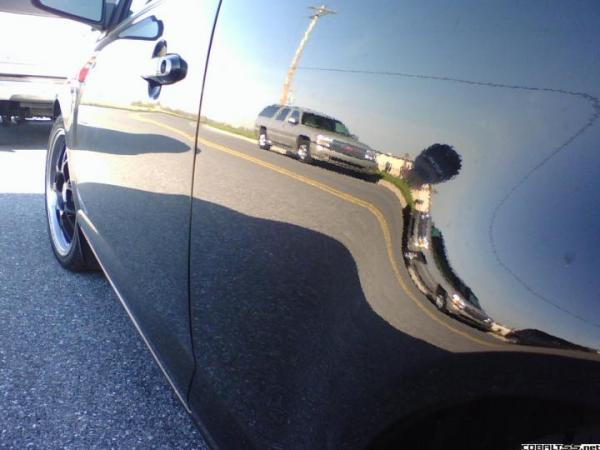
here is the finished product, enjoy!
here's what you will need.
1- clean 100% cotton rag
1- clean 100% cotton towel
1- bottle of Meguir's Scratch X
1- spray bottle of Goo Gone
1- plastic putty knife
-start with the side of the car that is not facing the sun, (trust me i did it the other way around and you will see why)
-start by sprying the Goo Gone gel onto the trim covering every bit of it and make sure to let it drip down between it and the car.
let it set for at least 8min. DON'T RUSH IT. if you want it to be easy and turn out good wait 10min.
-once it has soaked in thoroughly take your plastic putty knife using the towel to cushion it against the car and squeeze it between. i used and up and down motion while pushing forward at the same time.
go slowly and make sure the adhesive is coming off with the trim, and not being left on the car.
should look like this as you take it off.
try to minimize scratches but don't worry to much about small ones.
now if you get the whole trim off with out any residue left then you are done with this step, -but if you left some adhesive behind and it looks like this
which is what happened when i started on the sunny side of my car.
reapply Goo Gone and get your towel and start to rub, back and forth really hard.
it will eventually come off, but takes awhile. this is exactly why you need to be on the shady side, and take your time.
-so once all that is done either take your car to get it washed or wash it yourself. take extra time to scrub the area where the trim was since you are going to have all kinds of residue form the Goo Gone and the adhesive.
-once your done with washing it take you Meguir's Scratch X and start to work on the scratched areas. this stuff works just like wax and has good instructions on the bottle. work in small areas applying plenty of elbow grease wait til it dries then wipe it off with a clean cloth.
-i would recommend after your done this to clean the area and go ahead and wax your car.
here is the finished product, enjoy!
Last edited by TommyP; Oct 3, 2012 at 12:56 PM.


New Member
Joined: 11-29-06
Posts: 41
Likes: 0
From: Tennessee
great write up. Soon as I read this, i went and did it right away! I always thought the door trim was screw in from teh inside of the door and if i would take it off, i would need to get the holes fillled...painted...ect. Anyways I just got done with mine ( I did it in my garage, didn't need it to be hot) and got it done in little less then an hour! Came right off after letting the goo-gone sit for 10 mins then i slid the spatula under it and it took the entire guard right off, tape and all. No scratches or anything and now i love it! propz to ya

Senior Member
Joined: 03-02-06
Posts: 620
Likes: 0
From: Fleetwood, PA
If you don't want to wait for a hot day you can use a heat gun or a hair dryer on it you just have to keep it moving and don't leave it sit at one spot for too long. Nice write up...it looks a million times better

New Member
Joined: 03-20-07
Posts: 194
Likes: 0
From: Florida
Here is something better to use than a Putty Knife...That IMHO is just asking for scratches, hence you having to use Scratch X...
Get some HIGH STRENGTH fishing line...and go to town on it after heating up sections at a time with a hairdryer... This leaves almost NO sticker foam stuff behind...and all you have to do is use a MICROFIBER cloth and some Goo Gone and then finish up with a wash and wax cause that section has never been waxed...
I Highly Recommend people staying away from putty knives...much safer with Fishing line.

New Member
Joined: 06-13-07
Posts: 20
Likes: 0
From: Missouri
Here is something better to use than a Putty Knife...That IMHO is just asking for scratches, hence you having to use Scratch X...
Get some HIGH STRENGTH fishing line...and go to town on it after heating up sections at a time with a hairdryer... This leaves almost NO sticker foam stuff behind...and all you have to do is use a MICROFIBER cloth and some Goo Gone and then finish up with a wash and wax cause that section has never been waxed...
I Highly Recommend people staying away from putty knives...much safer with Fishing line.
Get some HIGH STRENGTH fishing line...and go to town on it after heating up sections at a time with a hairdryer... This leaves almost NO sticker foam stuff behind...and all you have to do is use a MICROFIBER cloth and some Goo Gone and then finish up with a wash and wax cause that section has never been waxed...
I Highly Recommend people staying away from putty knives...much safer with Fishing line.
Senior Member
Joined: 05-10-07
Posts: 5,890
Likes: 1
From: West Babylon, NY
Ive removed all the badges from my car with the fishing line.... the trim is next, ive grown to not be able to stand it. I suggest fishing line. then use your remover and let it soak a little on the glue. heat it with a hair dryer and it should just about "roll" off with just a little pressure
Senior Member
Joined: 05-10-07
Posts: 5,890
Likes: 1
From: West Babylon, NY
telling ya bro... fishing line is the way to go. you may leave some more glue, or you may leave non. then just soak the glue with whatever remover you use (I've used turtlewax bug and tar remover) for like 10 minutes, then heat it up with the hair dryer or heat gun and you should be able to roll it off in one piece. There is a video floating around, I forgot where I posted it, but some guys debadged 2 WRX's in under 20 minutes, all glue removed and everything.
Found It:
http://videos.streetfire.net/categor...89EE0B9E08.htm
Found It:
http://videos.streetfire.net/categor...89EE0B9E08.htm
Last edited by OrngBalt; Jul 2, 2007 at 01:31 PM. Reason: Automerged Doublepost
Banned
Joined: 12-18-05
Posts: 17,838
Likes: 1
From: North Jersey
great write up, plus rep!
when i did mine, i just peeled it right off. used a fingernail to pry up the edge, and SLOWLY pulled and it came off no problem. i used some goo gone afterwards, took about 3 minutes and came out perfect.
when i did mine, i just peeled it right off. used a fingernail to pry up the edge, and SLOWLY pulled and it came off no problem. i used some goo gone afterwards, took about 3 minutes and came out perfect.

Senior Member
Joined: 05-14-05
Posts: 745
Likes: 0
From: Nova Scotia
I have asked this before and havn't got the answer I was looking for. Has anyone done this on their car after 2 years? I'm worried If i do it now my rally yellow paint will be darker underneath.
Senior Member
Joined: 05-10-07
Posts: 5,890
Likes: 1
From: West Babylon, NY
I just removed my badges on my Sunburst after having the car for a year in harsh baking sun and awful new england winter.... no difference.
Thread Starter
Senior Member
Joined: 12-23-06
Posts: 1,500
Likes: 0
From: York, PA
my car was only like 6months old when i did it. honestly it's gonna be hard to tell with yellow, you might have a slight it of fading, two years is not a long time when you think about it.
yo shold be fine.
yo shold be fine.
Senior Member
Joined: 05-10-07
Posts: 5,890
Likes: 1
From: West Babylon, NY
I was thinking the same thing. Yellow is gonna be hard to tell. I would think if anything the darker colors have more of a chance of showing anything since they are a whole lot more prone to fading (absorbing more light) You should be all right.

 i will be doing mine sometime this week!!

New Member
Joined: 07-10-07
Posts: 12
Likes: 0
From: Pennsylvania
If you have any residue left over, even huge chunks, see if you can pick up some Kerosene. You can put the Kerosene in a spray bottle and spray it on the residue. The sticky garbage comes off immediately as the Kerosene breaks down the adhesive. Kerosene will also not damage the paint of your car if you was it shortly after this project.
FYI: Do not smoke, light a match or smell the Kerosene directly when doing this.
FYI: Do not smoke, light a match or smell the Kerosene directly when doing this.

New Member
Joined: 05-28-07
Posts: 14
Likes: 0
From: Latrobe, Pennsylvania
Long story short, the long strip on the driver side door has been stubborn to say the least. The rear quarter on both sides and the passenger side door trim came off without a hitch, though  And this was also done before I read this thread, FYI. I came here seeing if anyone had a potential solution to my issue. I did this whole process around 23:00 last night.
Any ideas as to what I should try to get the remaining sh** off the driver side door? I tried another coat of Goo Gone and started rubbing but it's thick enough that the plastic putty remover is taking off just a thin layer, even after the Goo Gone sits for ~10 mins. Should I just continue with the barrage of Goo Gone or try something else (like Kerosene... I'm still very apprehensive about doing that, though)? I wanted to pose a question before going any further and really fu**ing something up
HELP!!!
EDIT: I talked to a guy that does custom painting in town and he said about some "eraser" he has that he can use either that or just rub with my finger really hard to get it off. Any idea what this magical "eraser" might be and if it is an option?
Senior Member
Joined: 05-10-07
Posts: 5,890
Likes: 1
From: West Babylon, NY
the way in the video didnt do the trick? I let the bug and tar remover sit on it for 10 minutes. wiped it clean, heated it with the hair dryer and then just rubbed it with the heal of my thumb. just keep the hair dryer on it while you are peeling. I kept it about 6" away from the car and an inch ahead of where I was pushing just to keep it warm but not hot enough to burn me.