
A must have for EVERY LSJ
 08-30-2011, 08:14 PM
#1
A must have for EVERY LSJ
hey guys. As many of you may know i am setting up my TVS kit and have been finishing up a few things before i bolt her on. I wanted to share some insight to one of ZZP'S best cooling mods out there for the LSJ, their phenolic intake manifold spacer. Now before i post data and my experience with iat temps, i seen a few threads where a few people did an install and didnt do it correctly. so i took a few pics and will explain a little better about the install since it doesnt come with instructions. First off if youve ever done a dual pass install, its easier than that. ( if you havent i highly reccomend doing it while you do this since you will have the manifold off) disconnect your battery. remove your supercharger and your fuel rail. remove the three alternator bolts aand connectors and set the alternator aside. ( there are how tos on this so i wont get into that) remove your intake manifold from the cylinder head. dont forget the elusive 15mm bolt thats on the bottom that goes through the intercooler pump bracket. (pay attention to this as well this will come into play soon).
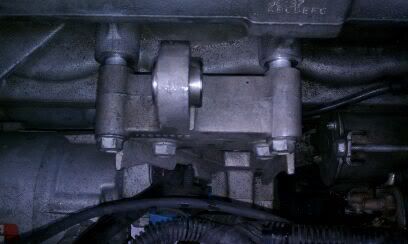
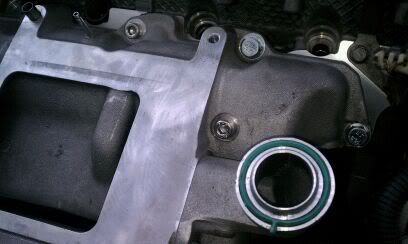
The kit that ZZP will send you will come with the phenolic spacer, two intake manifold gaskets, extended intake manifold bolts, and three aluminum spacers. once your intake is removed, remove the old gasket because you will not be needing this anymore. i cleaned my intake in my wash tank at work you can do so with some intake cleaner or carb cleaner. Make sre you clean both the cylinder head surface, and the intake manifold surface. after that is done if you look down you will see the intercooler pump bracket with two 13mm bolts on top and the third you have to access from under the car. loosen these bolts and insert the three spacers between the block and bracket. Tighten the bracket back down. It should look like this. a few people did not do this step and therefore the 15mm bolt will not line up with the manifold (and it is there for a reason)
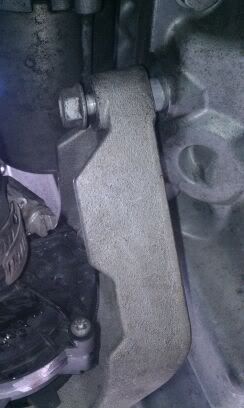
and this is from the bottom
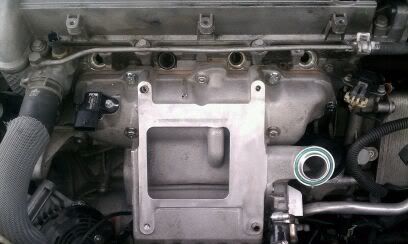
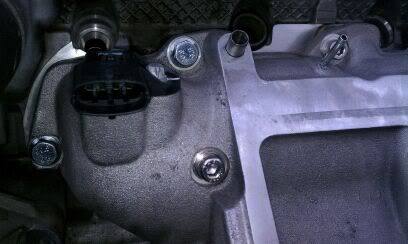
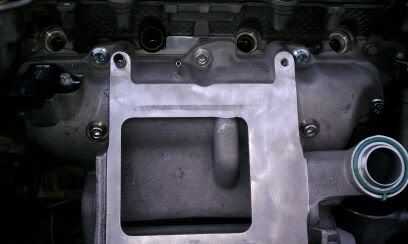
Now take the spacer and the two gaskets. Lay the gaskets on the spacer in the correct orientation, once youve done that apply a very light layer of rtv silicone to the spacer itself, it will help hold the gaskets in place while you thread the bolts into the head. Once you have your spacer with the gaskets attached to it youre ready to bolt everything back up. What i did to aid in lining everything up was i took the two studs that are in the center of the manifold from the factory, slid the phenolic spacer in place then set the intake manifold onto the studs. I then removed these one at a time(inverted torx bit) and used the two longest allen head bolts that zzp supplied. I used two washers from my shop for these bolts as the kit didnt come with any. Only on these two bolts since one of the holes on the manifold is elongated. do not tighten down yet just start the two studs. Now you can start the 15mm bolt at the bottom of the manifold. After start the remaining studs. Once all the studs are started torque to spec in sequence. There is a OEM sequence but just work from the middle out in a criss cross pattern. now bolt the alternator back on, the blower and the fuel rail and enjoy. Heres a few pics. this wasnt meant to be a how to just to give people a heads up on the correct install. This is an awesome cooling mod for the price and hats off to zzp.
and heres the temp difference between iat1 and iat2 while cruising.
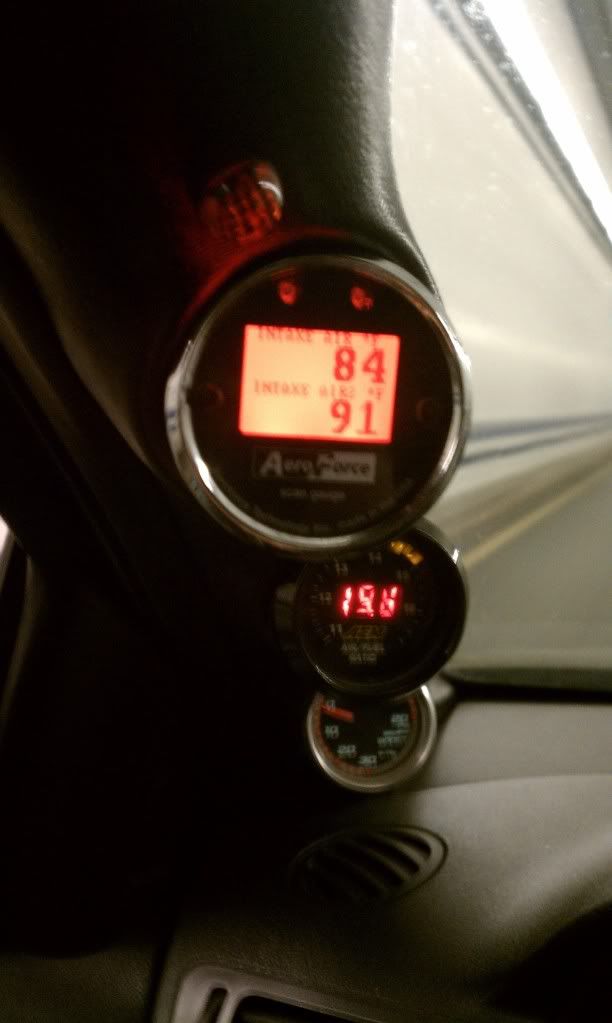
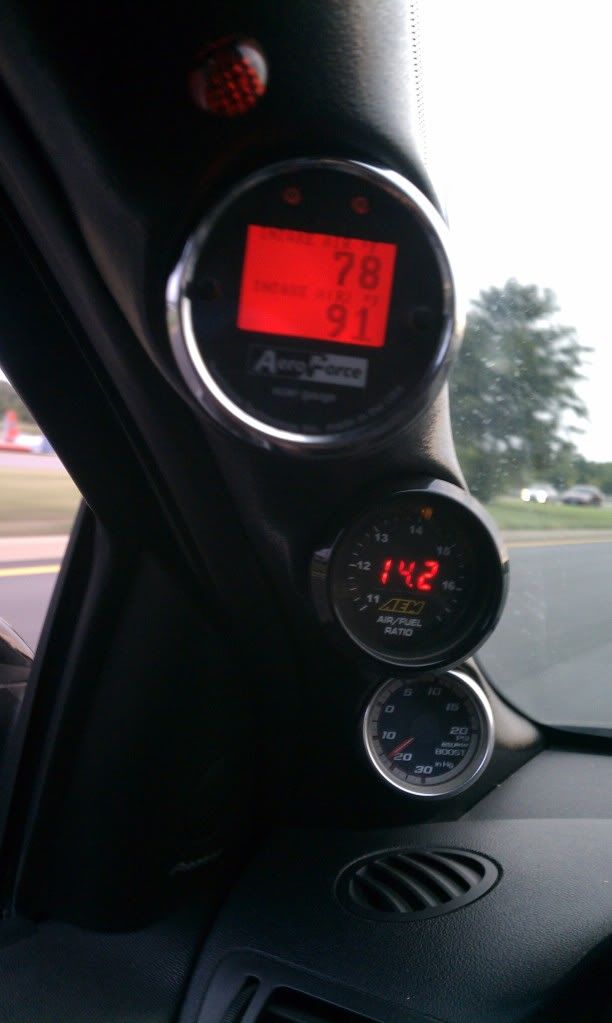
the best thing about this, is that the temps while idling dont rise to 150+ on a hot day or while sitting in the staging lanes. Cooler temps to begin with means cooler temps while driving and during wot. So if you dont have this i HIGHLY reccomend getting one!!!
sorry if this seems half assed i just got my power back on from the hurricane and i worked a ten hour day
The kit that ZZP will send you will come with the phenolic spacer, two intake manifold gaskets, extended intake manifold bolts, and three aluminum spacers. once your intake is removed, remove the old gasket because you will not be needing this anymore. i cleaned my intake in my wash tank at work you can do so with some intake cleaner or carb cleaner. Make sre you clean both the cylinder head surface, and the intake manifold surface. after that is done if you look down you will see the intercooler pump bracket with two 13mm bolts on top and the third you have to access from under the car. loosen these bolts and insert the three spacers between the block and bracket. Tighten the bracket back down. It should look like this. a few people did not do this step and therefore the 15mm bolt will not line up with the manifold (and it is there for a reason)
and this is from the bottom
Now take the spacer and the two gaskets. Lay the gaskets on the spacer in the correct orientation, once youve done that apply a very light layer of rtv silicone to the spacer itself, it will help hold the gaskets in place while you thread the bolts into the head. Once you have your spacer with the gaskets attached to it youre ready to bolt everything back up. What i did to aid in lining everything up was i took the two studs that are in the center of the manifold from the factory, slid the phenolic spacer in place then set the intake manifold onto the studs. I then removed these one at a time(inverted torx bit) and used the two longest allen head bolts that zzp supplied. I used two washers from my shop for these bolts as the kit didnt come with any. Only on these two bolts since one of the holes on the manifold is elongated. do not tighten down yet just start the two studs. Now you can start the 15mm bolt at the bottom of the manifold. After start the remaining studs. Once all the studs are started torque to spec in sequence. There is a OEM sequence but just work from the middle out in a criss cross pattern. now bolt the alternator back on, the blower and the fuel rail and enjoy. Heres a few pics. this wasnt meant to be a how to just to give people a heads up on the correct install. This is an awesome cooling mod for the price and hats off to zzp.
and heres the temp difference between iat1 and iat2 while cruising.
the best thing about this, is that the temps while idling dont rise to 150+ on a hot day or while sitting in the staging lanes. Cooler temps to begin with means cooler temps while driving and during wot. So if you dont have this i HIGHLY reccomend getting one!!!
sorry if this seems half assed i just got my power back on from the hurricane and i worked a ten hour day
Last edited by zrated89; 08-30-2011 at 08:28 PM.


 08-30-2011, 10:00 PM
#9
 08-30-2011, 10:03 PM
#11
here you go
Cobalt & Ion ---> ZZ Performance
Cobalt & Ion ---> ZZ Performance
08-30-2011, 10:14 PM
#12
Member
iTrader: (1)

Join Date: 05-28-08
Location: PA
Posts: 204
Likes: 0
Received 0 Likes
on
0 Posts
here you go
Cobalt & Ion ---> ZZ Performance
Cobalt & Ion ---> ZZ Performance
08-30-2011, 10:20 PM
#17
yes 2.7 pulley m62. i just got this from rodney today
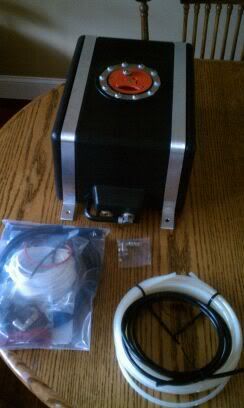
my pump died on my other kit and this new one had the nice tank with the 250 psi pump. I just have to feel like putting the blower on now. after turning wrenches all day at work i dont like to touch my car
my pump died on my other kit and this new one had the nice tank with the 250 psi pump. I just have to feel like putting the blower on now. after turning wrenches all day at work i dont like to touch my car
08-30-2011, 10:32 PM
#19
oh yea im on a 2.7 right now and you see my temps. best thing is i left my car running for the longest time on purpose and the difference between iat1 and 2 was at max 30 degrees, and the second i started driving it instantly dropped to a 10 to 13 degree difference
08-30-2011, 10:41 PM
#20
Senior Member
iTrader: (9)

Join Date: 05-17-08
Location: Pittsburgh
Posts: 2,070
Likes: 0
Received 0 Likes
on
0 Posts
heat soak is killer in the burgh during summer, like 100-105* ambient. Highest i saw my idle iat2s was 160* terrible. I got one of these sitting in a box at my house, I might put it on now haha

