
06 Cobalt SS System Install, HIDs, Big 3, Etc..
 05-07-2013, 11:14 PM
#26
Senior Member
iTrader: (1)

Join Date: 02-08-08
Location: Fayetteville/Linden, NC/Myrtle Beach, SC
Posts: 3,728
Likes: 0
Received 0 Likes
on
0 Posts
As far as I know you remove it and the carpet would have bolt holes going through but most would not notice. IDk, I have a base.
 05-13-2013, 09:10 PM
#27

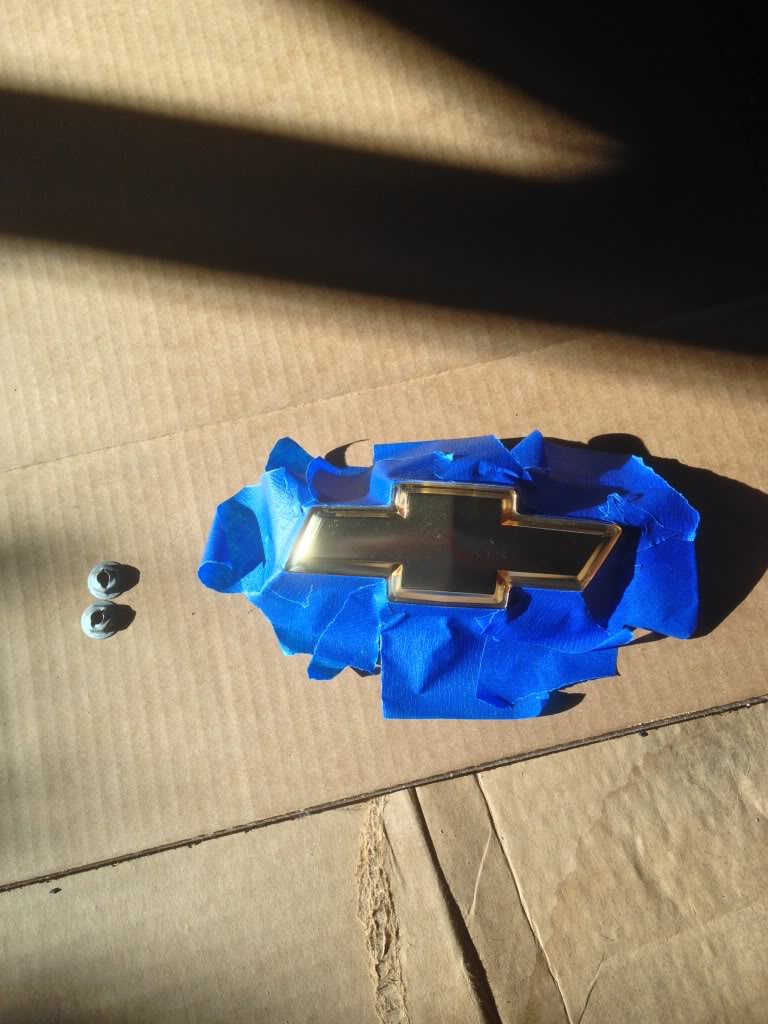
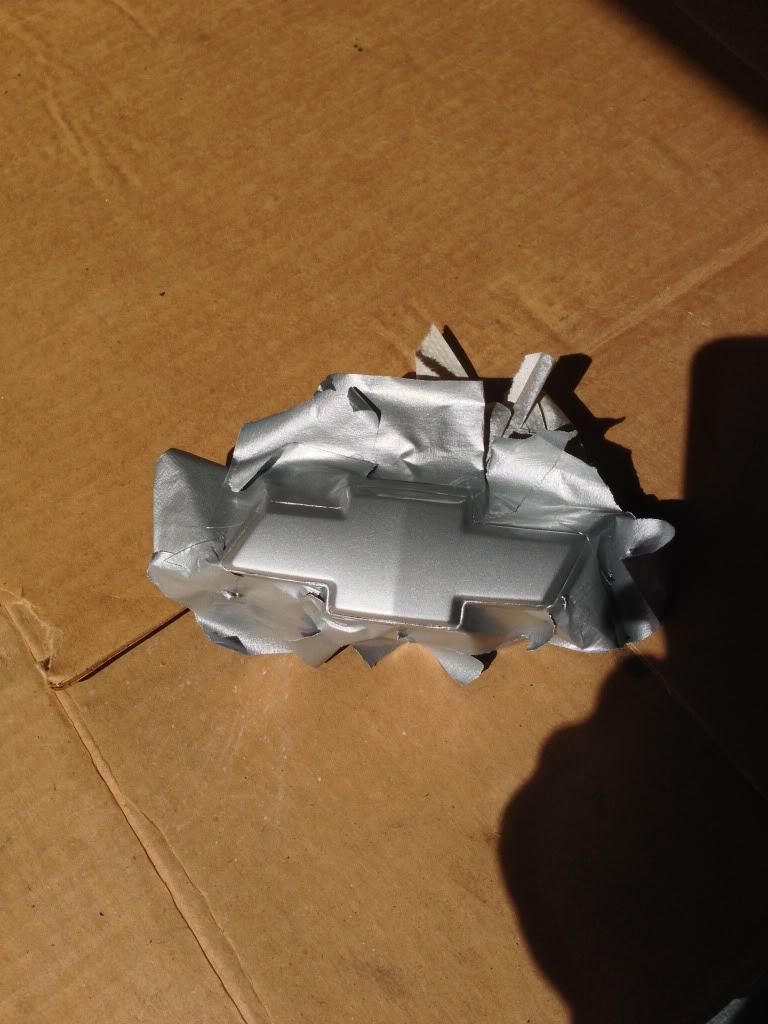
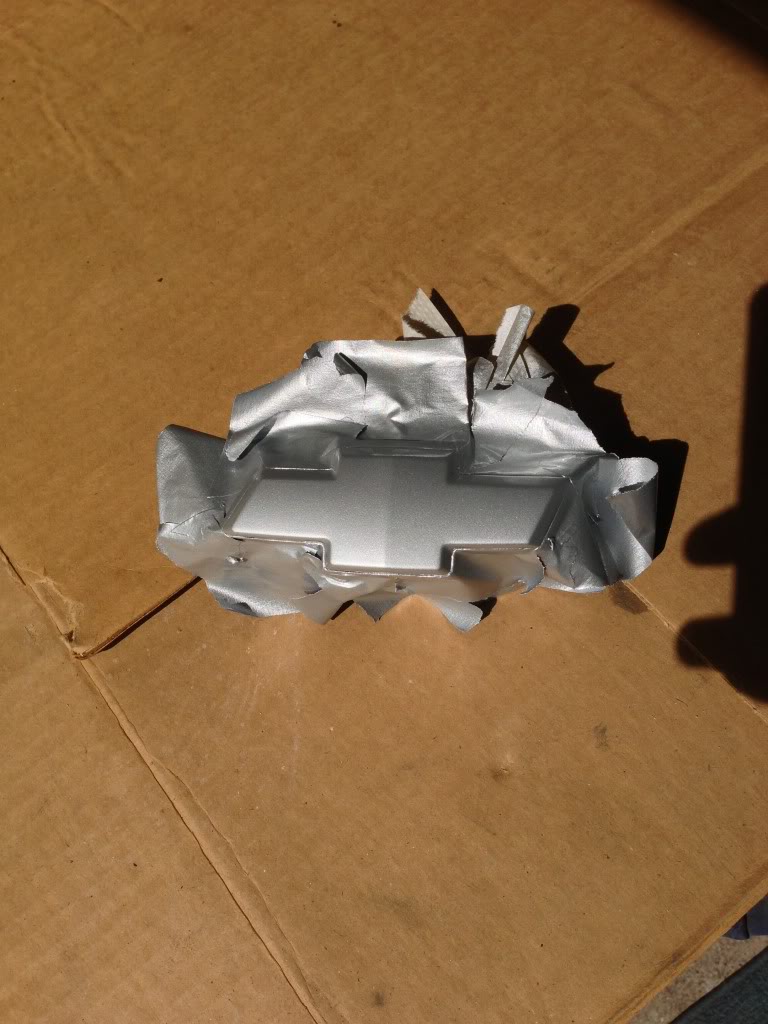
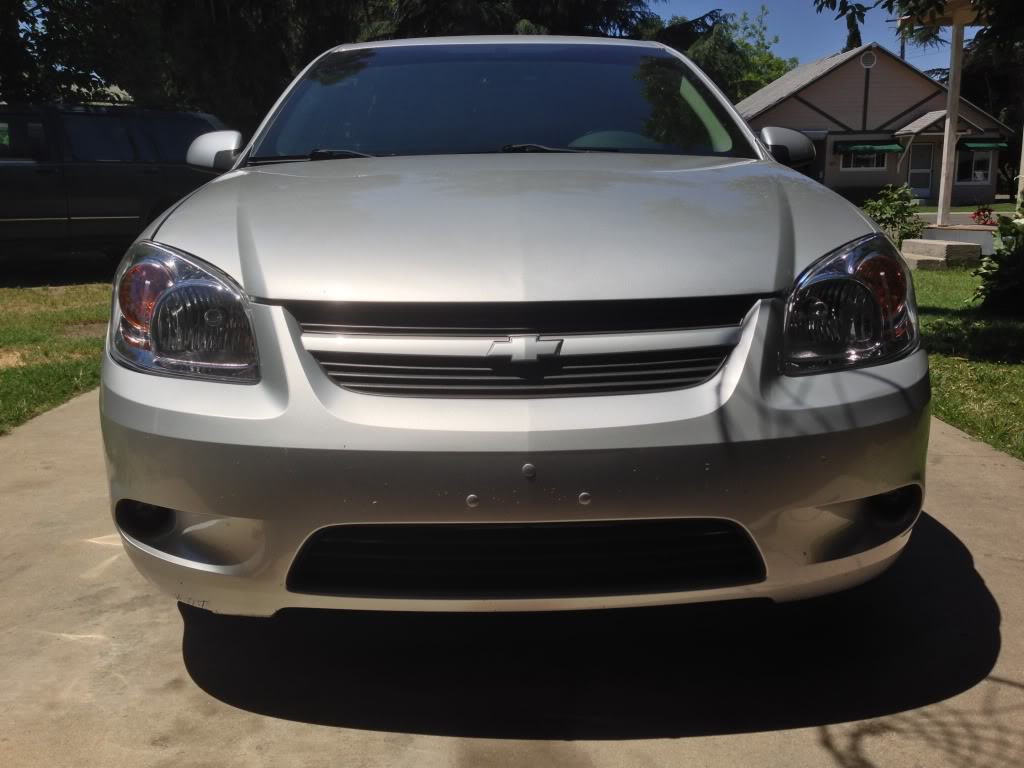
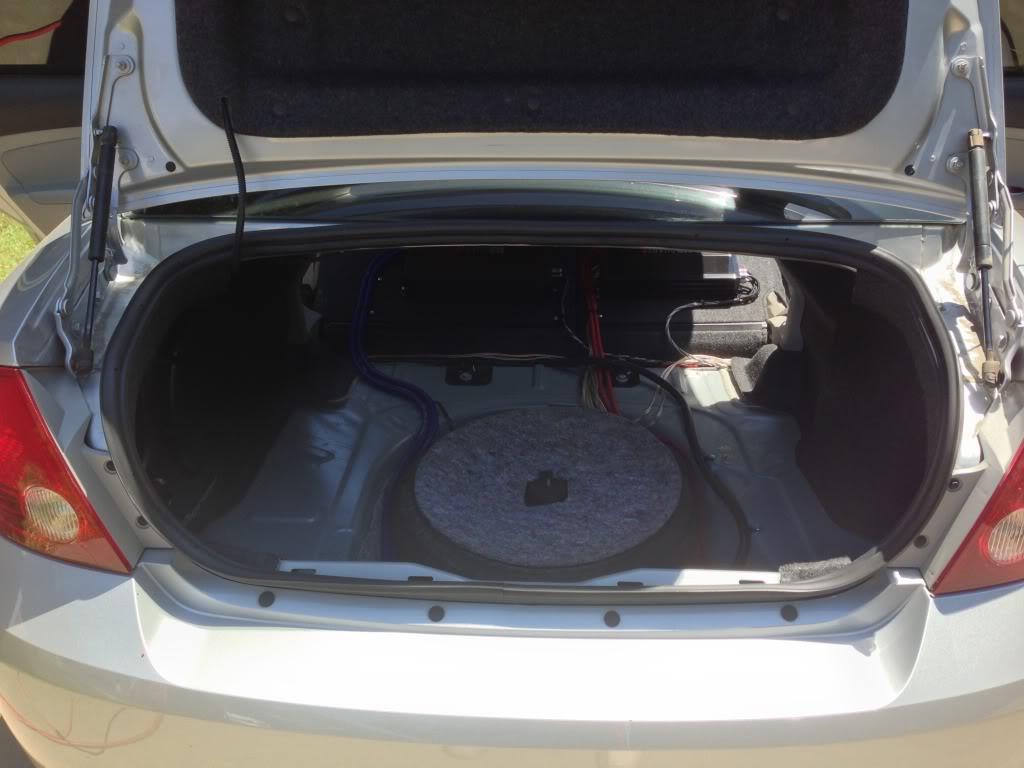
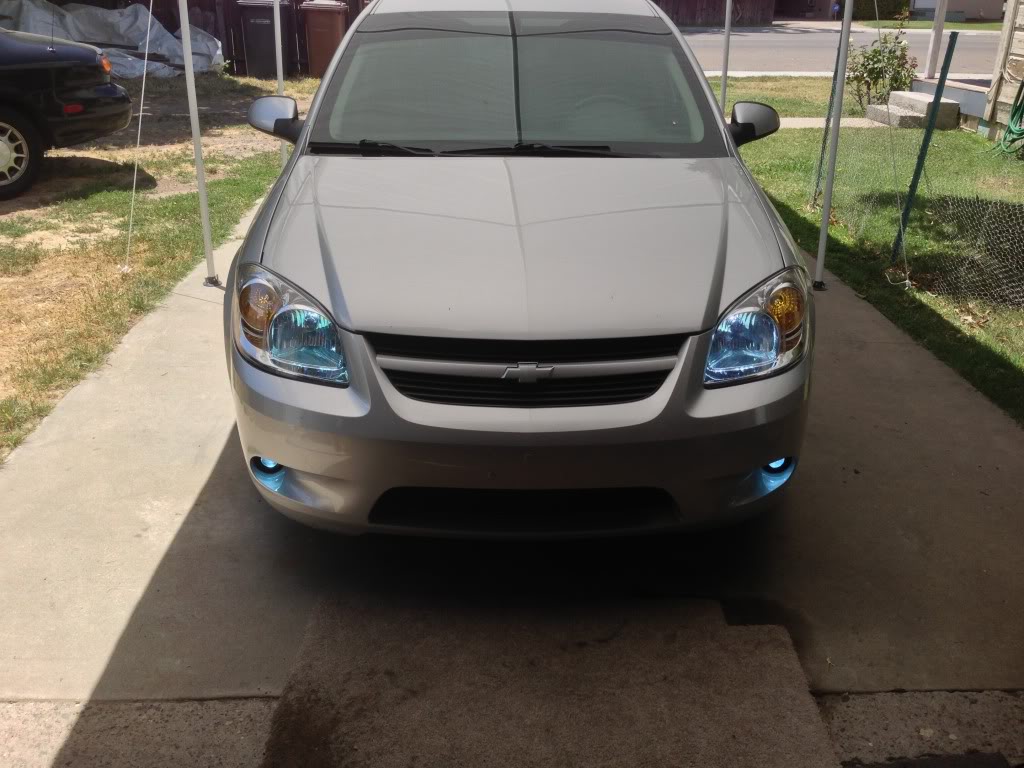
I'll have to check it out and see. It's just extra weight killing my gas milage now.. lol I ordered some 1/0 wire for the sub amp. It says 2ga and the 2ga I had fit in it easily so I'm gonna shove as much wire I can into it with 1/0. And clean up all the wiring a little more. Also ordering some LED bulbs and HIDs for outside lights. And also painted my bowtie the other day. I color-matched it instead of blacking it out. Taping it perfect is the key. Little chip of paint came off with the tape in a few spots but came out OK. Don't pay any attention to all the bugs lol this time of year in CA is bad with bugs. I just washed my car 2 days before picture.


 05-19-2013, 03:22 PM
#29
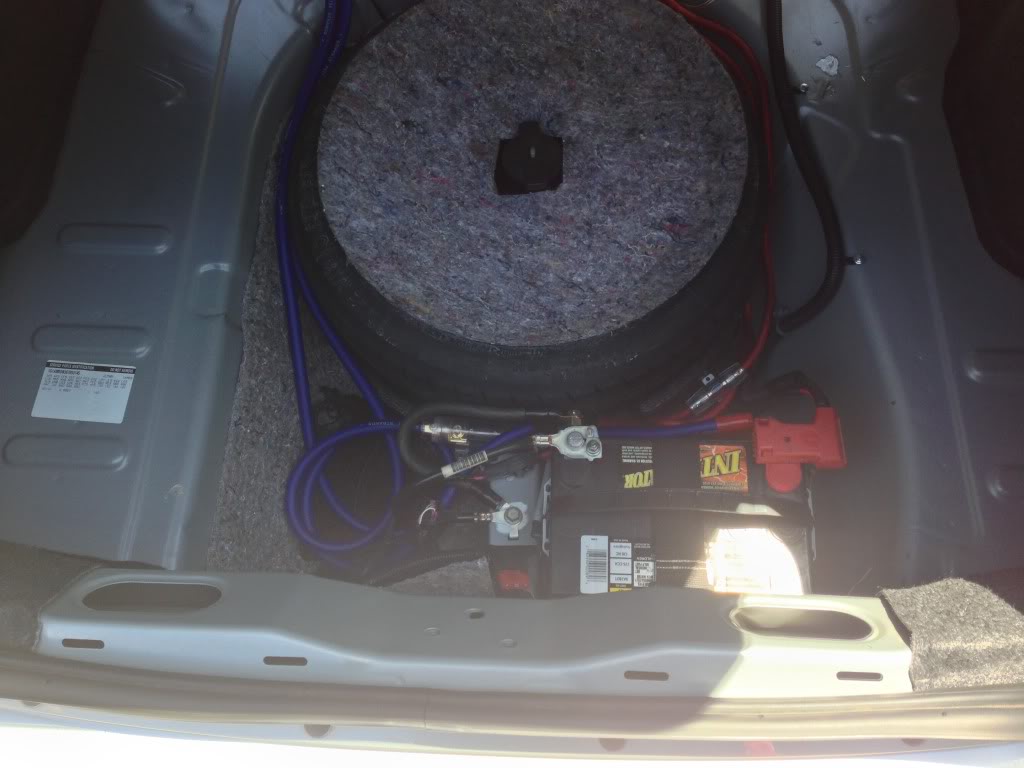
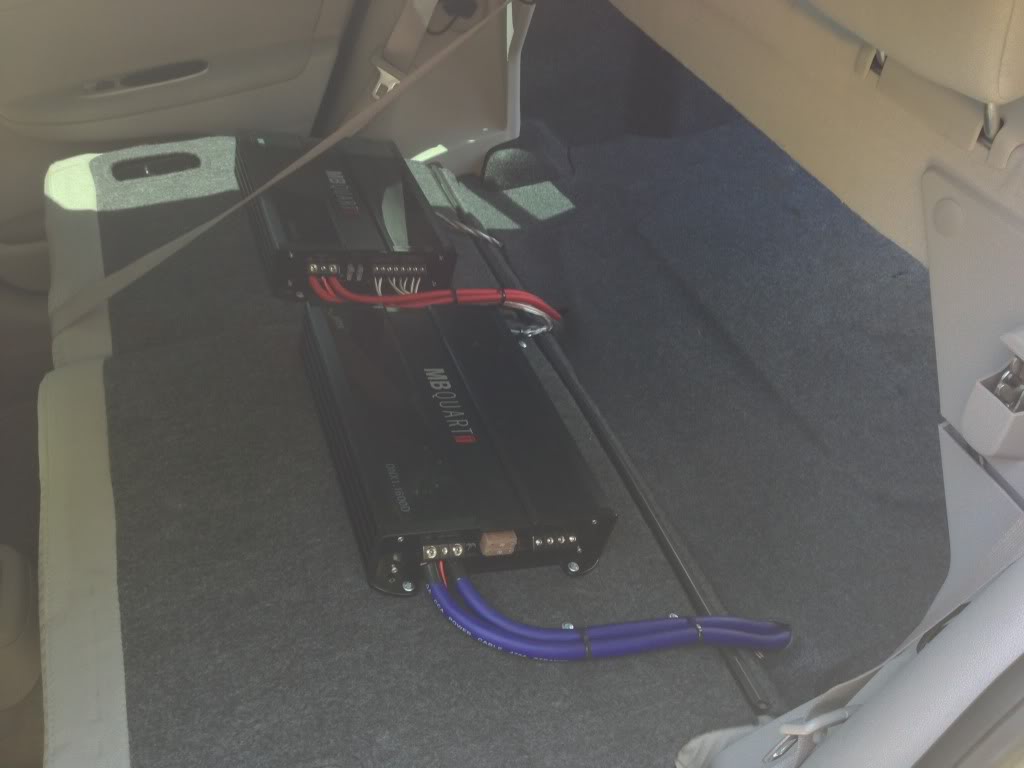
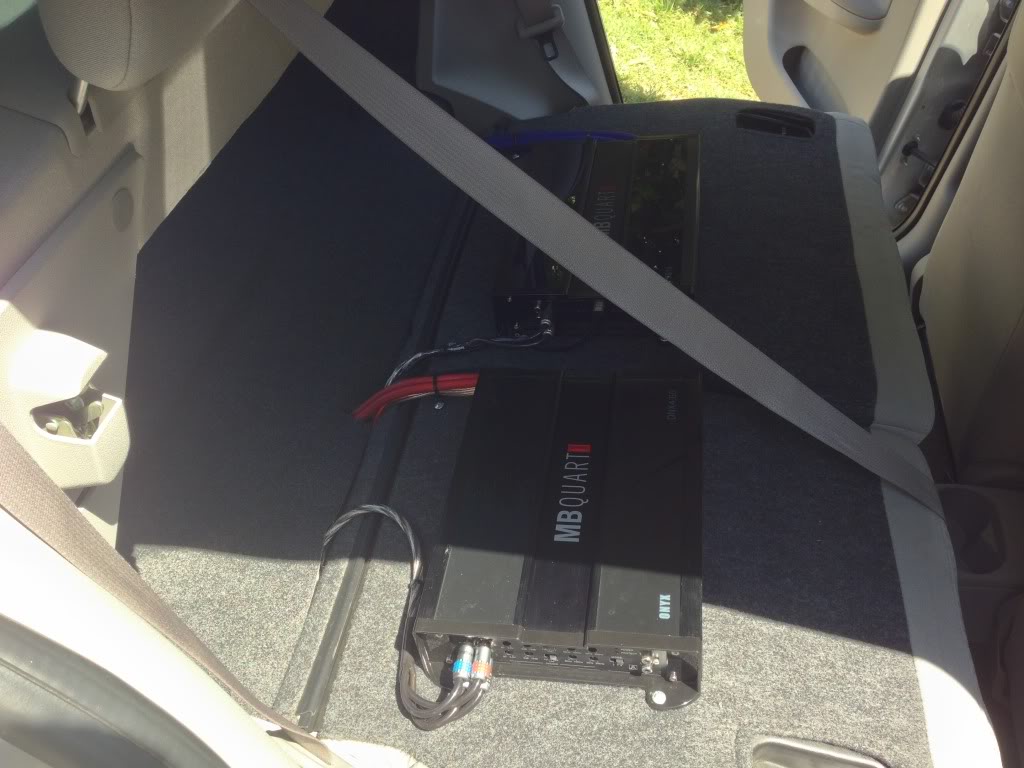
Thanks, wiring still kinda messy. I got the new 1/0 wire in though so I'm gonna re-run some stuff and clean it all up. Decided to try some Audio Technix wire this time. Got the CCA stuff because I'm not going over 250amps, 4704 strands compared to knu 5145 strands. Looks pretty good. Really flexable and great price. The 1/0 kits are on sale right now, I just picked up 2. They also sell oversized 1/0 which is 5292 strands and come in CCA and OFC but of course higher price.
http://www.ebay.com/itm/Audio-Technix-1-0-AWG-0-ga-Gauge-Complete-Fused-Amp-Amplifier-Wire-Wiring-Kit-/121095224277?pt=US_Car_Audio_Video_Amplifier_Kits&hash=item1c31d67bd5
http://www.ebay.com/itm/Audio-Technix-1-0-AWG-0-ga-Gauge-Complete-Fused-Amp-Amplifier-Wire-Wiring-Kit-/121095224277?pt=US_Car_Audio_Video_Amplifier_Kits&hash=item1c31d67bd5
Last edited by Joe22; 05-19-2013 at 03:27 PM.
05-23-2013, 09:30 PM
#30
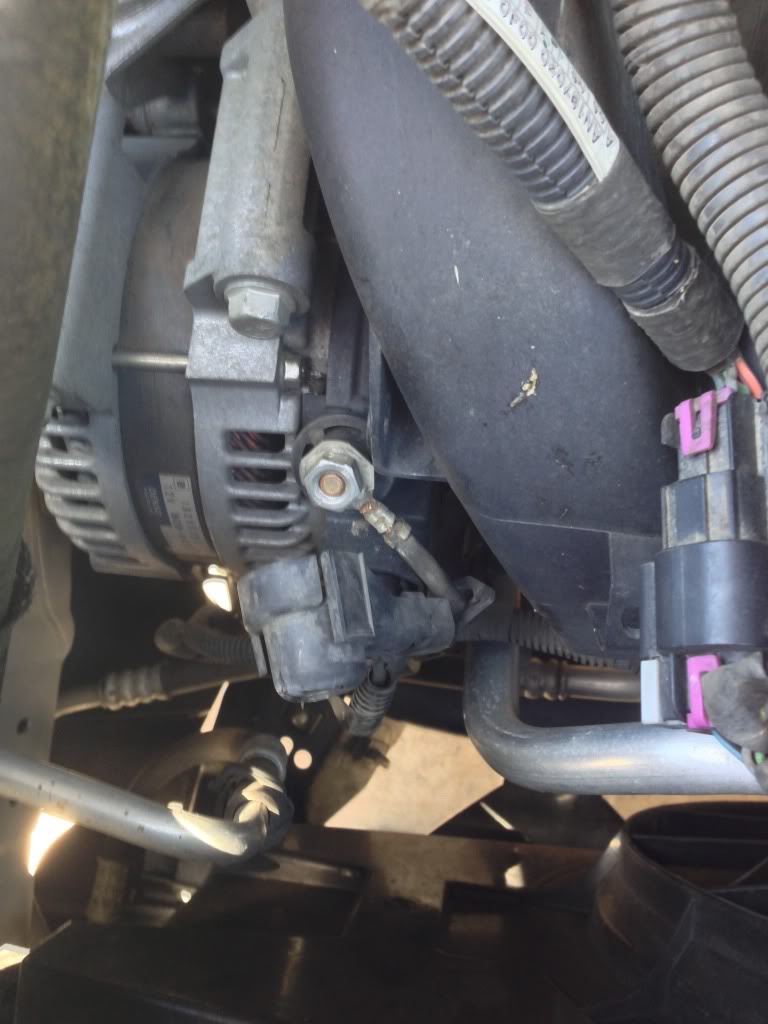
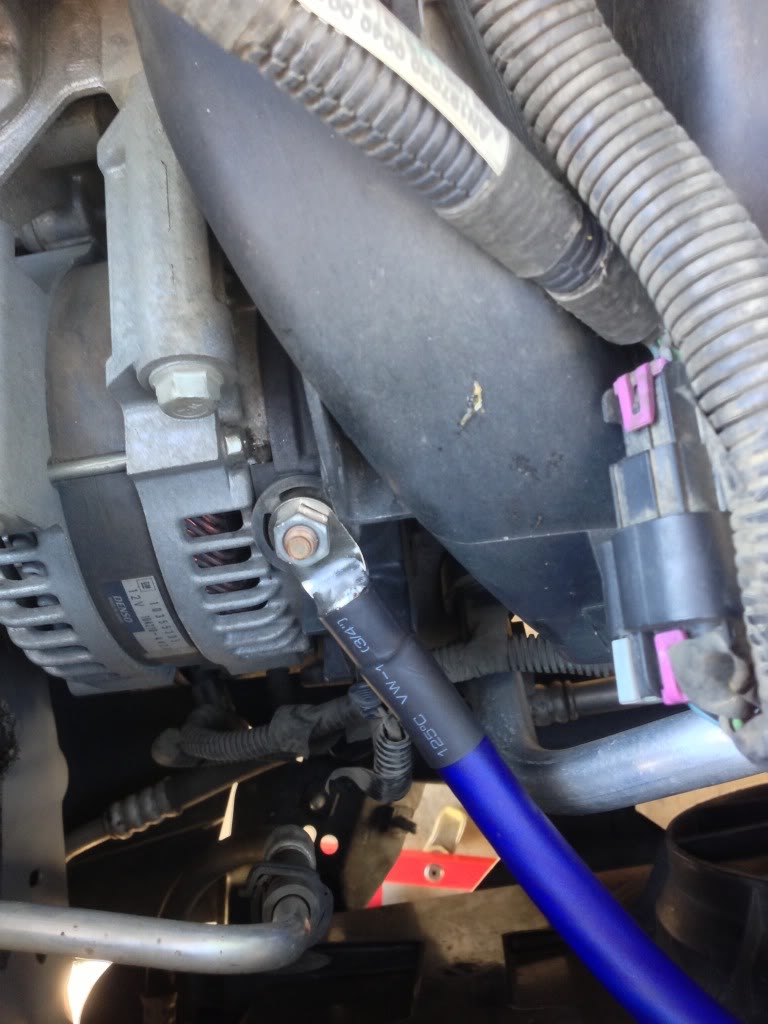
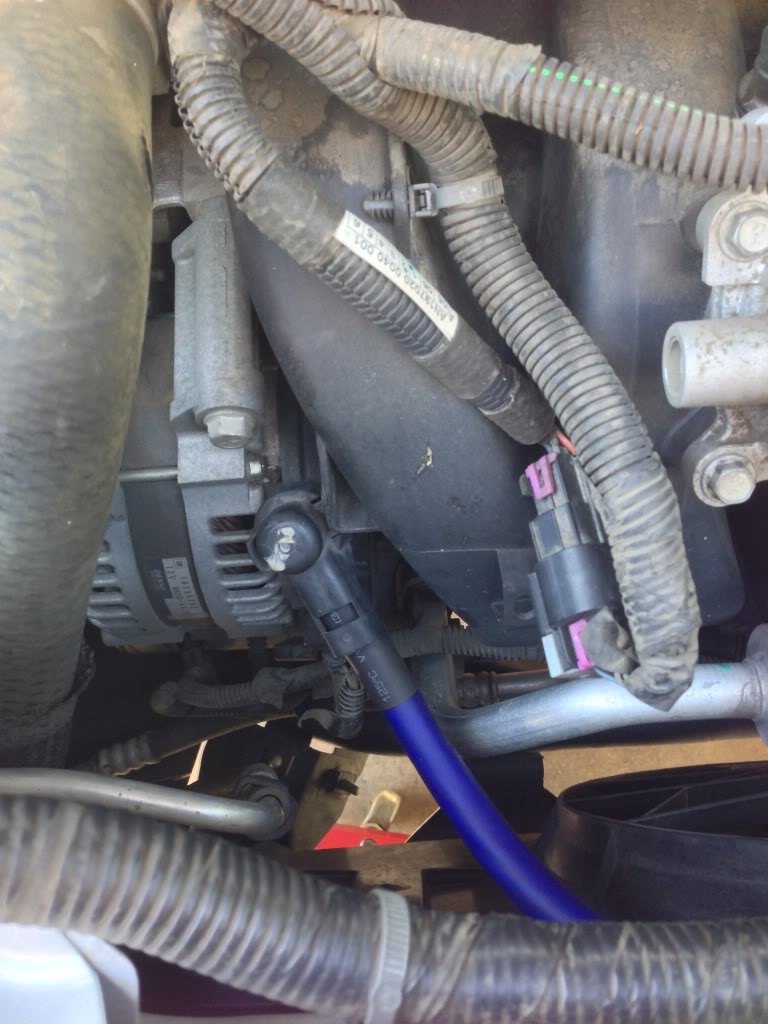
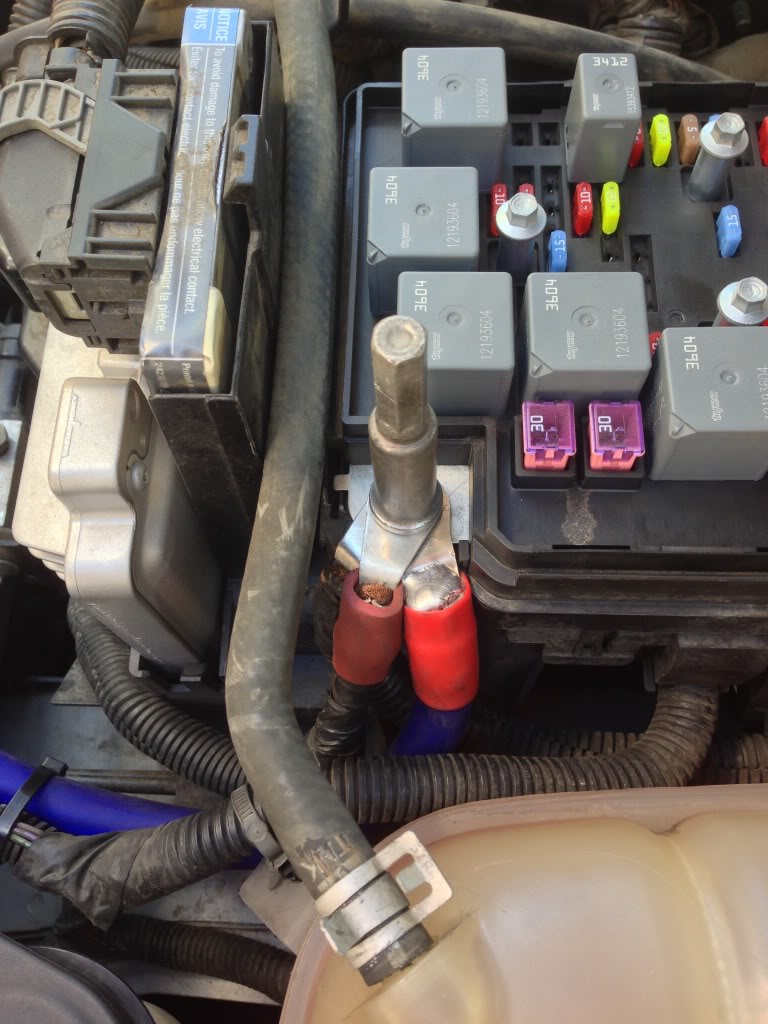
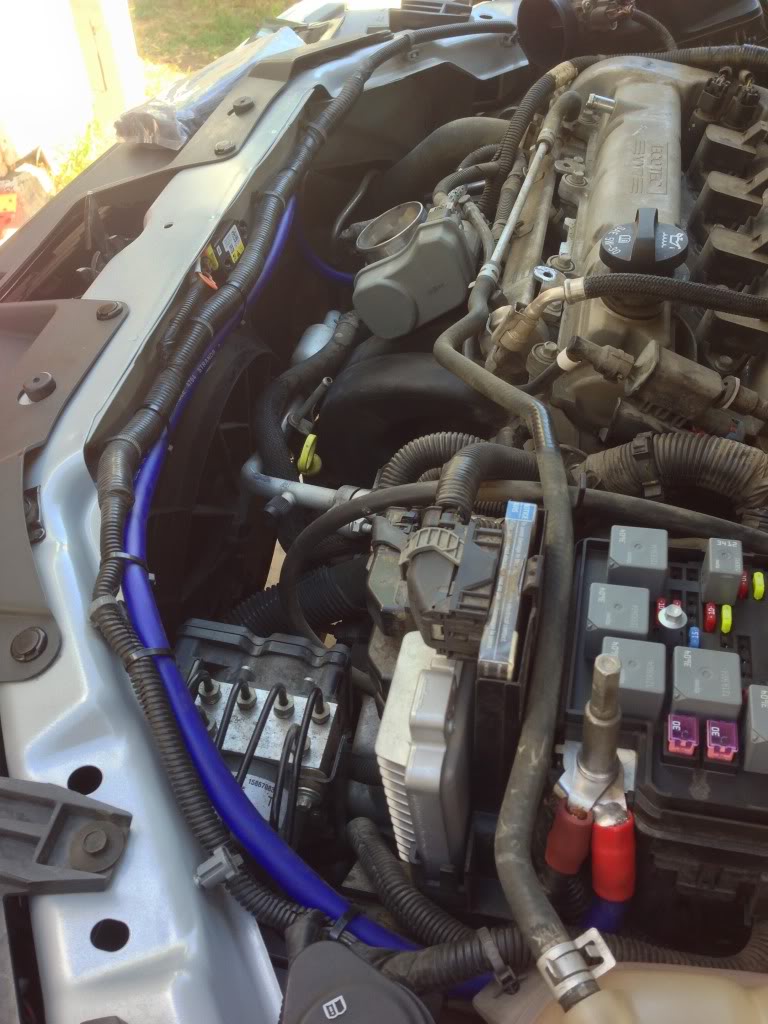
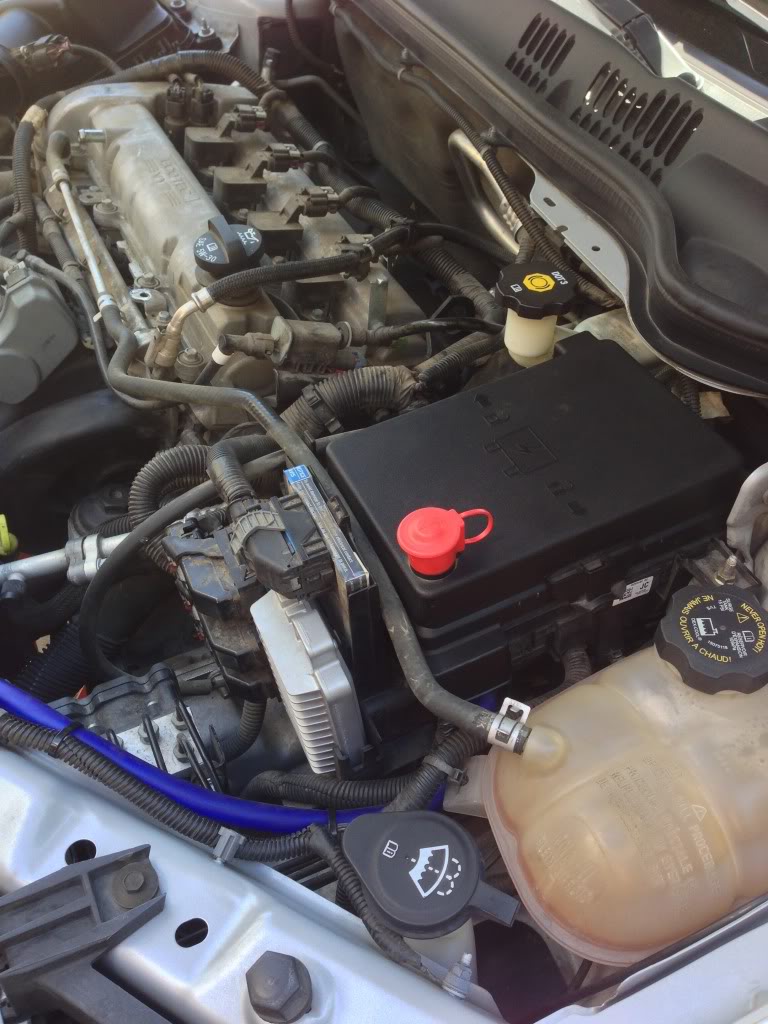
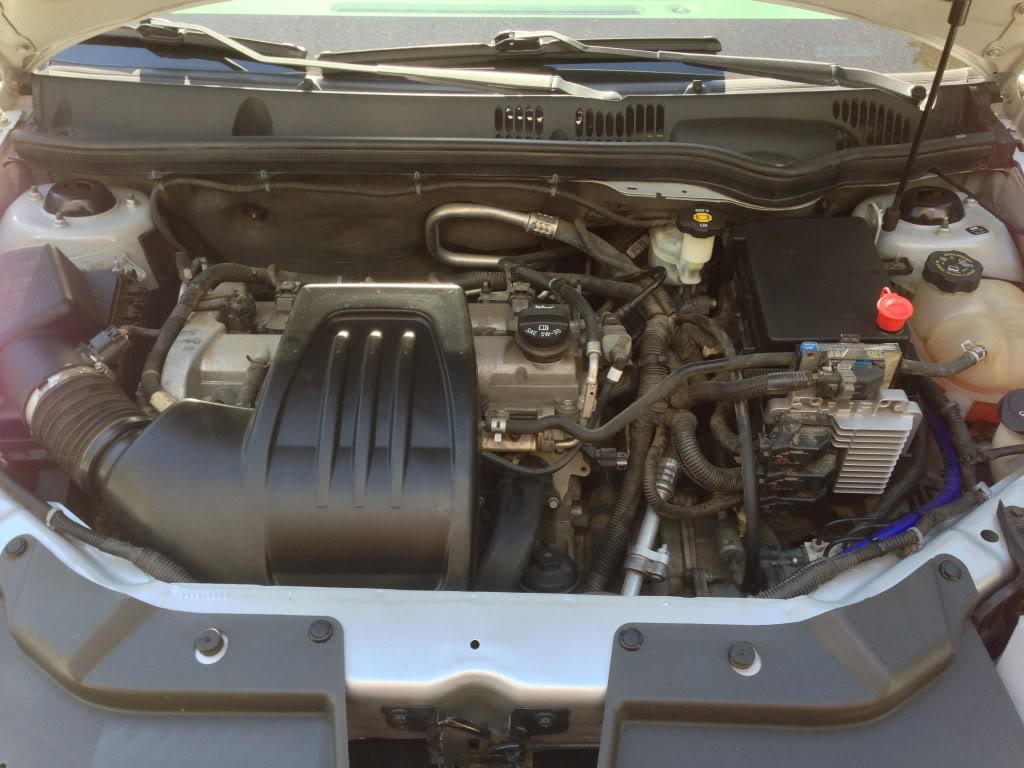
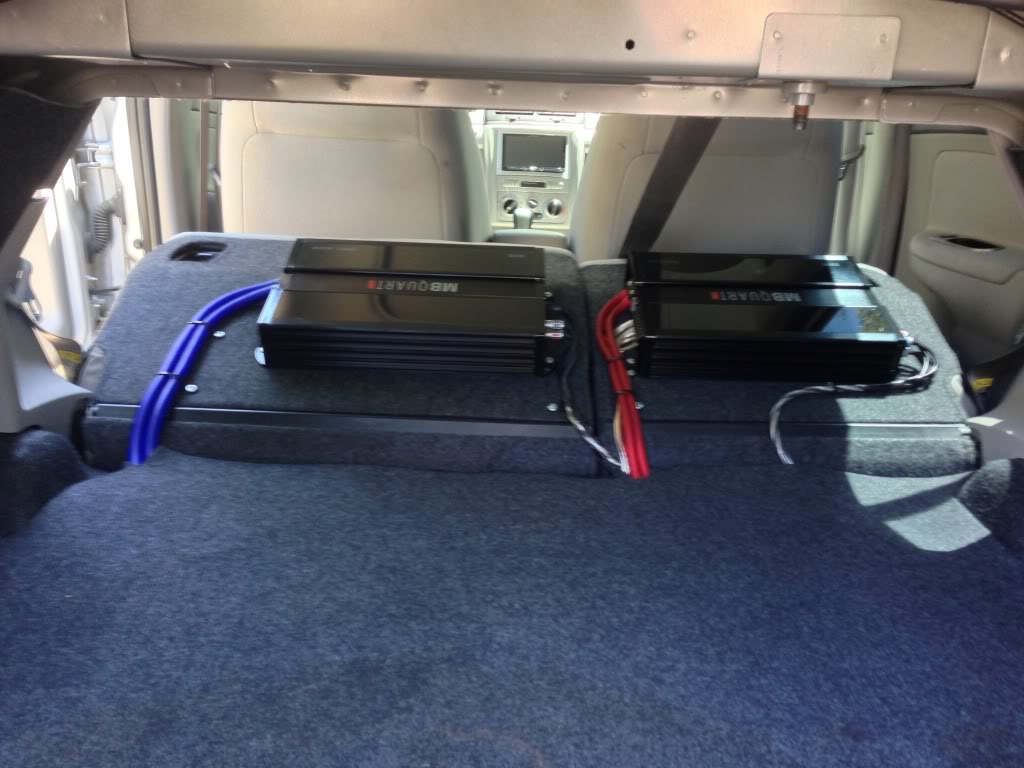
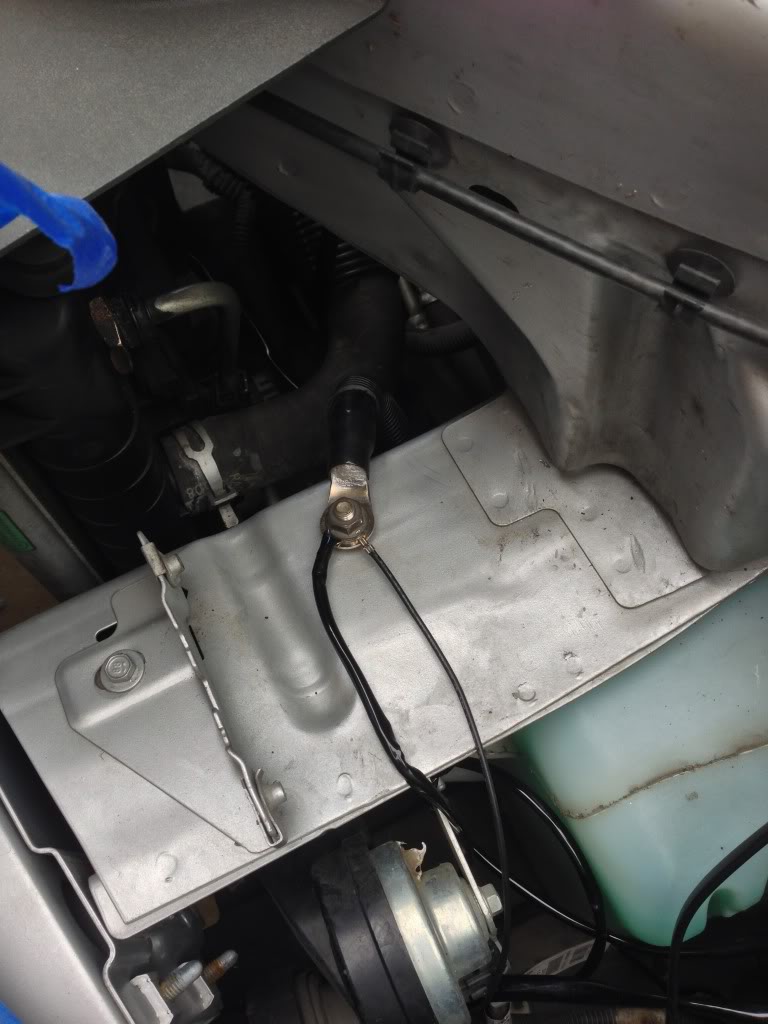
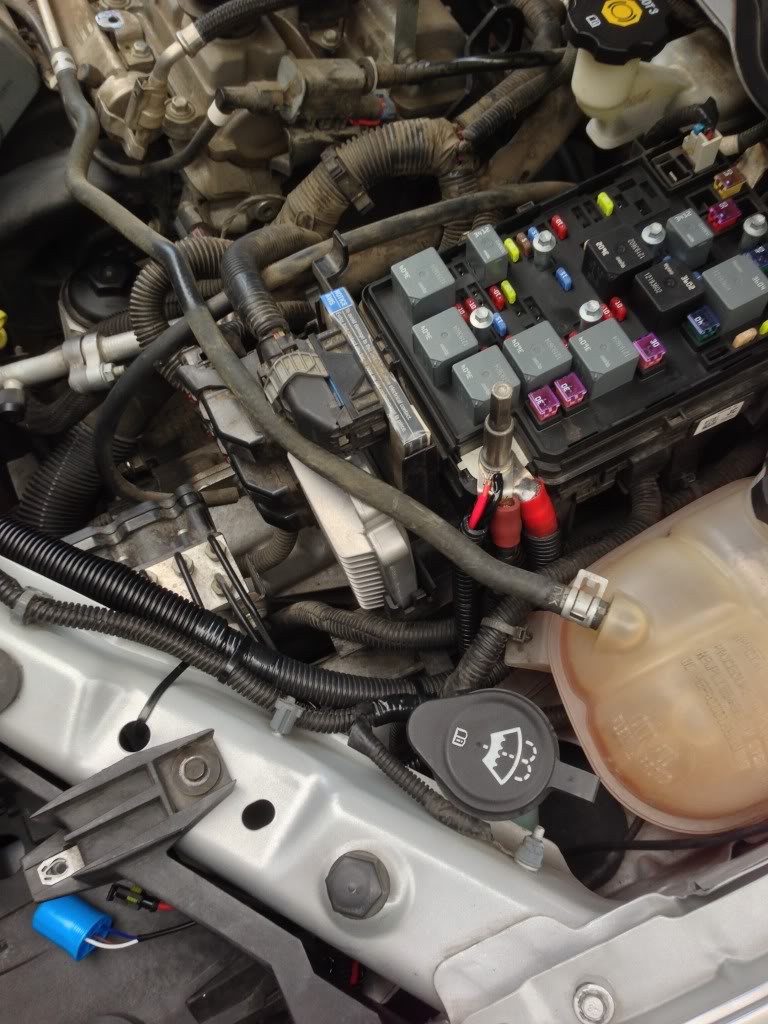
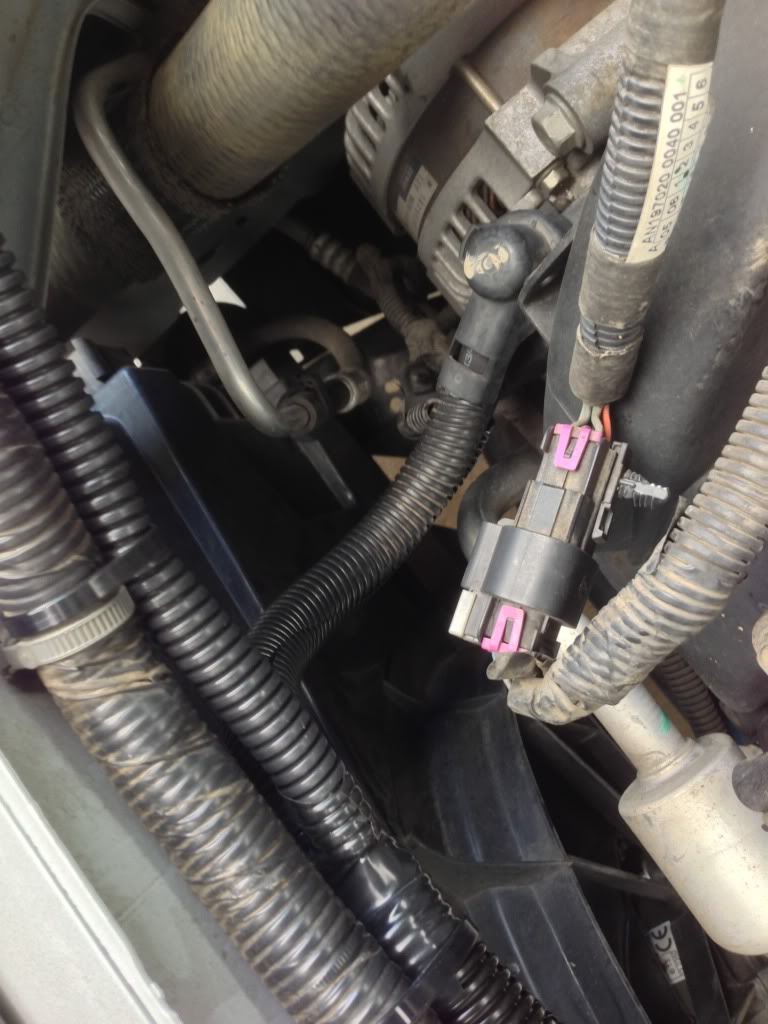
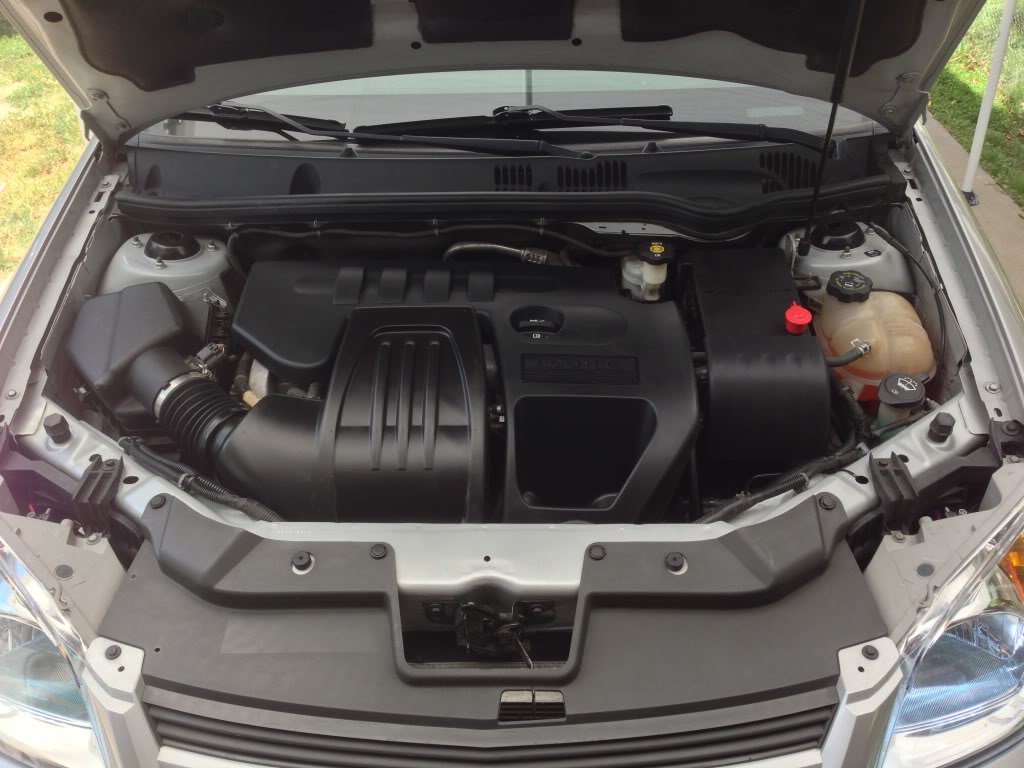
Little Update.. Upgraded my wire and cleaned everything up. I also wanted to do the big 3 which is upgraded wires that go from alt->battery(Power), Batt->Chassis(Ground), and Engine Block<-->Chassis(Ground) but this being a little car with no actual Chassis Frame makes it a little different then to top things off the battery is in the trunk so made it a little difficult.
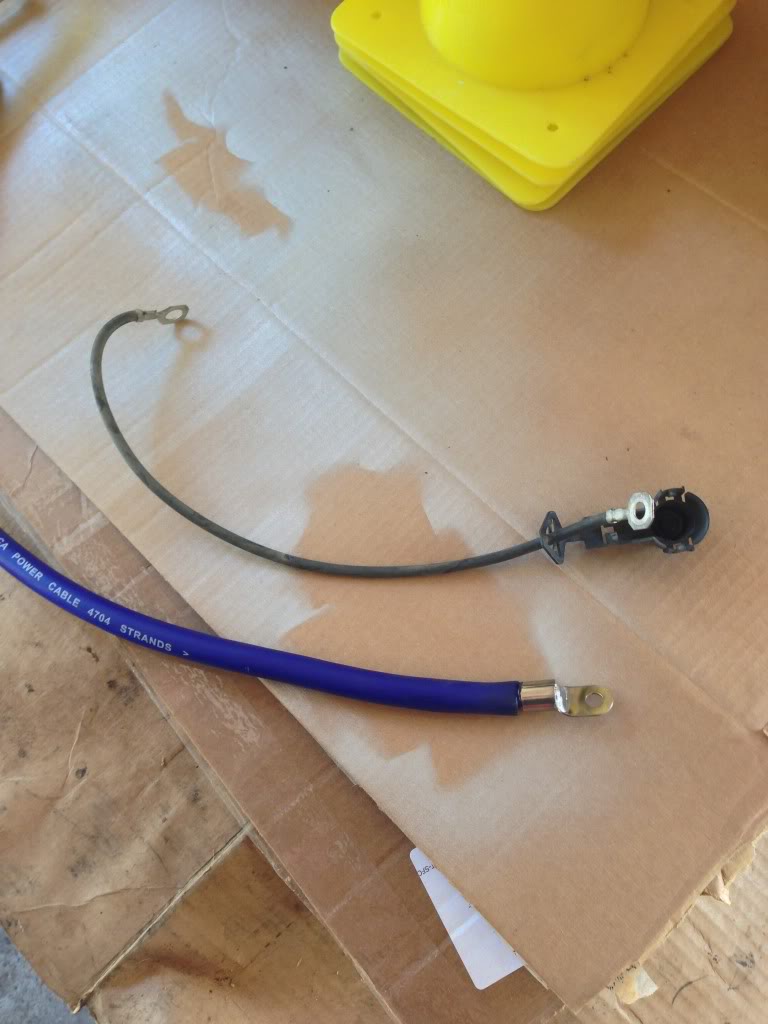
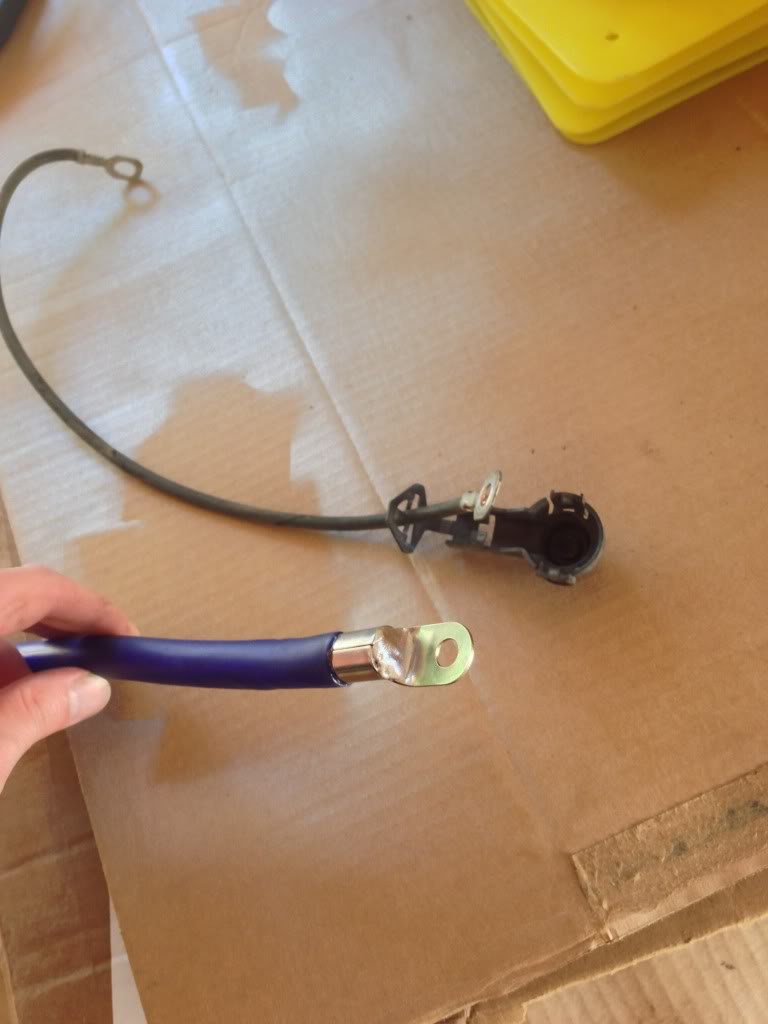
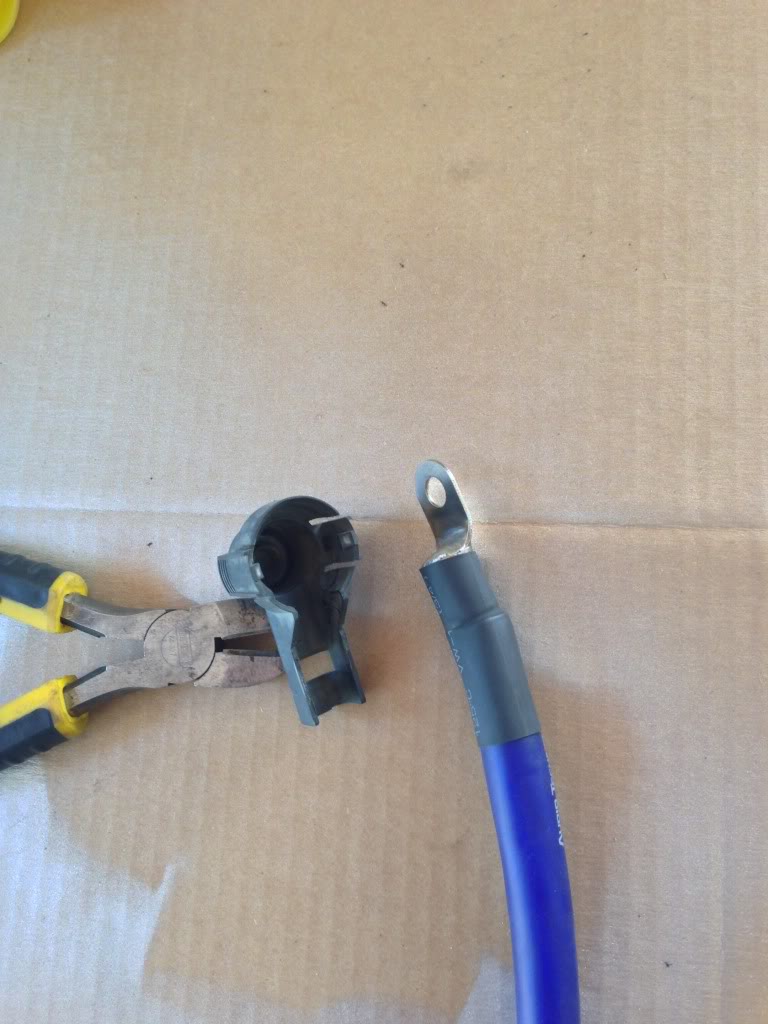
I was checking out all the wiring on the car because my voltage always seemed low to me even at a fresh start 13.9-14.2 and my lights dimming just a little when the bass hit.. Well I found that the alternator had a little 8ga wire that went to starter and then from starter it had a decent size 4ga(Close to 2ga) that goes to fuse box then the same size decent 4ga(Close to 2ga) that goes from fuse box to the back battery. So I ditched the little 8ga and ran my own 1/0 wire from Alternator straight to fuse box. Also did my own 1/0 ground at the back battery to the body I guess right over the stock wire. The grounds in engine bay from engine block to body/frame looked pretty good so I didn't do that. Anyways fresh start now at 14.7 - 14.8 and leveling out when warm to 14.5. So seems to have helped quite a bit. Have not checked if lights dim when bass hits any more but will do tonight.
If you do this you can also fuse it if you want but this short of a run you know exactly where you are putting the wire and not much risk if any of a short. If you wanted to go to the extreme and run from Alternator to Battery in the back which I was going to do until I got under the car and saw how hard it would be to run it, you'd definitly want to fuse it at both ends.
Also will be covering the new alternator wire with black wire loom when I do my HID's next week when they come. Keep everything looking factory.
I forgot to take some pics until after I took the factory wire off so I just set the factory wire back on for picture.


Last edited by Joe22; 05-23-2013 at 09:38 PM.
05-24-2013, 12:19 AM
#32
Senior Member
iTrader: (1)
Join Date: 02-08-08
Location: Fayetteville/Linden, NC/Myrtle Beach, SC
Posts: 3,728
Likes: 0
Received 0 Likes
on
0 Posts
CLEAN!!!! How much did you get the 0g CCA? You can get 25ft of 00g OFC for $60 at Diyma.com. If you get lucky and catch them on a sale you can get it for $30(I got 50ft for $60 about a month ago). Looks great though, Hopefully now that I have a garage to do things in I can take my time and do something comparable.
05-24-2013, 12:38 AM
#33
Thanks. I bought the Audio Technix kit I posted a few posts up. 1/0 Kit for 40bucks shipped. Actually bought 2 of them because I was going to use both the fuse holders and the wire from other kit to run alternator wire all the way back.. But.. then I crawled up under the car and saw how big of a pain it would be lol.
06-11-2013, 09:28 PM
#34
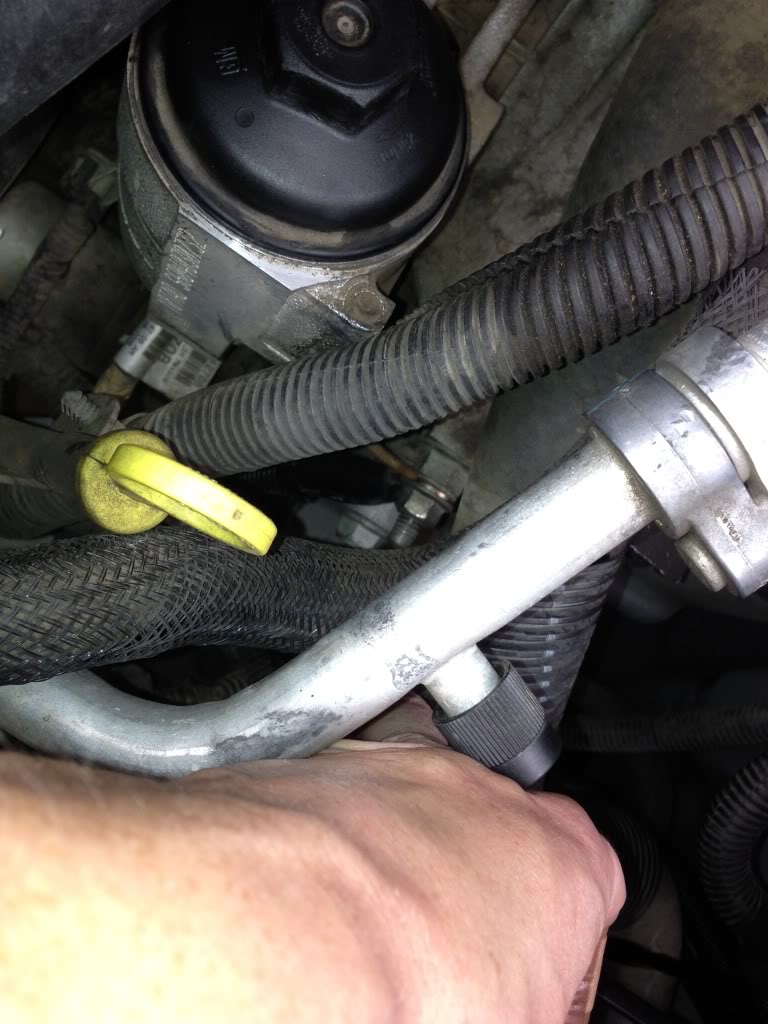
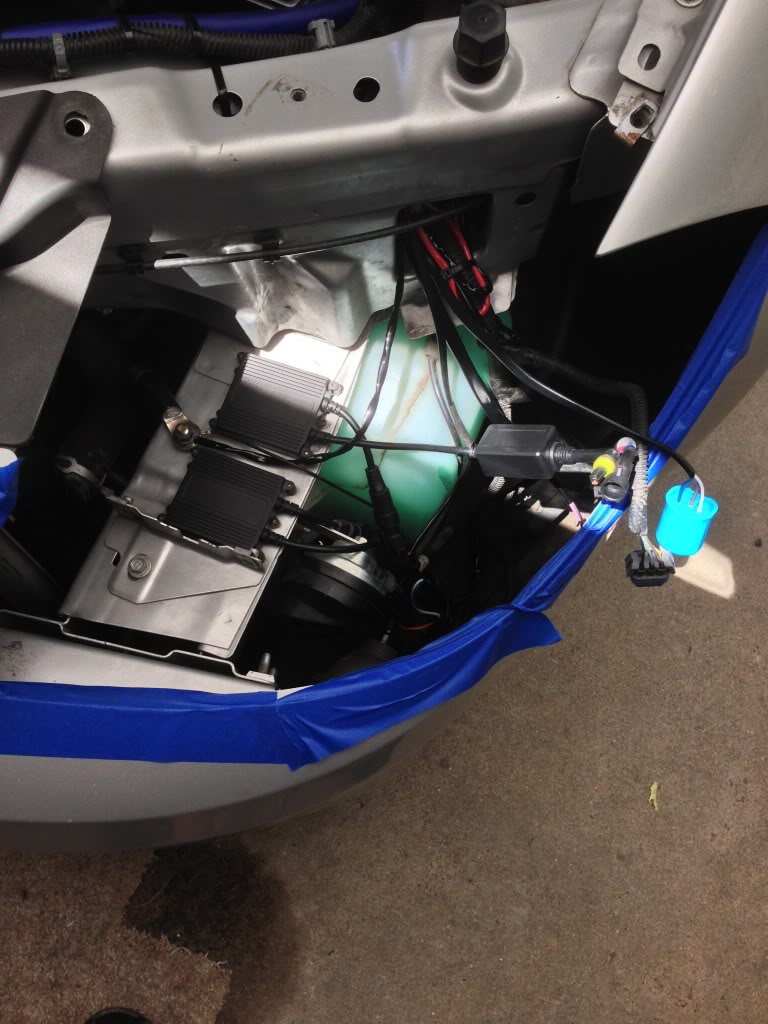
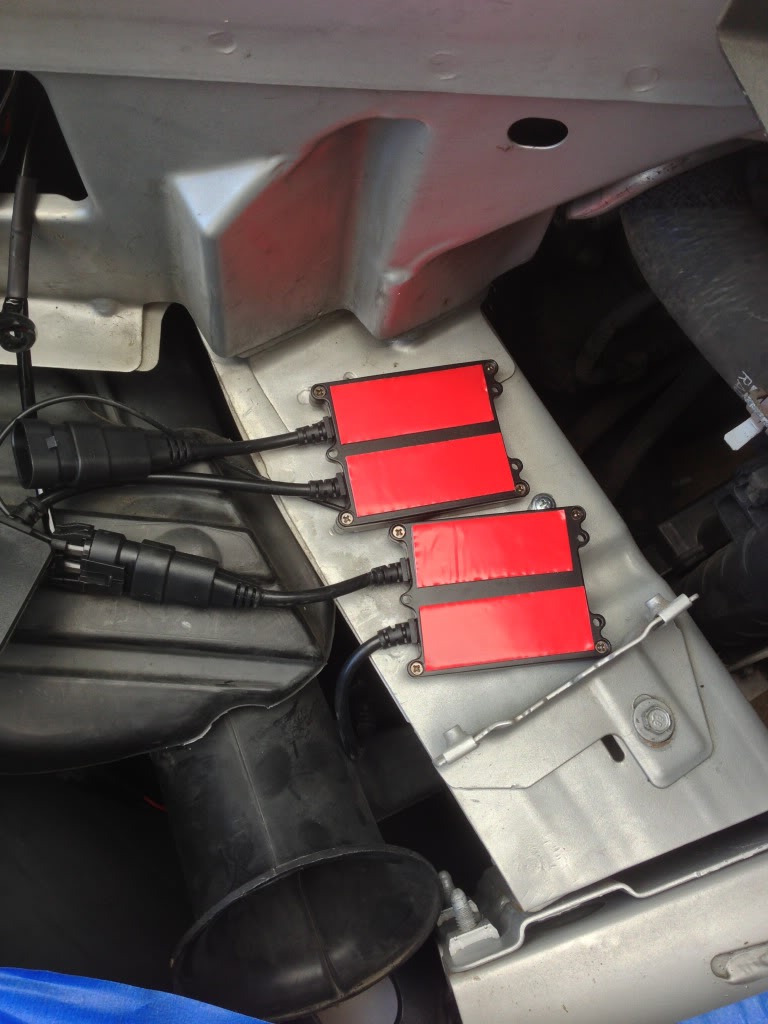
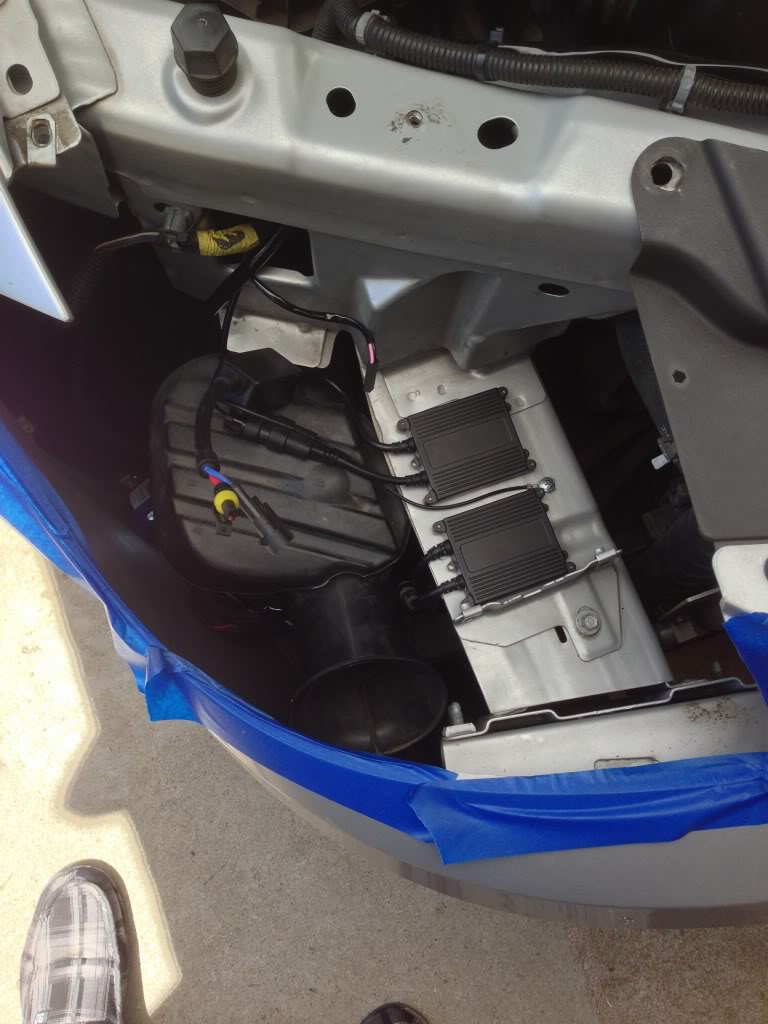
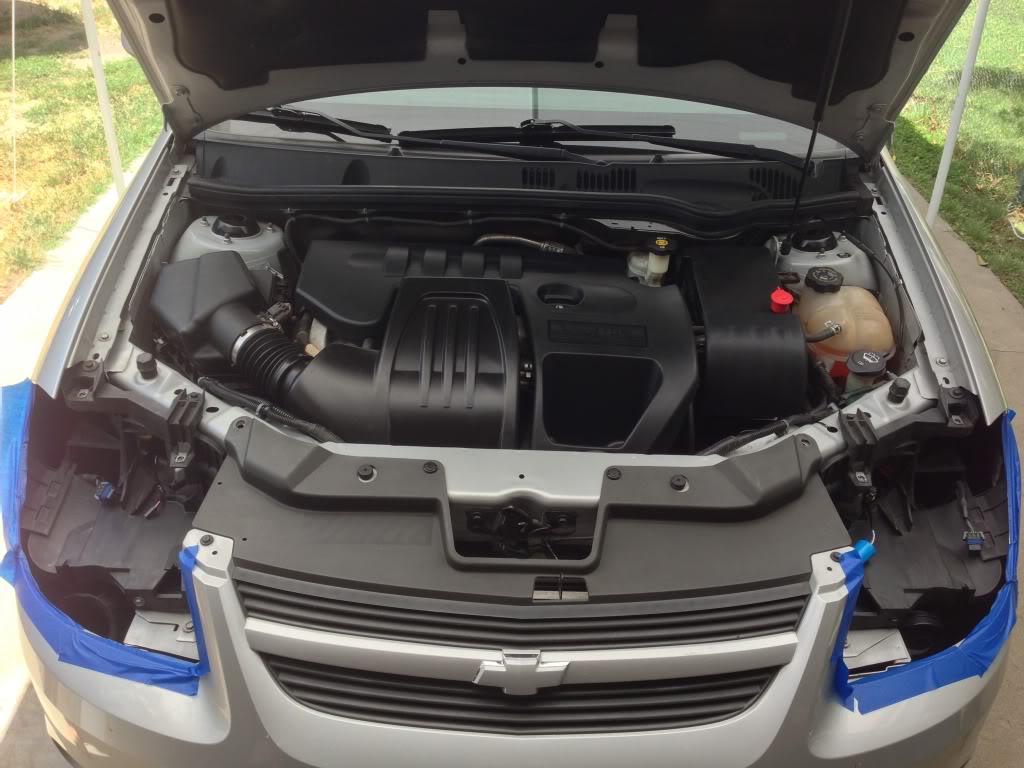
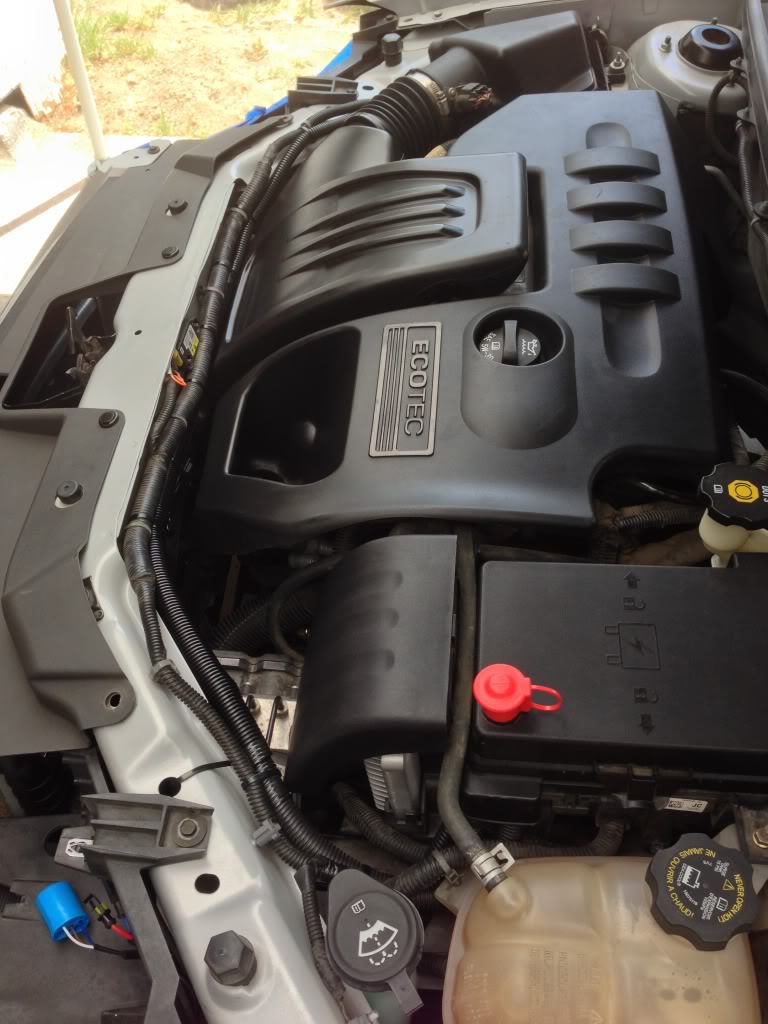
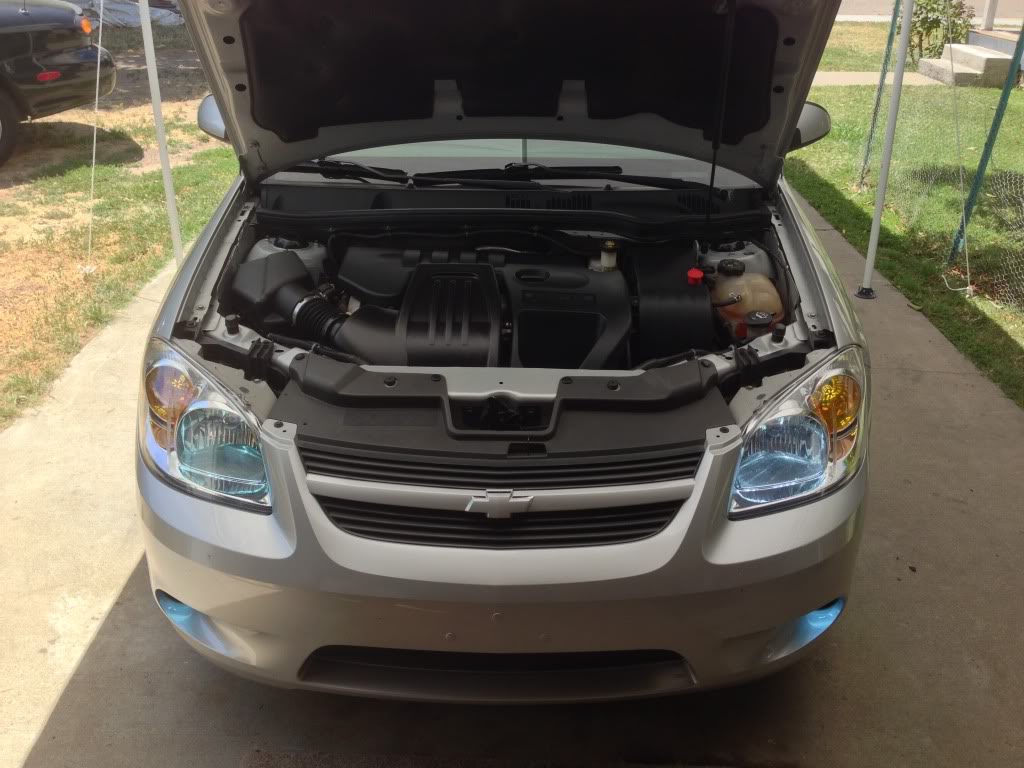
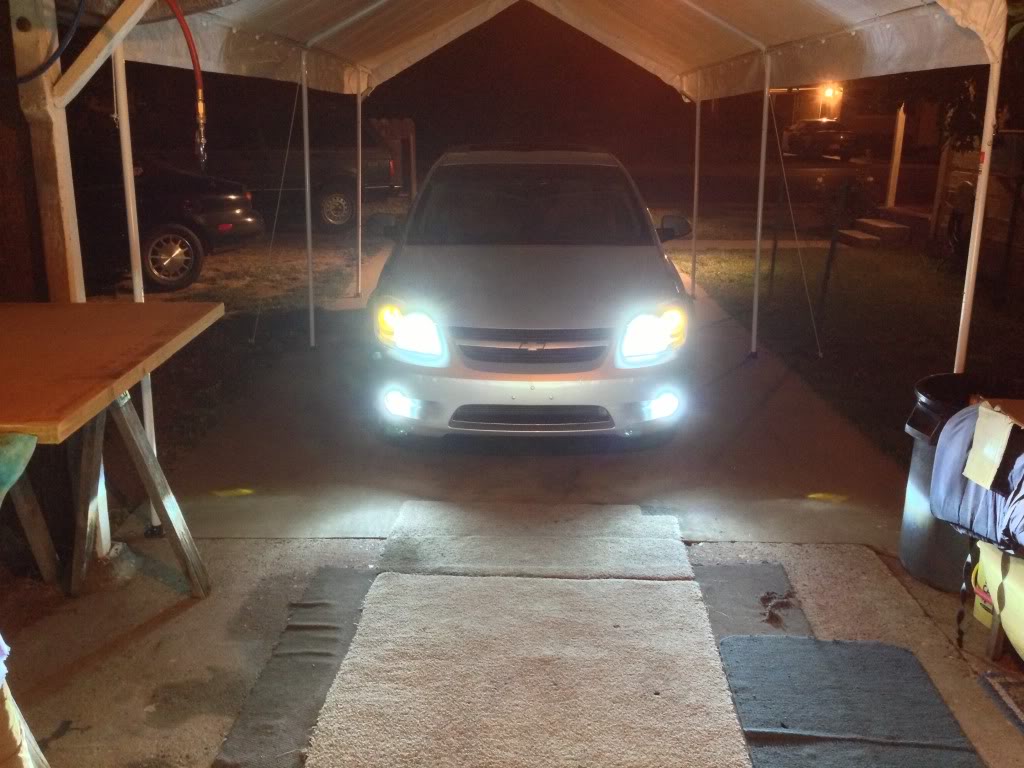
So a little update, installed my HID's. Went with 8k 35w DDM Tuning but figured out I'm not a fan of the slim ballast's. The stupid igniter is bigger than the ballast. But oh well there in.. I also added a 1/0 ground for chassis(body in this case) to engine block finishing up my Big 3 eventhough I doubt this ground will have any noticable gain but I know it's a complete Big 3 lol. And cleaned up everything with wire loom.

EDITED: Picture at night


EDITED: Picture at night

Last edited by Joe22; 06-21-2013 at 01:13 AM.
06-11-2013, 10:02 PM
#35
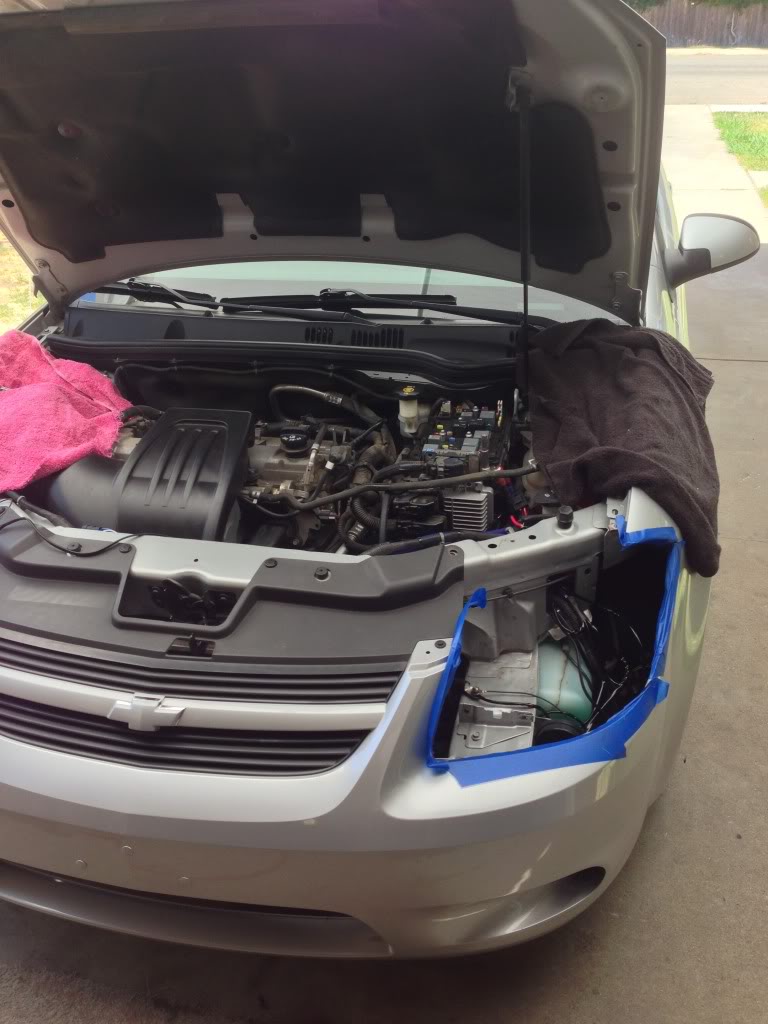
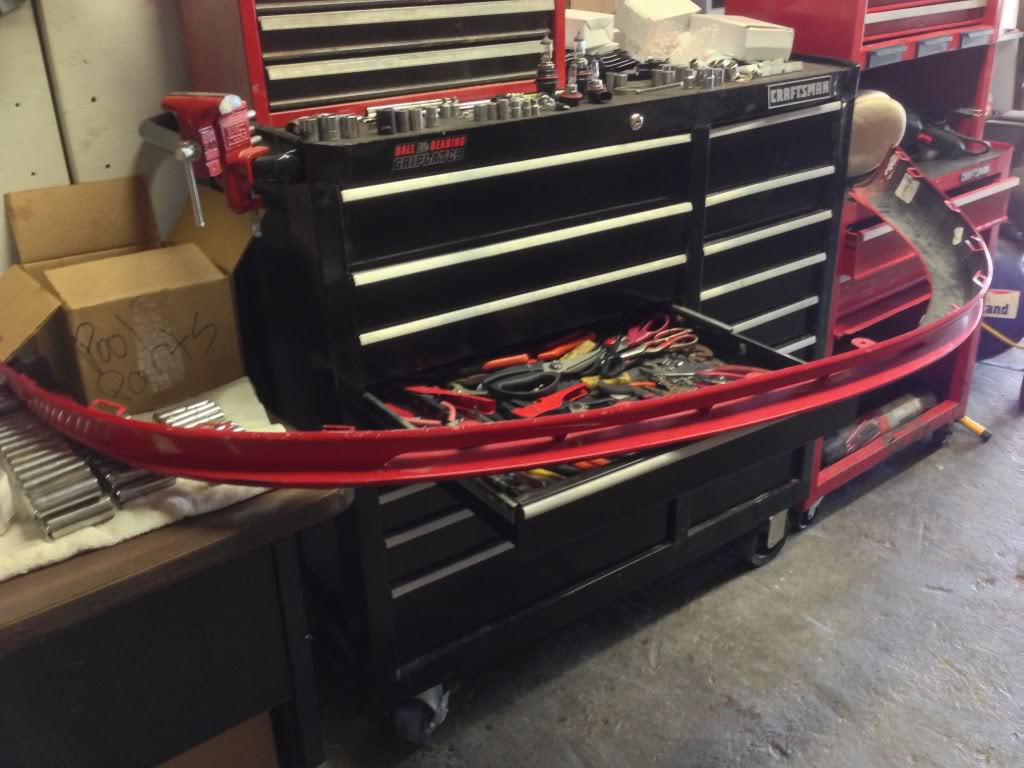
Heres my next project too. Picked up a front lip off craigslist. Little scuffed and beat up, few clip tabs broken but I was going to have to paint it anyways so.. Anyone have any recommendations on super strong permanate plastic glue for the broken clip tabs? Pay no attention to the messy tool box either, It's getting reorganized 

 06-14-2013, 10:59 PM
#38
Ya, I'm still young and love the 8k lol. I'll probably out grow it and just focus on light output later but here in CA don't get too bad of rain/fog often so don't have to worry about it too much.
Last edited by Joe22; 06-15-2013 at 07:39 PM.
06-16-2013, 02:42 PM
#39
New Member
iTrader: (2)

Join Date: 04-19-13
Location: IN
Posts: 64
Likes: 0
Received 0 Likes
on
0 Posts
Nice choice on the VVX, I picked up a 10 with their blowout sale too, they're pretty beefy and pretty on par with the SA's. Where did you pick up that 0 gauge heatshrink? I might just order some online. Nice work man!
06-21-2013, 12:57 AM
#41
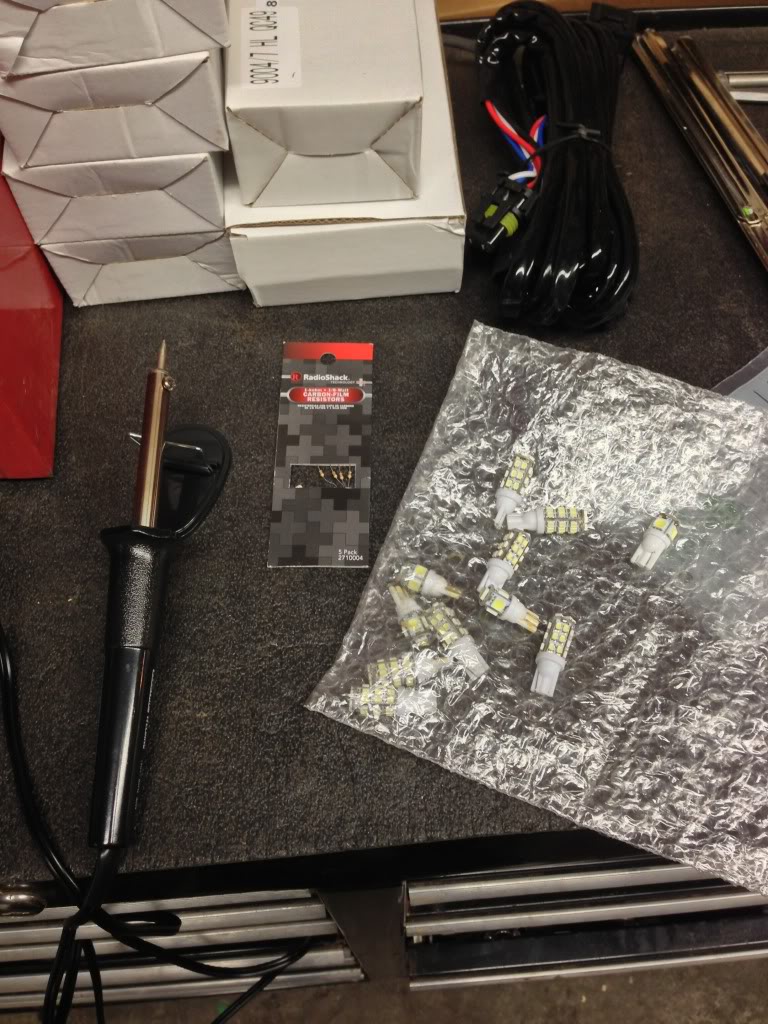
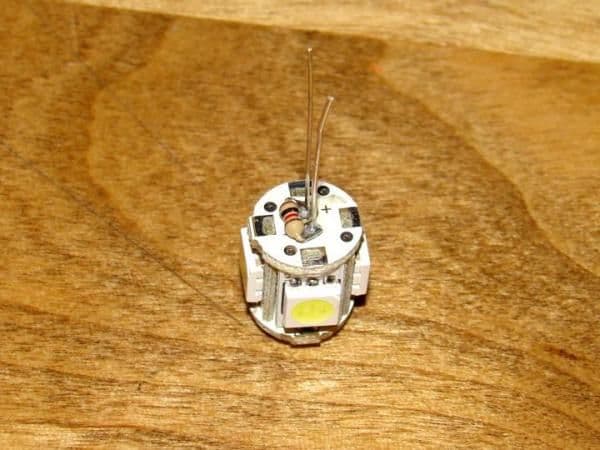
So I decided to do the resistors on my 194 LED maplights. I only did 1 LED with resistor, threw it back in the light to make sure it still worked and that solved the dim light problem. I left just the one done in there for right now, but IM'd the person that made the How-To to see if I should still do the other one anyways because i'm no expert on resistors... Btw stole the picture of resistor actually soldered on LED from the how-to because I forgot to take a picture of mine

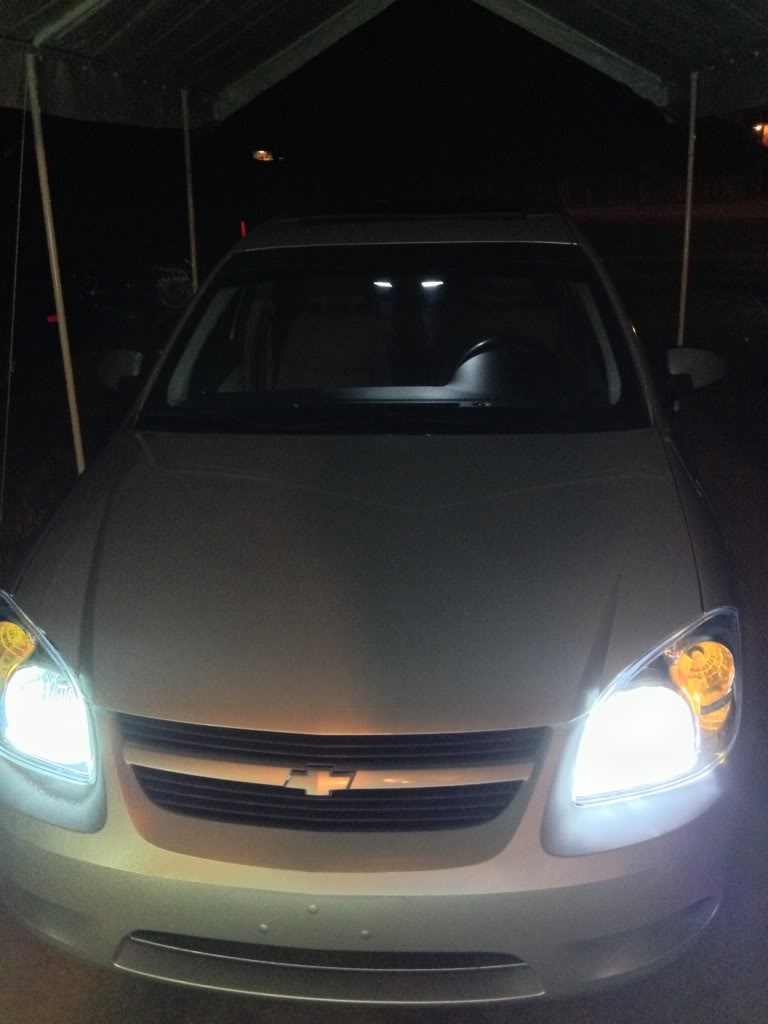
Also a picture of HID's at night time


Also a picture of HID's at night time
Last edited by Joe22; 06-21-2013 at 01:13 AM.
06-21-2013, 11:47 PM
#45
like this but a chevy emblem
LED Car laser projector Shadow Door lamp Passat B5+ - YouTube
LED Car laser projector Shadow Door lamp Passat B5+ - YouTube
06-21-2013, 11:55 PM
#46
Nice job.
06-22-2013, 01:16 AM
#47
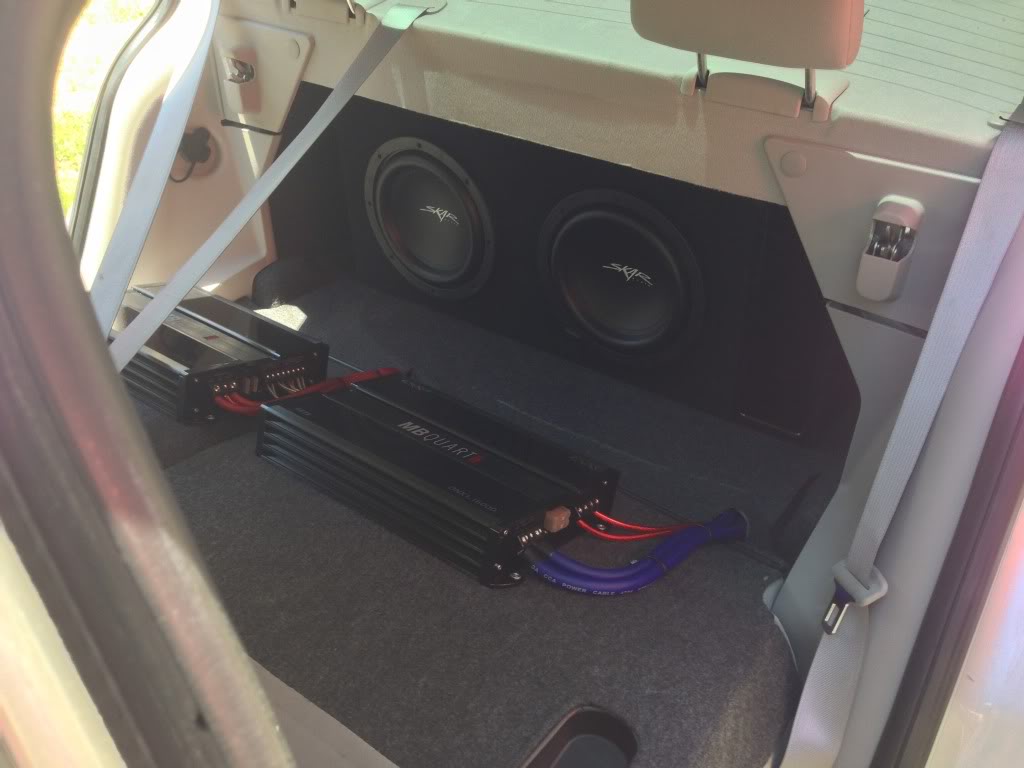
looks good man. MB Quart isnt what it used to be. If you remember them in the 90's that was when they were really good. Nice parts choices overall and very good job on the enclosure build. You know what you are doing. I would have soldered/heat shrink the wires to the headunit but that's just me.
Nice job.
Nice job.