
First shot at a fiberglass box
 10-21-2008, 10:36 PM
#1
New Member
Thread Starter

Join Date: 06-09-07
Location: Carol Stream, IL
Posts: 126
Likes: 0
Received 0 Likes
on
0 Posts
First shot at a fiberglass box
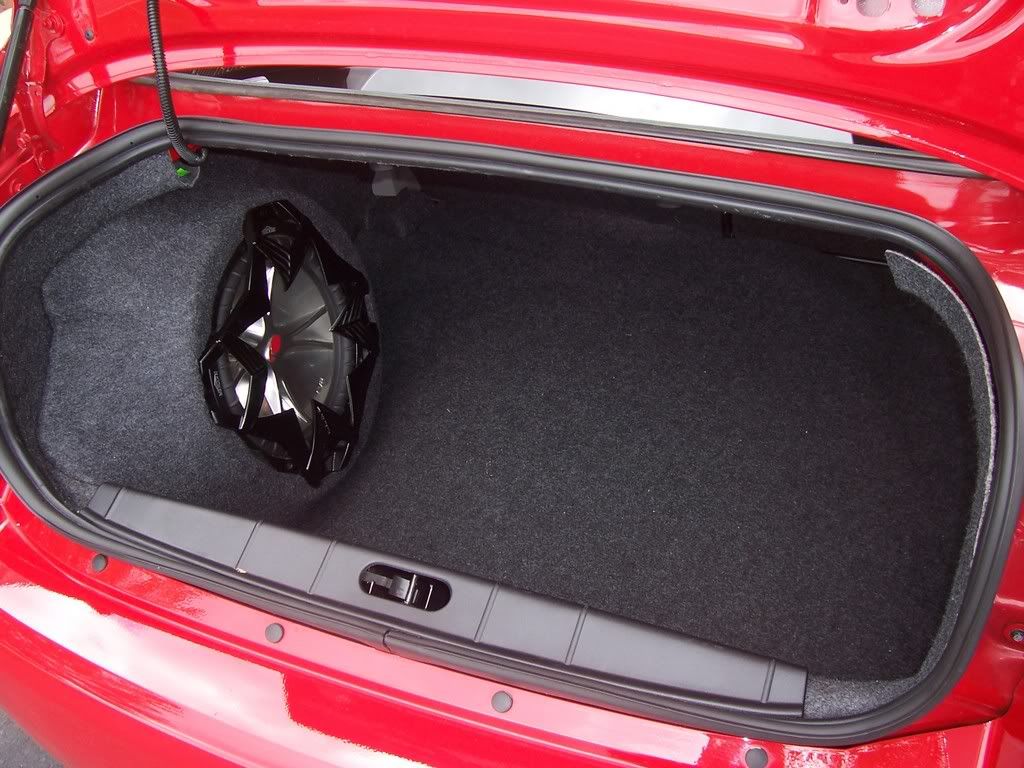
Pics for now, info later. Just remember that this is my first attempt at fiberglass, so be gentle.


The sub thats going in it


Sean
The sub thats going in it
Sean

 10-21-2008, 10:39 PM
#3
New Member
Thread Starter
Join Date: 06-09-07
Location: Carol Stream, IL
Posts: 126
Likes: 0
Received 0 Likes
on
0 Posts
Yeah, should have mentioned that that is only the first two layers of the back side. Kinda ran out of time, but I have 5-6 layers on it now just no pics yet.
Sean
Sean
10-21-2008, 10:44 PM
#5
Banned

Join Date: 08-04-06
Location: New York
Posts: 3,153
Likes: 0
Received 0 Likes
on
0 Posts
hey man nice try for you first time. try this next time. put down aluminum foil down first. make sure to tape all the edges down and use blue painters tape. Then go over the foil like you did with the other tape but a larger area and make sure to then go over again perpendicular to the layer before. invest in a fiberglass roller. your shell you made doesn't look like it's flush enough with the trunk space it's in. go over to fiberglassforums.com and read up on a bunch of builds before you start over again.
10-21-2008, 10:46 PM
#6
Senior Member
iTrader: (7)

Join Date: 06-10-06
Location: Omaha, NE
Posts: 3,021
Likes: 0
Received 0 Likes
on
0 Posts
My only complaint... if your going to be using fiberglass to create the face of your box, make sure you get all the air bubbles out. It looks like a decent start. That a 10" or 8" woofer?
10-22-2008, 05:43 AM
#7
New Member
Thread Starter
Join Date: 06-09-07
Location: Carol Stream, IL
Posts: 126
Likes: 0
Received 0 Likes
on
0 Posts
Thanks guys. There are more bubbles than I would have liked, Im gonna blame them on my friend who was helping  I think a roller would have helped A LOT, but I couldnt find ant local so I said screw it. We had some problems laying down the first couple layers as well. We were trying to use to big of pieces and it was wanting to fall down when we did the sides. It was a nightmare, but I would definatly say we learned from it. Im gonna stick with what I have only because Im not too concerned with the looks. I thought about redoing it, and I probably should have (and I may still later) but I didnt want to spend the money. Now Ive layed up 5-6 layers so Im sticking to the not so good start. The layers after the bad ones are much better. The sub is a Infinity Kappa Perfect 10d VQ, so a 10"
Sean
I think a roller would have helped A LOT, but I couldnt find ant local so I said screw it. We had some problems laying down the first couple layers as well. We were trying to use to big of pieces and it was wanting to fall down when we did the sides. It was a nightmare, but I would definatly say we learned from it. Im gonna stick with what I have only because Im not too concerned with the looks. I thought about redoing it, and I probably should have (and I may still later) but I didnt want to spend the money. Now Ive layed up 5-6 layers so Im sticking to the not so good start. The layers after the bad ones are much better. The sub is a Infinity Kappa Perfect 10d VQ, so a 10"Sean
10-22-2008, 02:20 PM
#9
Senior Member

Join Date: 01-23-08
Location: Cape Coral, FL
Posts: 2,920
Likes: 0
Received 0 Likes
on
0 Posts
more pics, im looking into doing the same but using wood for the back side against the trunk side and wood for the bottom of it, then doing a fiberglass front of the box
10-22-2008, 03:52 PM
#11
New Member
Thread Starter
Join Date: 06-09-07
Location: Carol Stream, IL
Posts: 126
Likes: 0
Received 0 Likes
on
0 Posts
Sean
10-23-2008, 03:12 PM
#12
Banned
Join Date: 08-04-06
Location: New York
Posts: 3,153
Likes: 0
Received 0 Likes
on
0 Posts
do urself a favor and junk it bro. it will not sound right and all the bubbles will cause it to be weak. do it the right way. cut 3/4 inch mdf fr the bottom and glassthe sides. take pride in your work and learn from your mistakes. its not like its a huge box its not alot of money wasted. get supplies online from uscomposites.com great company.
10-23-2008, 03:42 PM
#13
New Member

Join Date: 10-20-08
Location: Lil' Rhody
Posts: 3
Likes: 0
Received 0 Likes
on
0 Posts
What is the Qts and Fs of that sub? That looks like it is WAY to small of a volume. You are going to have major resonant problemst at the boxes impedance peak. You can use an apriodic vent (no to be confused with ports) if neccessary to bale the box "look" bigger to the woofer electromechanically. Also the glass looks WAY to thin. It seems like start though. If you are happy with it, best of luck!
You can't get ten pounds of t1ttie out of an "A" cup....
You can't get ten pounds of t1ttie out of an "A" cup....
10-23-2008, 03:57 PM
#14
Member

Join Date: 11-14-07
Location: Palmyra, PA
Posts: 323
Likes: 0
Received 0 Likes
on
0 Posts
It looks like your going for something like I made.
My main piece of advise for molding in that side is take the carpet out! The carpet is still enough and will retain its shape. Just support the carpet so it doesn't bend while your working on it. Lay the fiberglass on the covered carpet then take it and put it in the car and work on how you want it to look Its much simpler that way.
Oh, make sure you measure your box before you glass it to see if it will fit through the tiny ass trunk opening. The main killer will be from the front of the box where the woofer is to the back corner where it sits on the carpet. If you need any help or have any questions feel free to message me and ill give you some better contact info to reach me at
10-23-2008, 04:34 PM
#15
Senior Member

Join Date: 06-14-06
Location: Nashville, TN
Posts: 2,535
Likes: 0
Received 0 Likes
on
0 Posts
It looks like your going for something like I made.
My main piece of advise for molding in that side is take the carpet out! The carpet is still enough and will retain its shape. Just support the carpet so it doesn't bend while your working on it. Lay the fiberglass on the covered carpet then take it and put it in the car and work on how you want it to look Its much simpler that way.
Oh, make sure you measure your box before you glass it to see if it will fit through the tiny ass trunk opening. The main killer will be from the front of the box where the woofer is to the back corner where it sits on the carpet. If you need any help or have any questions feel free to message me and ill give you some better contact info to reach me at
My main piece of advise for molding in that side is take the carpet out! The carpet is still enough and will retain its shape. Just support the carpet so it doesn't bend while your working on it. Lay the fiberglass on the covered carpet then take it and put it in the car and work on how you want it to look Its much simpler that way.
Oh, make sure you measure your box before you glass it to see if it will fit through the tiny ass trunk opening. The main killer will be from the front of the box where the woofer is to the back corner where it sits on the carpet. If you need any help or have any questions feel free to message me and ill give you some better contact info to reach me at
you can always take the back seats off and pout it through there. Its actually really easy
10-23-2008, 06:55 PM
#16
New Member
Thread Starter
Join Date: 06-09-07
Location: Carol Stream, IL
Posts: 126
Likes: 0
Received 0 Likes
on
0 Posts
Ok guys, let me restate that the pics are only the first two layers. I ground out the bubbles and layed about 6 more layers over it, so there may still be some air bubles but they are under a good amount of fiberglass. Im sure I will eventually redo it but I dont feel like spending the money again right now. So I'm going to finish it and have SOMETHING in the car for now.
I dont rember the Qts or the Fs of the sub, and Im not going to look it up because Im lazy. BUT if you know about the Perfect VQ you know its adjustable. In a sealed box it can work well with anywhere from .3 - 1 cubic ft of box volume with the optimum being .75
Stubri51, thats basicly what Im goin for. Looks nice and thanks for the advice, and offer of help
I dont normally do this kind of stuff, I normally go for performance. If you want to see my normal fabrication work check out turbo kit I built for my buddys TA
http://www.sidewayz.net/turbota
Sean
One last thing I just kinda looked at. In the pics there is still foil stuck to the back of the box making areas look lighter. If you didnt know that it really looks like its almost all HUGE bubbles, but it isnt. The biggest bubles we got were quarter size and like I said I ground them out and relaid that area.
Sean
Last edited by Broke EF; 10-23-2008 at 06:55 PM. Reason: Automerged Doublepost
10-24-2008, 08:31 PM
#17
New Member

Join Date: 07-02-08
Location: Plymouth, MA
Posts: 9
Likes: 0
Received 0 Likes
on
0 Posts
10-26-2008, 07:36 PM
#20
Member

Join Date: 07-22-06
Location: Franklin, Connecticut
Posts: 244
Likes: 0
Received 0 Likes
on
0 Posts
not necessary to seal the sub to the box, just make sure you screw it in nice and tight and stuff the box with some polyester stuffing for better sound quality. other than that you should be all set. just find a nice place to mount your amp such as the back of the rear seats or opposite of the sub might look good as well. great job!
10-26-2008, 07:45 PM
#21
New Member
Thread Starter
Join Date: 06-09-07
Location: Carol Stream, IL
Posts: 126
Likes: 0
Received 0 Likes
on
0 Posts
Amp is hidden. I need to get the ring area smoother and actually put in all 8 screws (I only have 4 in because I need to bondo the box and paint it still) But right now its leaking air all around the sub. Ill get pics up when its pic worthy
Sean
Sean
10-26-2008, 08:34 PM
#22
New Member

Join Date: 11-20-07
Location: Ontario, Canada
Posts: 102
Likes: 0
Received 0 Likes
on
0 Posts
Use foam weatherstripping that has an adhesive backing on one side. You can pick it up at your local hardware store. Works perfectly.
Looks like a good start. Can't wait to see the finished setup !!
Later,
Brad
Looks like a good start. Can't wait to see the finished setup !!
Later,
Brad
11-10-2008, 11:07 AM
#23
New Member
Thread Starter
Join Date: 06-09-07
Location: Carol Stream, IL
Posts: 126
Likes: 0
Received 0 Likes
on
0 Posts
Well bad news everybody, the sub is toast  I finished up the box this weekend got it perfect looking, painted and ready to go. I had the sub on the back of the car while I was fixing the wiring getting ready to put it back in the box. My friends brother came by with the kids (haven't seen him in a long time) so I went to go say Hi, and the sub fell. It was like slow motion, we all tried to grab it and none of us made it. I turned away once I realized I wasn't going to catch it, I couldn't bear to watch. The spider is completely broken in two spots so one area is not connected anymore. Thing that really sucks is that I don't have the money to replace it (especially with Christmas coming up). I spent lots of time and money building a box for it, and its just gonna sit and collect dust Ill be taking donations to replace it, if anybody is interested
Sean
Sean