
How to install aftermarket seat heaters
 09-07-2009, 12:53 PM
#1
Senior Member
Thread Starter

Join Date: 01-02-09
Location: Edmonton
Posts: 677
Likes: 0
Received 0 Likes
on
0 Posts
How to install aftermarket seat heaters
**THIS HAS BEEN UPDATED IN THE HOW-TO SECTION**
So winter is almost here, and it's damn cold in Canada. A heated seat sounds like the best option, since GM didn't offer it on the SS/TC
This is my first write up, so I hope it goes well...Note that some of the pictures aren't following the steps exactly because I took some before I noticed there was a better way of doing it. The pictures will just give a general idea of that to look for. An example is how I routed the wires through the carpet, yet some pics the wires are not routed as such...I though of this after the fact. Either way it should work for you.
Tools needed:
Electrical Tape
Wire stripper/crimper
10MM socket
15MM socket
#10 or #15 torx bit, dunno which.
Flathead screwdriver
Electrical spade connector
Add-a-circuit (fuse tap)
Scissors
I highly suggest disconnecting all the connectors on the harnesses before throwing stuff together as it makes it much easier to install and wire. When you install the pads you don't worry about wires everywhere (just one from each pad) and then you can wire up all the harness stuff in the car and reconnect everything when it's done...much simpler.
1. Buy a heated seat. I got mine from someone called "autowarm" on Ebay, got it for 80 bucks US, and free shipping. It's the carbon fibre kit with dual pads. Before you buy, measure your seats to make sure what you buy will fit, or will be big enough. Smaller is ok, too wide is BAD. You can not cut the last inch of the pad on each side because that's where the power "wire" is.
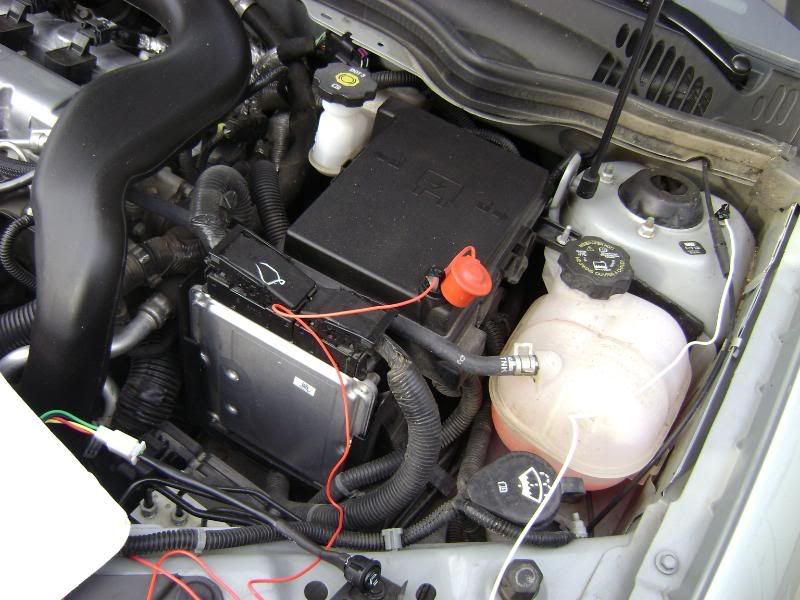
2. Test the kit you bought. I hooked mine up under the hood by using electrical tape to hold the positive wire on the positive battery terminal and the negative wire to the ground screw on the strut tower.
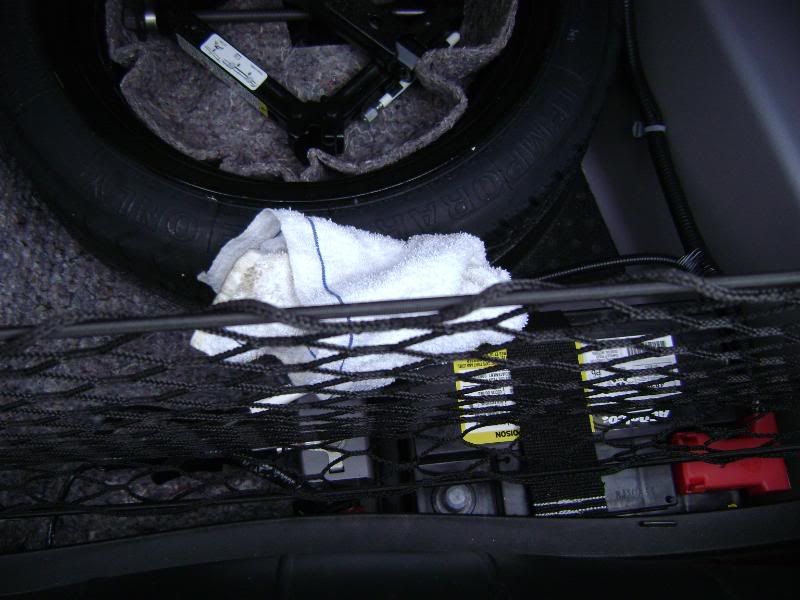
3. Unhook the negative battery terminal (in the trunk....duh) with a 10mm socket or wrench. Make sure to wrap the cable with any dirty oily rag of you choice to ensure it doesn't connect itself again. The reason for unhooking the battery is so when you remove the airbag harness connection you won't set off the airbag light.
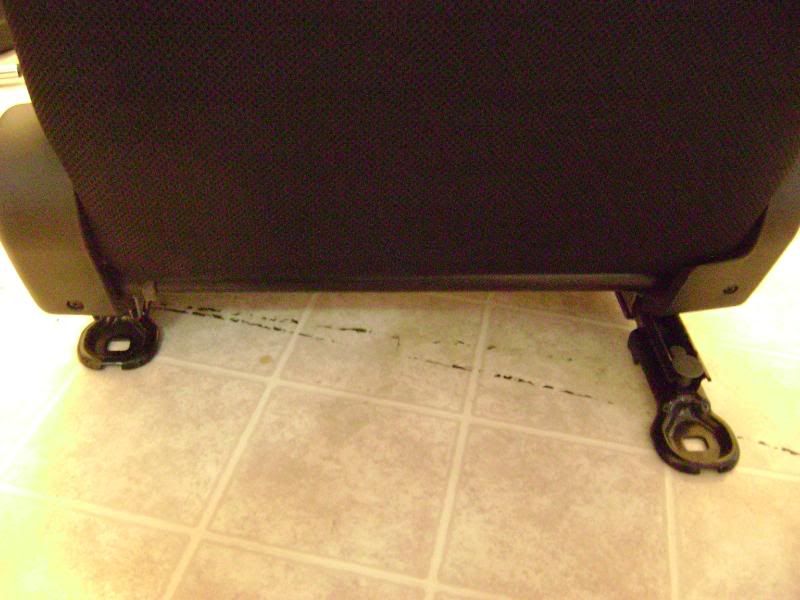
4. Slide the seat all the way forward. Use a 15mm socket to remove both bolts.
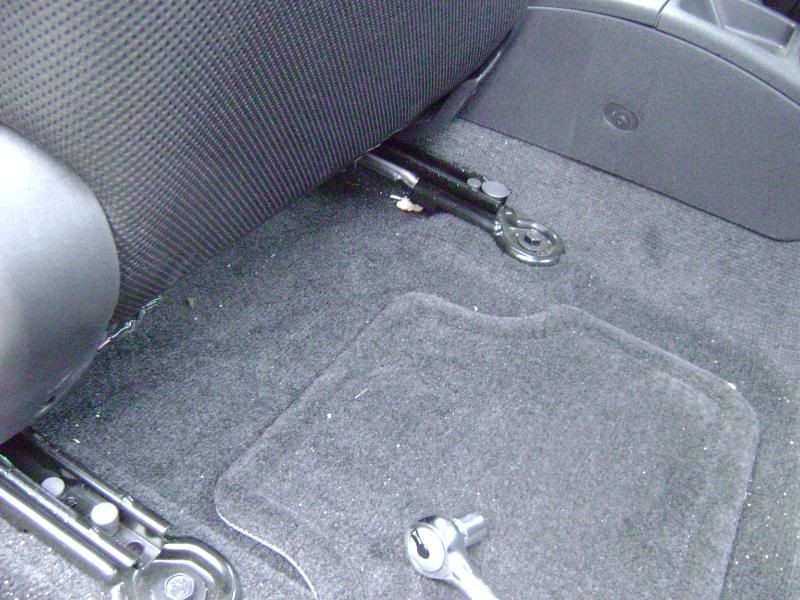
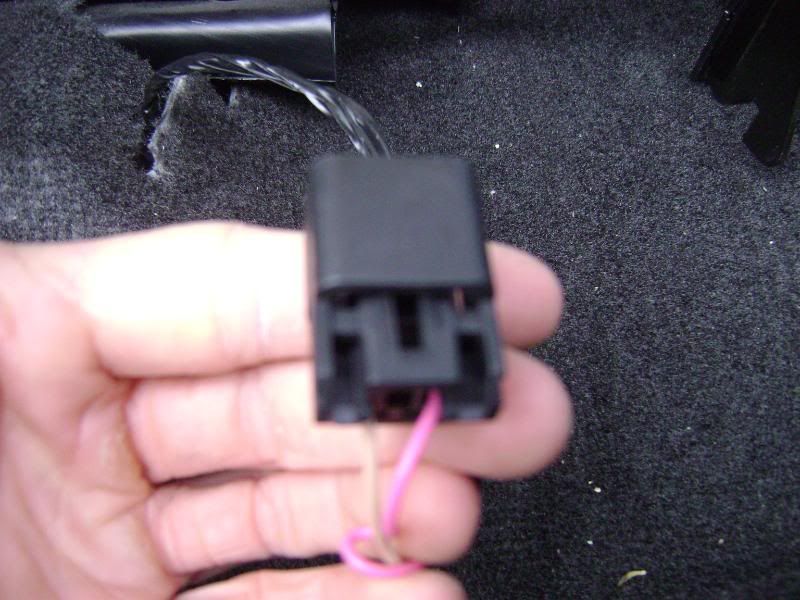
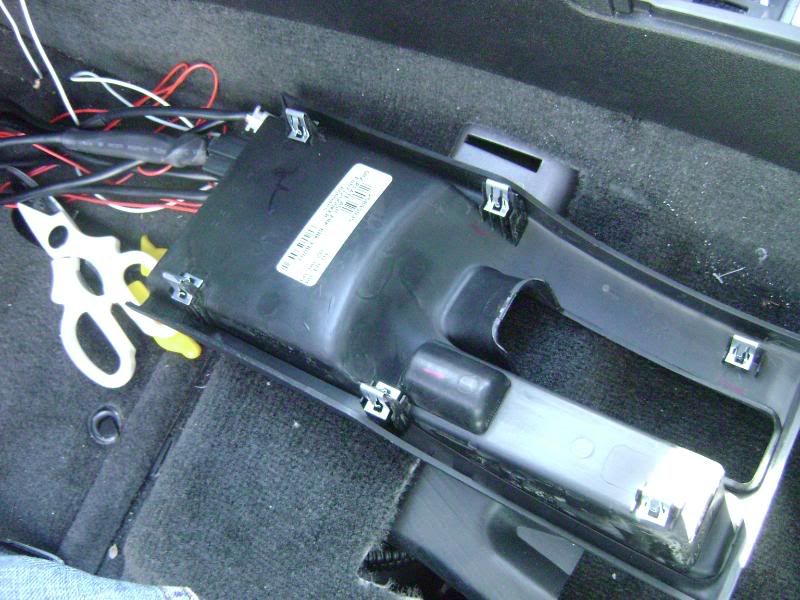
5. Take out the seatbelt from the seatbelt holder on the headrest (if you have the coupe). Tilt the seat forward and lift up. Remove the wire harness from the bottom of the seat. It's removed by simply pushing the top tab and separating the halves.
6. Bring the seat inside or to a good work area. Don't bother trying to do it in the car, it's a pain in the ass.
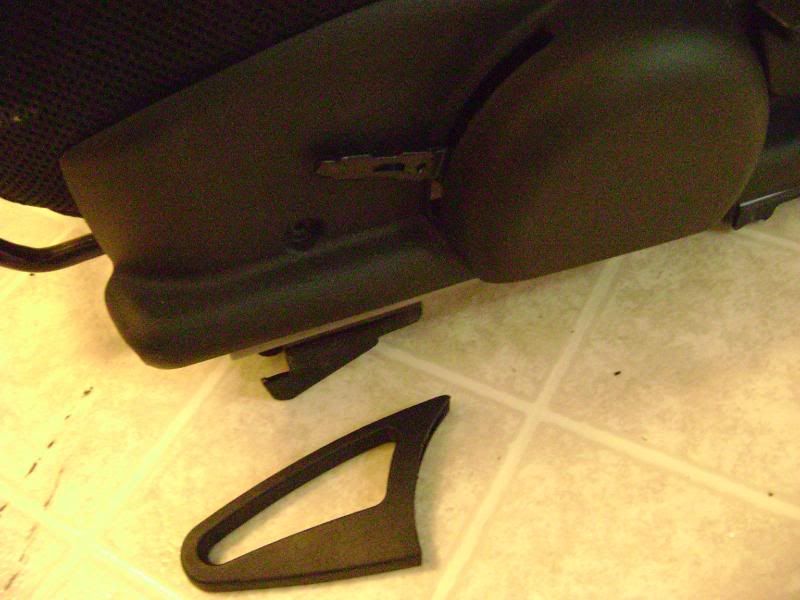
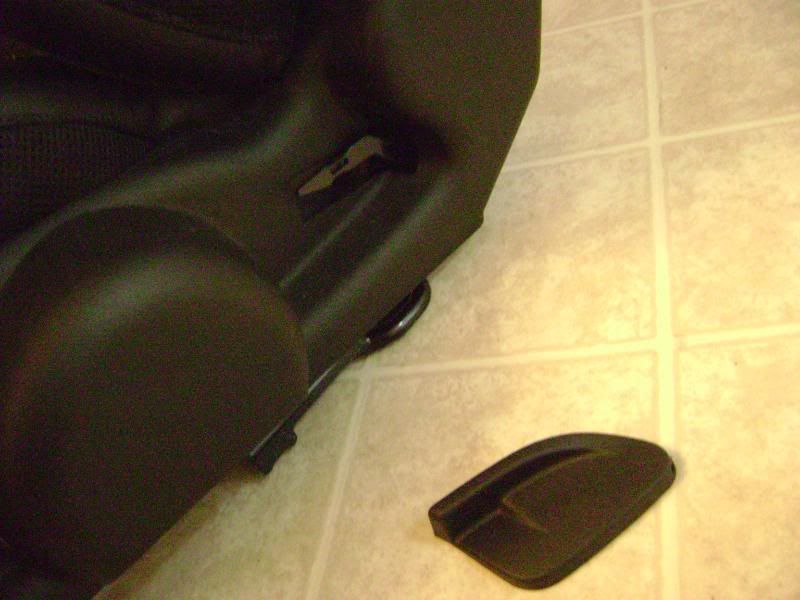
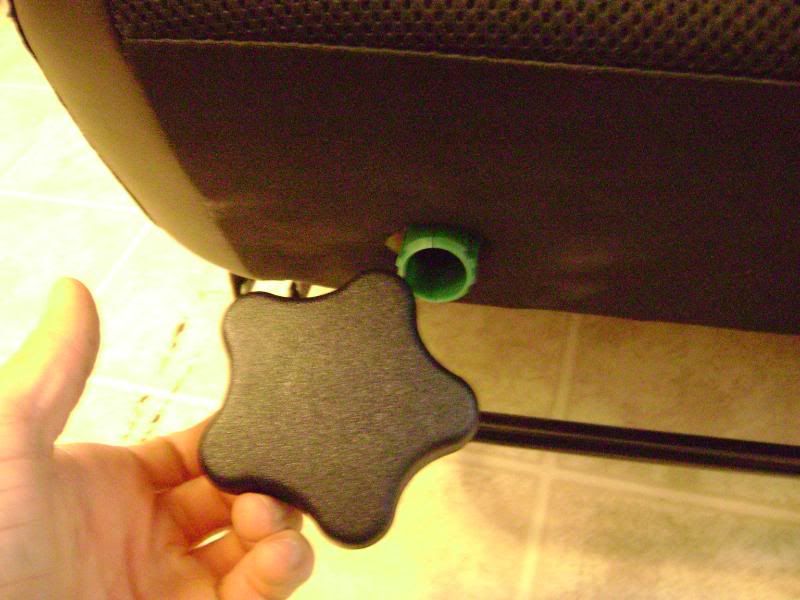
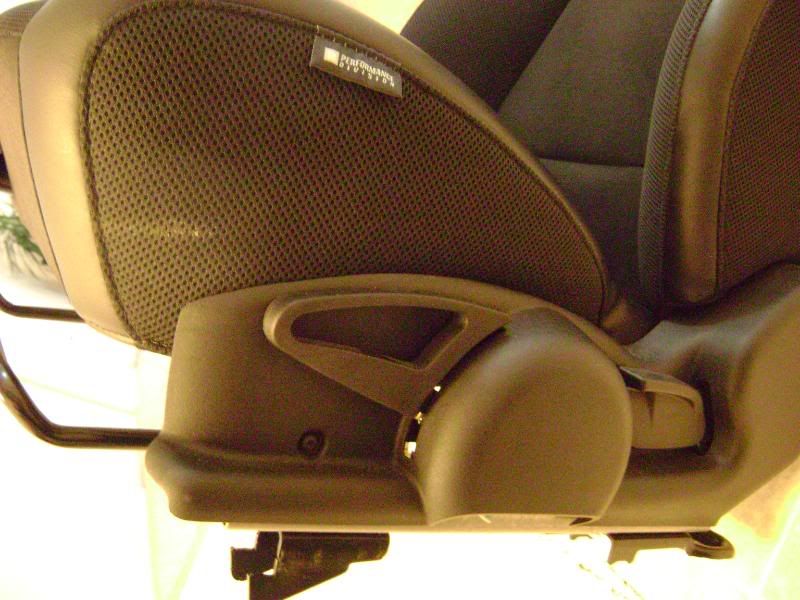
7. Pull off all the handles (for seat height adjuster, seat recliner and the lumber knob if you have it). Pull these straight off, they require quite a heave but if you pull it straight off nothing should break.
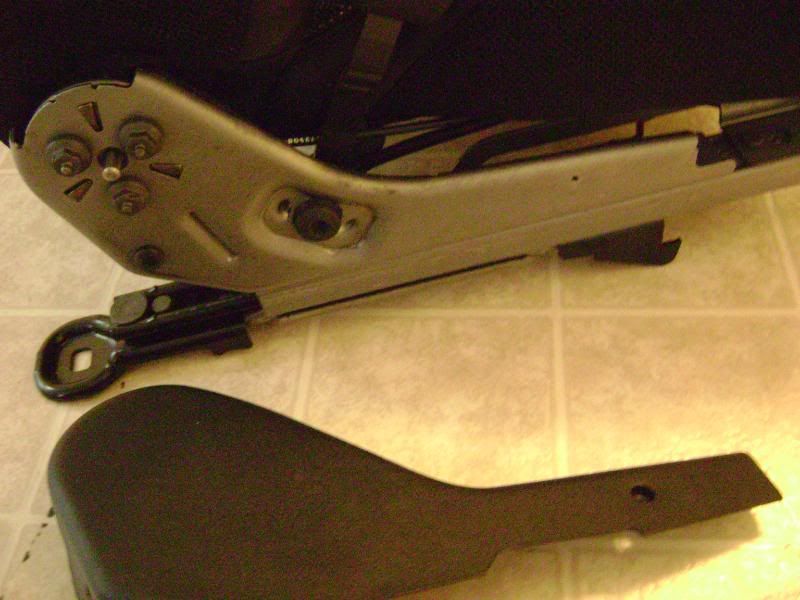
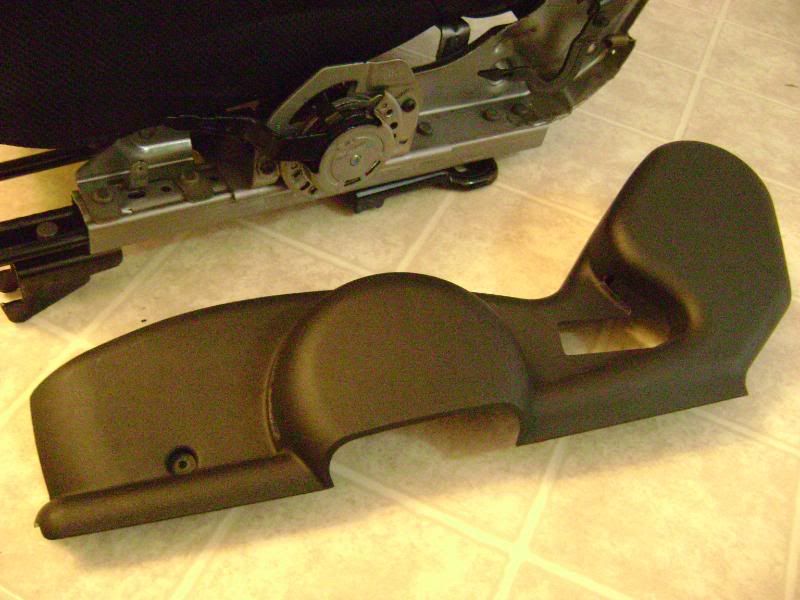
8. There are four torx screws on the plastic sides of the tracks. I don't remember what size the torx screws were...either #10 or #15... Remove all four.
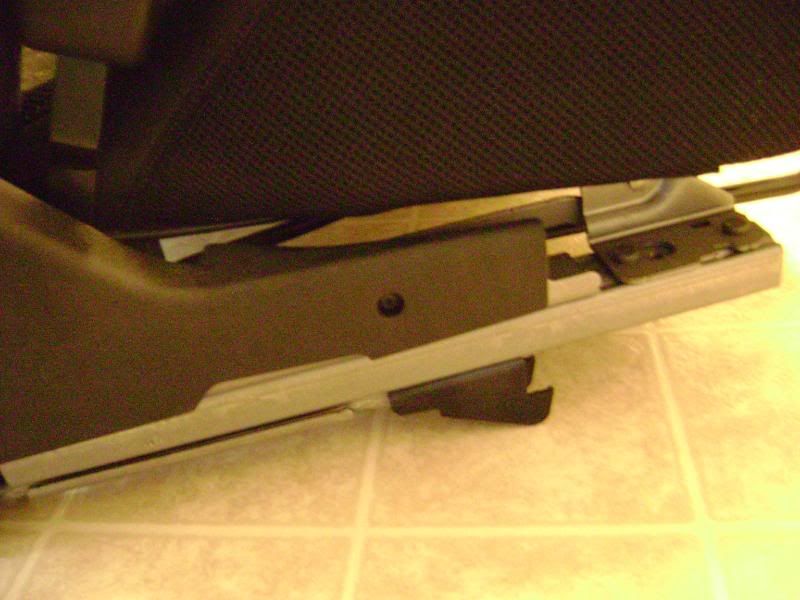
9. Remove the plastic sides. Just rip them off. Do not break them or you will cry. Maybe shimmy them is a better option.
10. Flip the chair up so you're facing the bottom of the bottom seat. There are 4 long plastic hooks/clips that hold the fabric on. Pull on the plastic hooks/clips to remove from their mounting location. Take note how they go on so you're not clueless how to put them back, but it's not that hard really, they only fit one way.
11. Pull up the fabric. Be careful to not rip the foam while doing this. To remove the fabric from the seams, just pull, it's held by velcro...just be careful and patient, I could see ripping the velcro off the foam if you get to crazy...
12. Test fit your heating pad and find a good spot. Don't make it too far forward that the wire rides up your ass every time you sit down, unless you like that kind of thing...
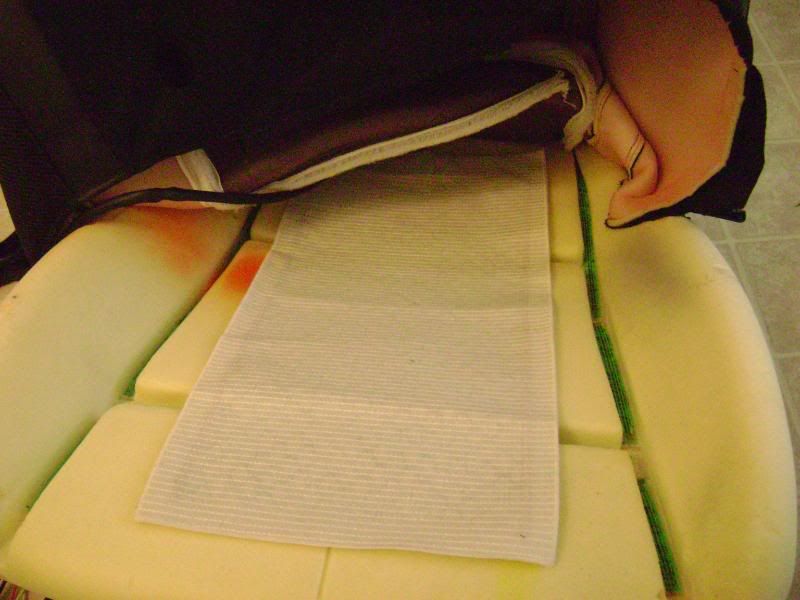
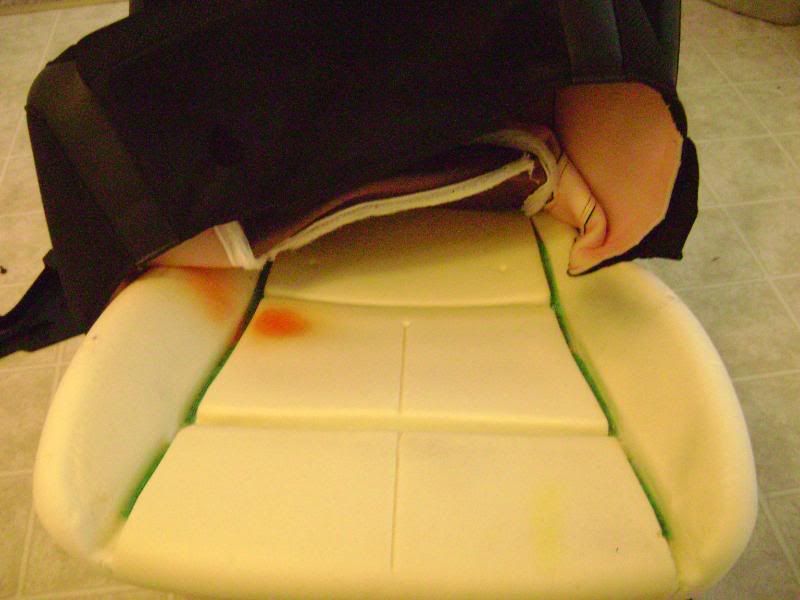
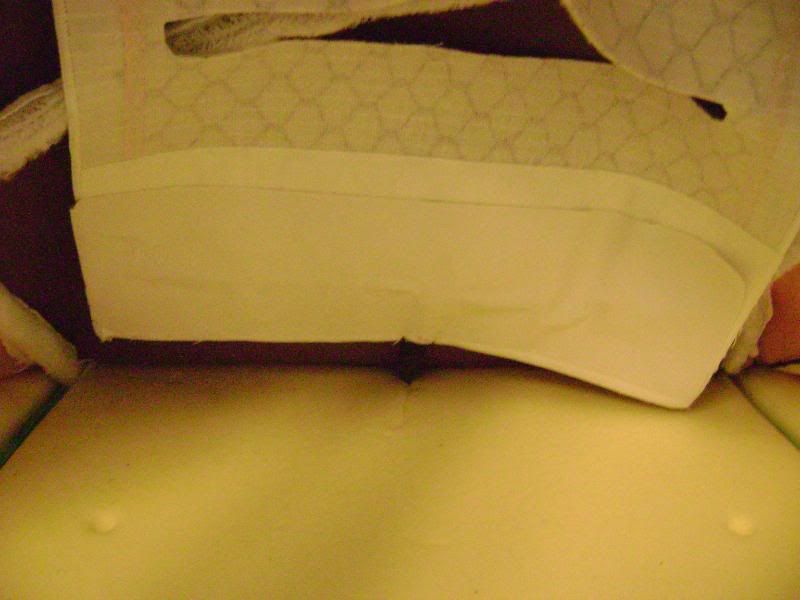
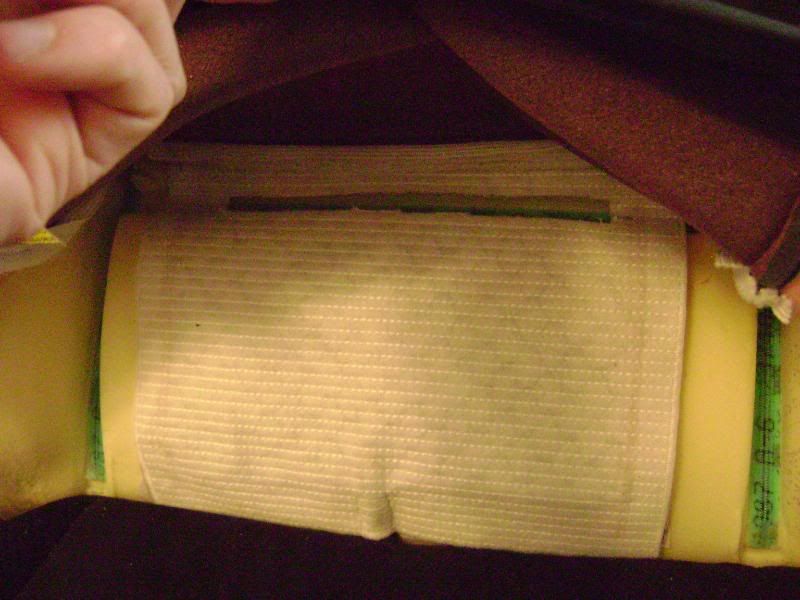
13. Push the heating pad into the seam on the back portion of the seat and mark the center of that seam with a pen or marker, you will be cutting this area to maintain the seat's form.
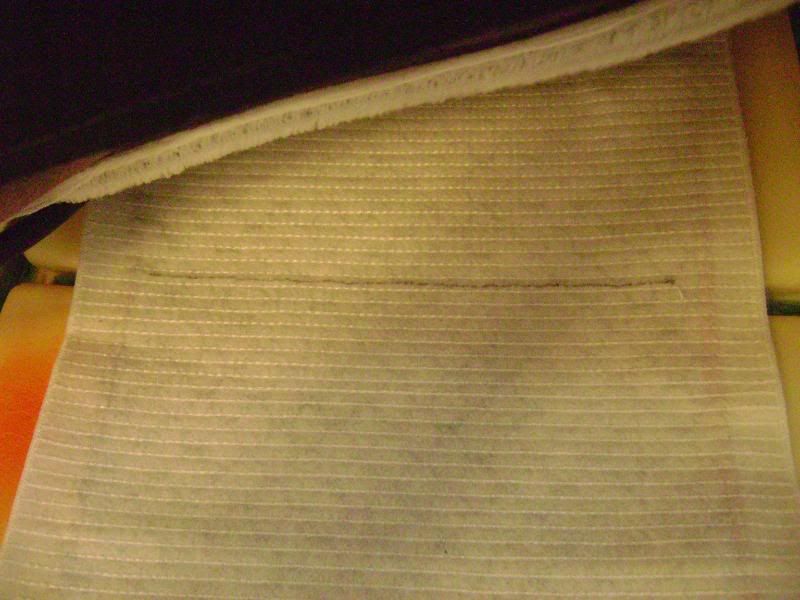
14. Cut the pad where you marked, about 1/2 inch wide or so, and note how I did not cut to that red "line" on mine. That red line is the power wire that you do not want to cut into. Notice how the grid all runs criss cross but always goes back to that power wire. This is the reason you can cut the pad and it will still work, just don't cut into that wire.
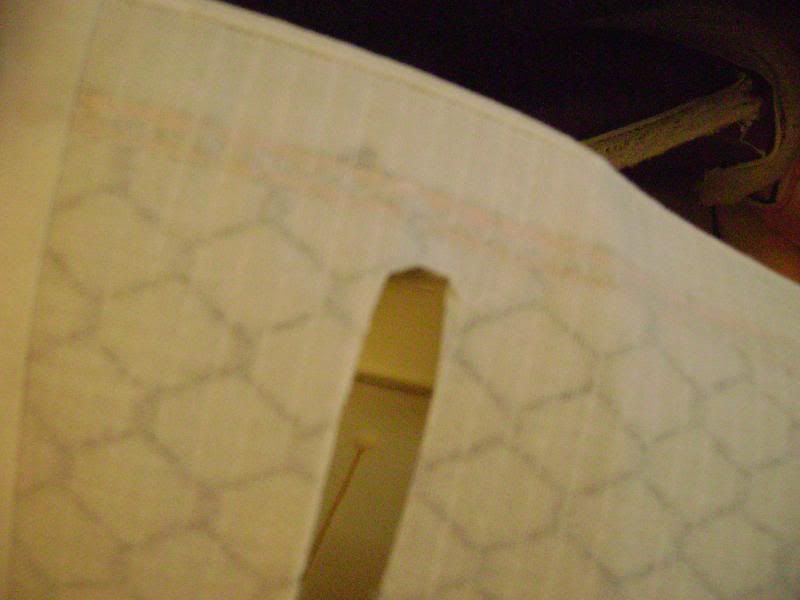
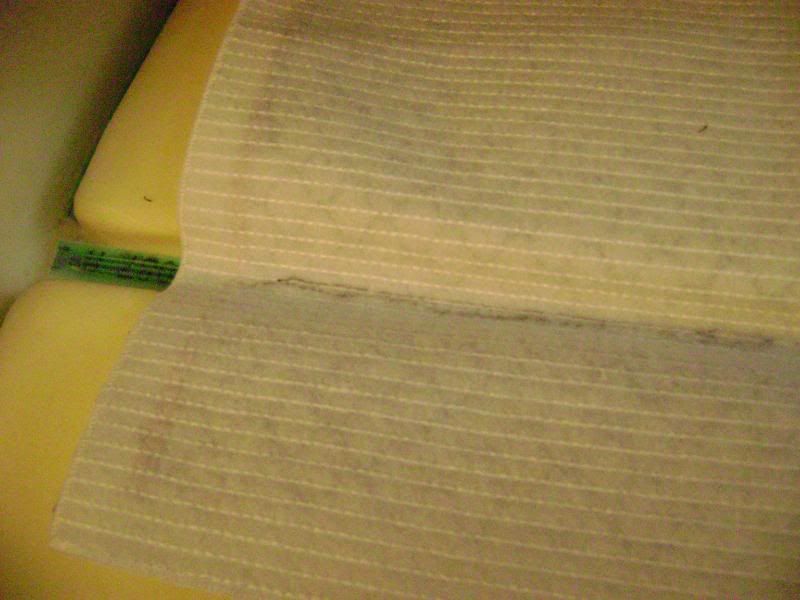
15. Do the same for the front seam. Make sure you have the back of the pad where you want it with the back seam pushed in otherwise when you get it all set up you will see you cut the front one in the wrong spot. Do everything as if it's ready to be put in at the moment, no second chances here.
16. Use sticky stuff of your choice to secure the heating pad to the seat foam. Mine came with some tape stuff so I used that. As long as the pad is not going to move after installation, you'll be good to go.
17. Run the wire of the heated pad to the back of the seat and towards the bottom. Run your hand inside the seat cover while putting it on, making sure the velcro is securely attached to the seat cover, this will maintain the seat's original look. Pull everything tight and reclip the clips on the bottom of the seat and the bottom will be done.
So winter is almost here, and it's damn cold in Canada. A heated seat sounds like the best option, since GM didn't offer it on the SS/TC
This is my first write up, so I hope it goes well...Note that some of the pictures aren't following the steps exactly because I took some before I noticed there was a better way of doing it. The pictures will just give a general idea of that to look for. An example is how I routed the wires through the carpet, yet some pics the wires are not routed as such...I though of this after the fact. Either way it should work for you.
Tools needed:
Electrical Tape
Wire stripper/crimper
10MM socket
15MM socket
#10 or #15 torx bit, dunno which.
Flathead screwdriver
Electrical spade connector
Add-a-circuit (fuse tap)
Scissors
I highly suggest disconnecting all the connectors on the harnesses before throwing stuff together as it makes it much easier to install and wire. When you install the pads you don't worry about wires everywhere (just one from each pad) and then you can wire up all the harness stuff in the car and reconnect everything when it's done...much simpler.
1. Buy a heated seat. I got mine from someone called "autowarm" on Ebay, got it for 80 bucks US, and free shipping. It's the carbon fibre kit with dual pads. Before you buy, measure your seats to make sure what you buy will fit, or will be big enough. Smaller is ok, too wide is BAD. You can not cut the last inch of the pad on each side because that's where the power "wire" is.
2. Test the kit you bought. I hooked mine up under the hood by using electrical tape to hold the positive wire on the positive battery terminal and the negative wire to the ground screw on the strut tower.
3. Unhook the negative battery terminal (in the trunk....duh) with a 10mm socket or wrench. Make sure to wrap the cable with any dirty oily rag of you choice to ensure it doesn't connect itself again. The reason for unhooking the battery is so when you remove the airbag harness connection you won't set off the airbag light.
4. Slide the seat all the way forward. Use a 15mm socket to remove both bolts.
5. Take out the seatbelt from the seatbelt holder on the headrest (if you have the coupe). Tilt the seat forward and lift up. Remove the wire harness from the bottom of the seat. It's removed by simply pushing the top tab and separating the halves.
6. Bring the seat inside or to a good work area. Don't bother trying to do it in the car, it's a pain in the ass.
7. Pull off all the handles (for seat height adjuster, seat recliner and the lumber knob if you have it). Pull these straight off, they require quite a heave but if you pull it straight off nothing should break.
8. There are four torx screws on the plastic sides of the tracks. I don't remember what size the torx screws were...either #10 or #15... Remove all four.
9. Remove the plastic sides. Just rip them off. Do not break them or you will cry. Maybe shimmy them is a better option.
10. Flip the chair up so you're facing the bottom of the bottom seat. There are 4 long plastic hooks/clips that hold the fabric on. Pull on the plastic hooks/clips to remove from their mounting location. Take note how they go on so you're not clueless how to put them back, but it's not that hard really, they only fit one way.
11. Pull up the fabric. Be careful to not rip the foam while doing this. To remove the fabric from the seams, just pull, it's held by velcro...just be careful and patient, I could see ripping the velcro off the foam if you get to crazy...
12. Test fit your heating pad and find a good spot. Don't make it too far forward that the wire rides up your ass every time you sit down, unless you like that kind of thing...
13. Push the heating pad into the seam on the back portion of the seat and mark the center of that seam with a pen or marker, you will be cutting this area to maintain the seat's form.
14. Cut the pad where you marked, about 1/2 inch wide or so, and note how I did not cut to that red "line" on mine. That red line is the power wire that you do not want to cut into. Notice how the grid all runs criss cross but always goes back to that power wire. This is the reason you can cut the pad and it will still work, just don't cut into that wire.
15. Do the same for the front seam. Make sure you have the back of the pad where you want it with the back seam pushed in otherwise when you get it all set up you will see you cut the front one in the wrong spot. Do everything as if it's ready to be put in at the moment, no second chances here.
16. Use sticky stuff of your choice to secure the heating pad to the seat foam. Mine came with some tape stuff so I used that. As long as the pad is not going to move after installation, you'll be good to go.
17. Run the wire of the heated pad to the back of the seat and towards the bottom. Run your hand inside the seat cover while putting it on, making sure the velcro is securely attached to the seat cover, this will maintain the seat's original look. Pull everything tight and reclip the clips on the bottom of the seat and the bottom will be done.
Last edited by Highbeamz; 10-05-2009 at 08:12 AM.
 09-07-2009, 12:53 PM
#2
Senior Member
Thread Starter
Join Date: 01-02-09
Location: Edmonton
Posts: 677
Likes: 0
Received 0 Likes
on
0 Posts
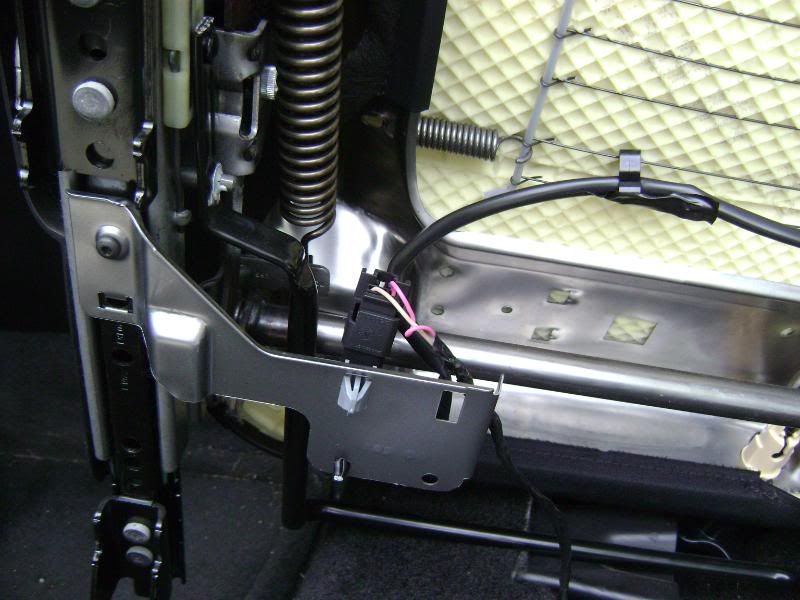
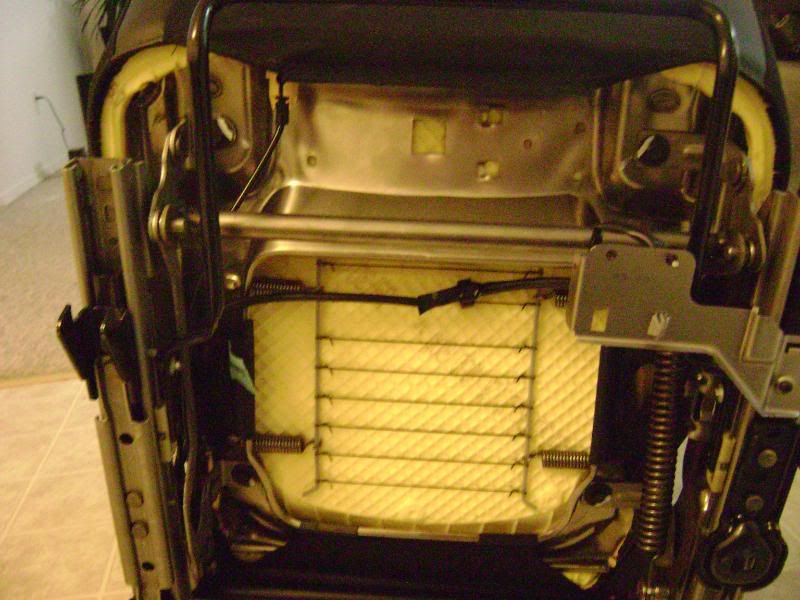
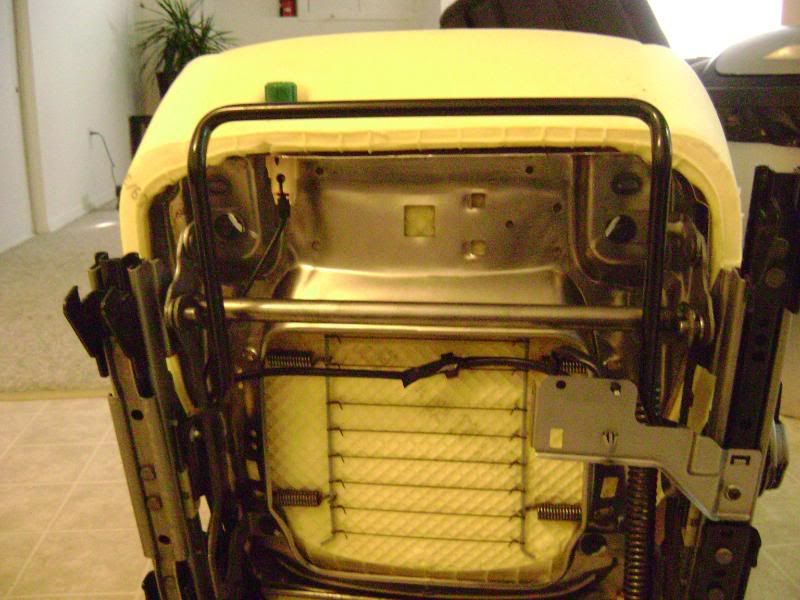
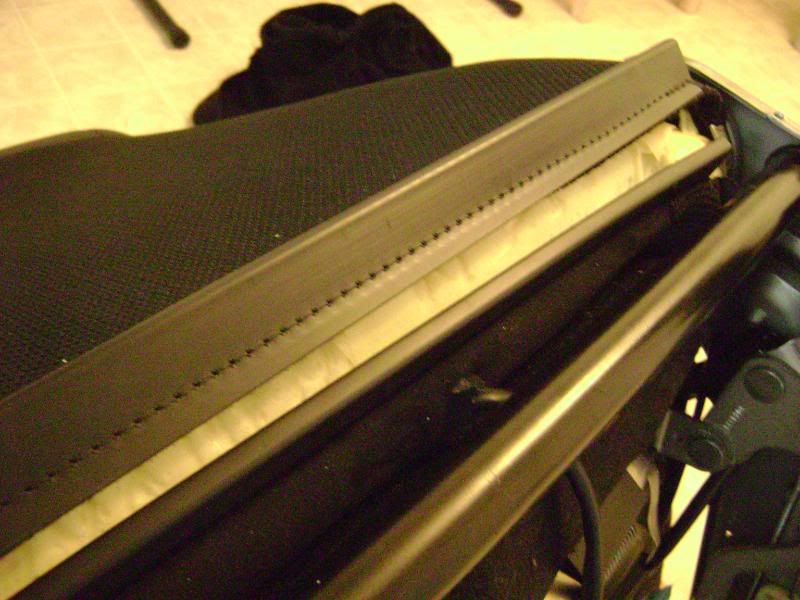
18. Recline the seat back forward. There is a long clip held to another long clip. Undo this (I used a flathead screwdriver to help) and pull them apart. This is what holds the fabric on for the seat back.
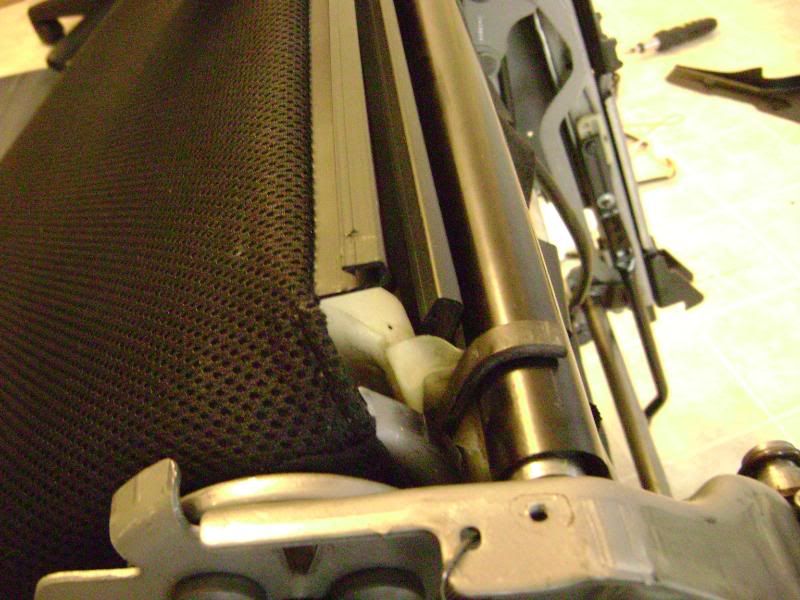
19. Recline the seat back and pull the fabric and clip end through.

20. To easily do the back you can just undo all the velcro on the front side of seat and that will give you just enough room to work without removing the whole back seat cover. I do this because note in the picture in step 18 that the fabric is looped around the recline pivot and I did not want to take that apart.
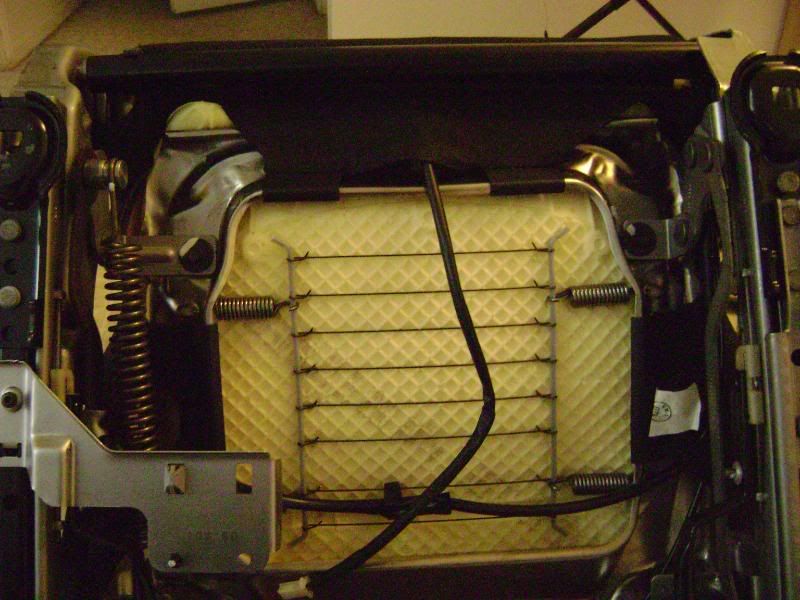
21. Test fit the heating pad on the seat back.
22. Mark the seam as done on the bottom and cut as you did last time making sure to stay away from the edge.
23. Use whatever your sticky stuff was again on the seat back.
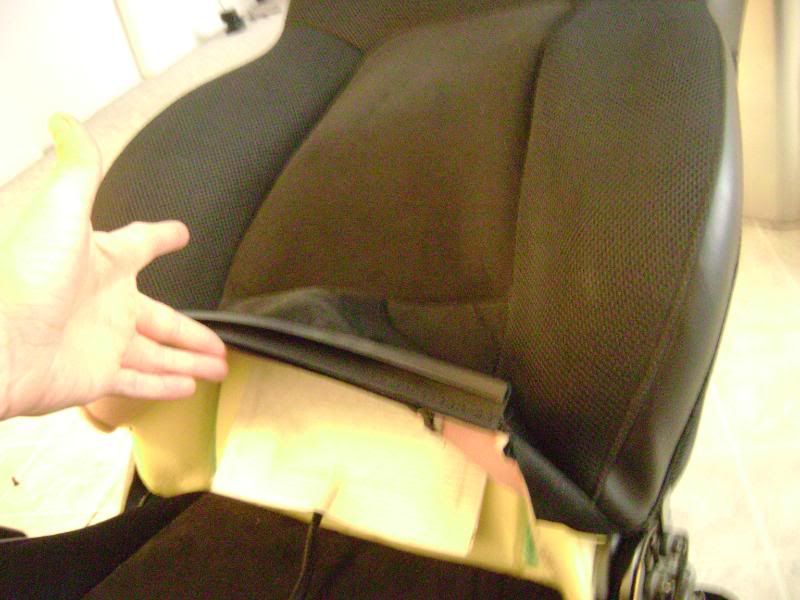
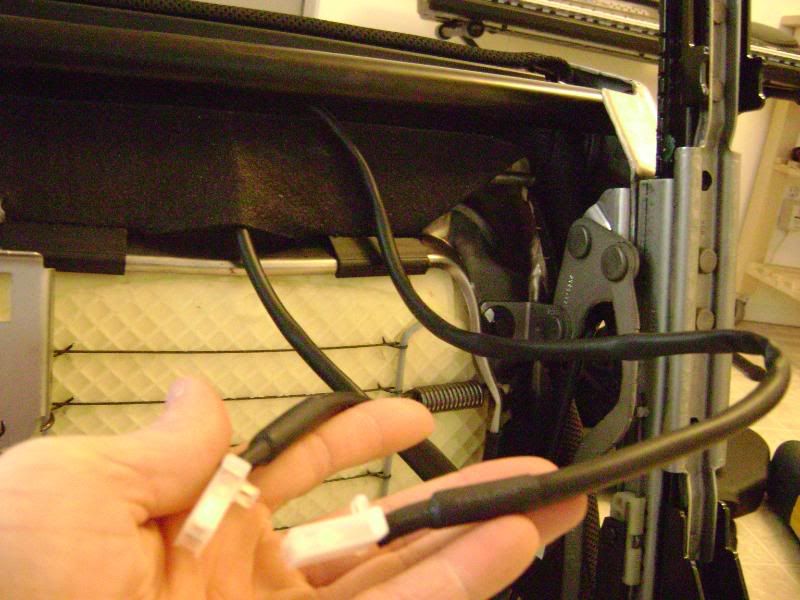
24. Pull the wire throught the space between the seat back and seat bottom and lead to the bottom. I cut a small hole in the fabric for a better fit because of that long clip.
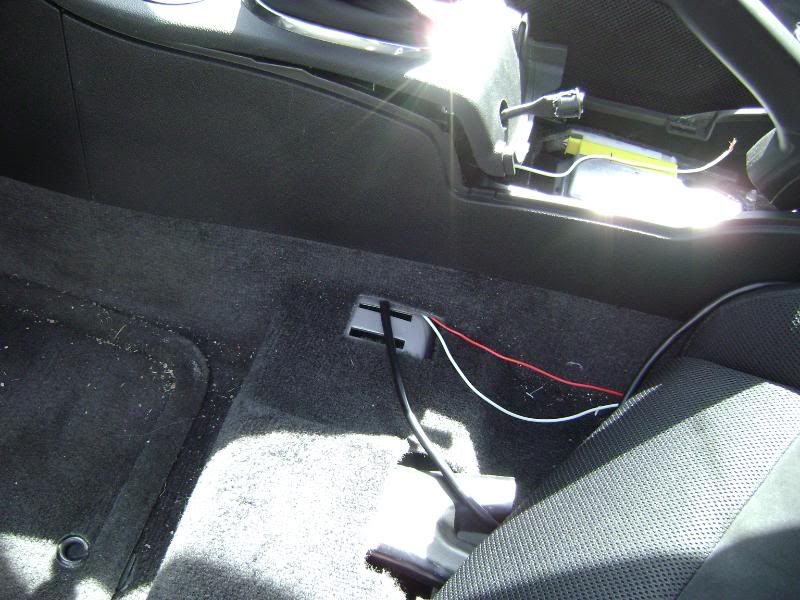
25. Reattach the fabric as you did on the seat bottom, making sure to re-velcro everything all nice to keep the form. Run the clip between the seat back and bottom and clip it to the other piece. It should look like this now:
26. Evaluate the seat fabric and fix anything that does not look right or if the fabric is not fitting well. Re-install all the plastic sides you took off, screw the torx bolts back in and put the handles back on. A good SS seat will look like this when finished...as good as new.
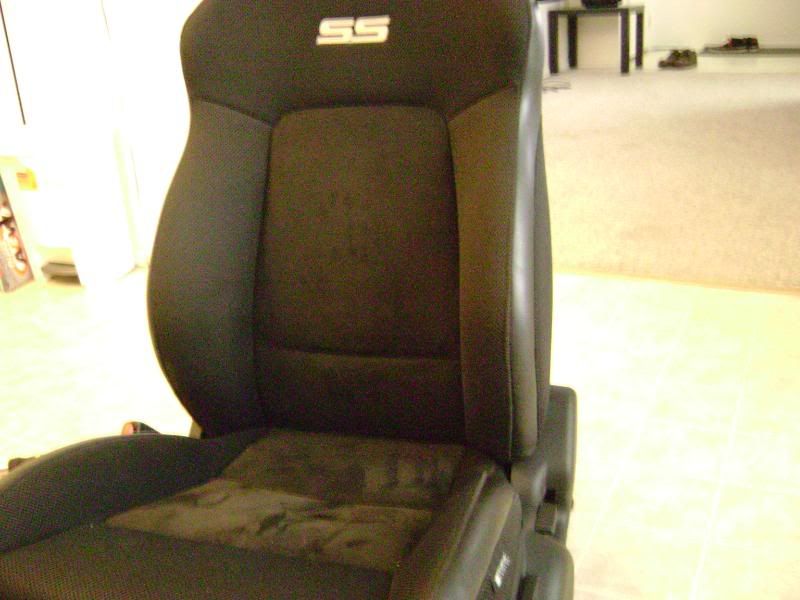
That's everything as far as setting up the seats. The rest is wiring in the interior. FUN!
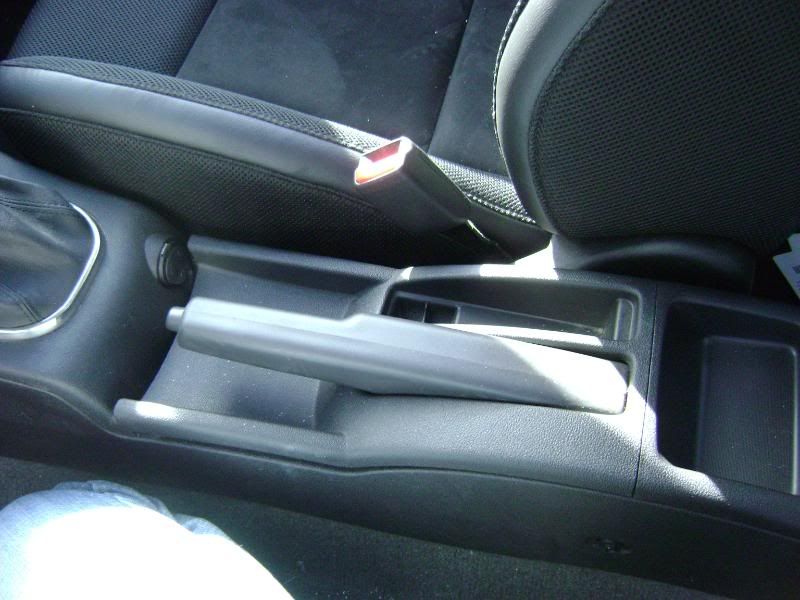
27. Remove the console pieces: Center where the ebrake is and unclip the part where the shifter is. These are all held by simple clips, so just PULL.
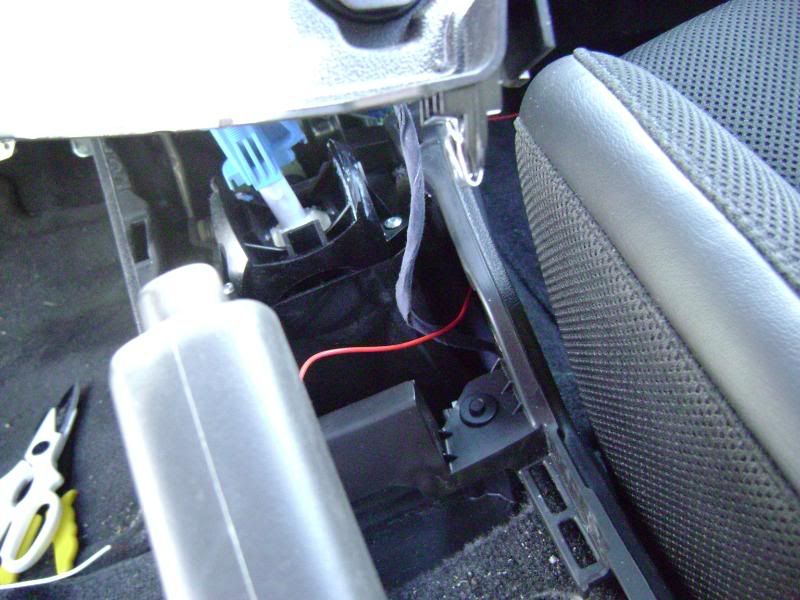
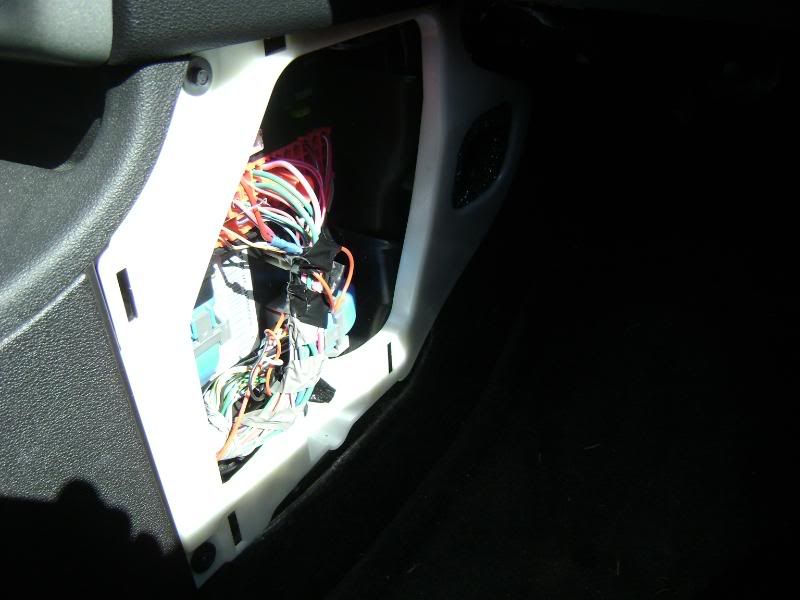
28. Remove the side where the fuses are while you are at it. This is on the passenger side just under the radio. Note I took this picture after I installed the power wire, that's the red wire hanging out...
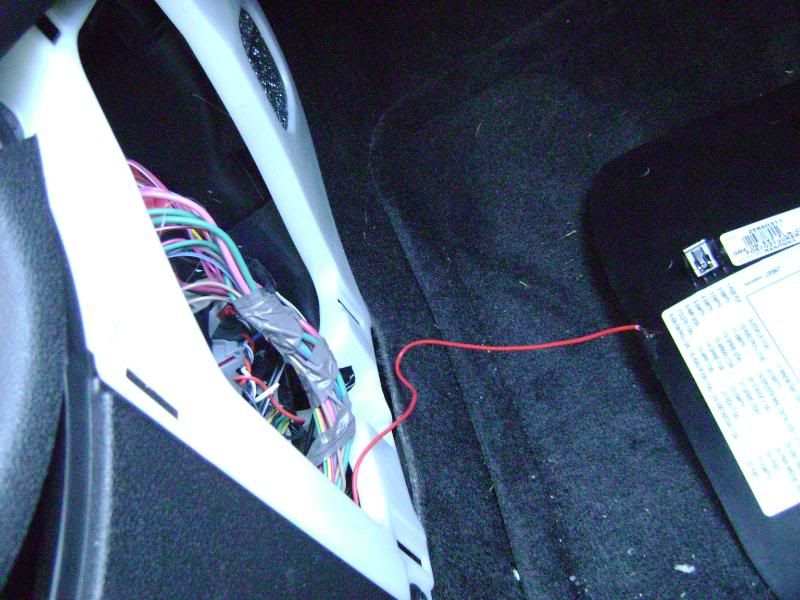
29. I noticed you can run the wires under the carpet where the front of the seat attaches, so run all of them under there and into the console. Run the power wire to the fuse area, the ground wire to the center of the console (near the ebrake). Run the switch wire to wherever you choose to mount the switch.
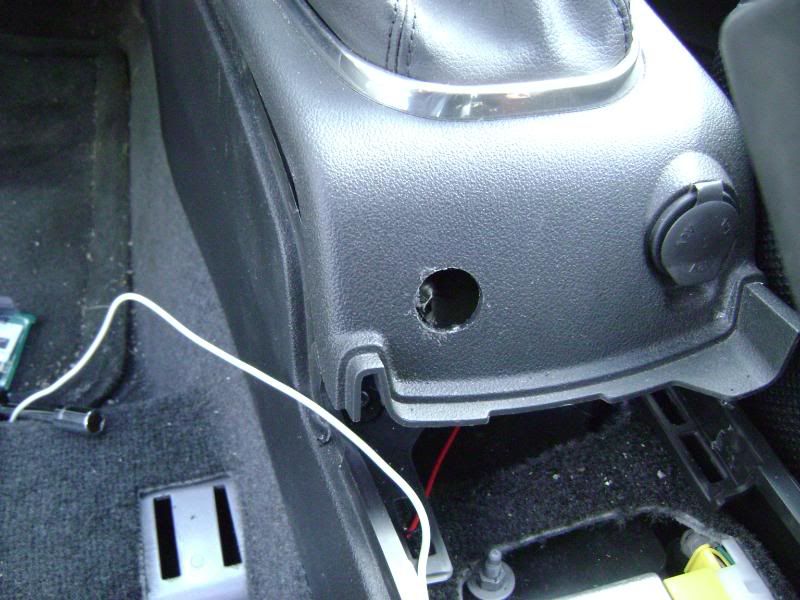
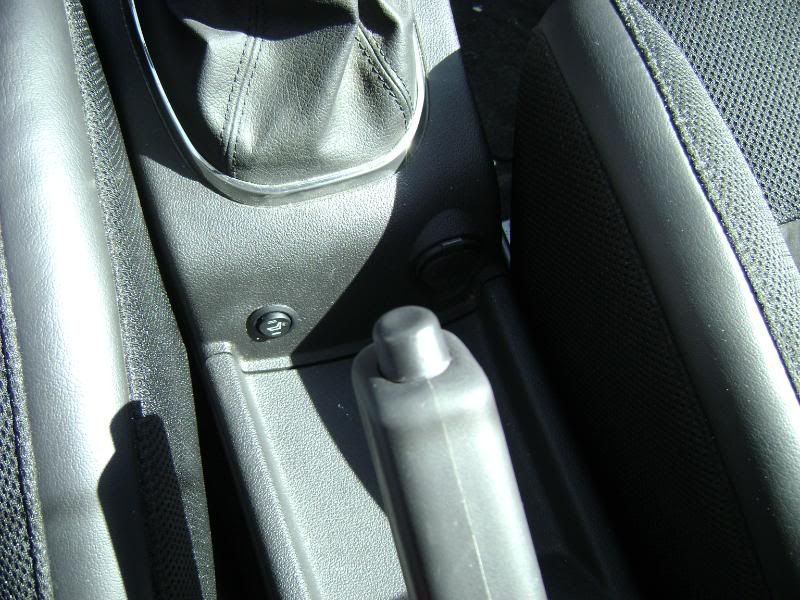
30. Drill a hole for your switch. I chose just across from the accessory power outlet, I think it looks clean. Use whatever you have to drill, a large drill bit, Dremel, whatever. I used a Dremel myself. Make sure the hole is just the right size to fit the switch. Too small and it won't fit all the way, too big and it'll fall through.

31. Ground the ground wire using the existing grounding screw in the center console. It's right beside the e-brake, I used a 18-22 gauge spade to connect it.

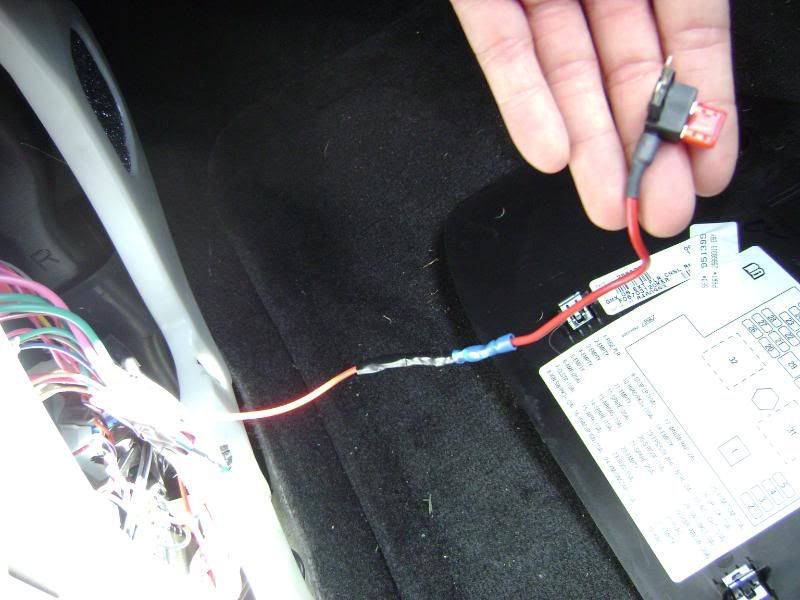
32. Tap in the power wire to your fuse box. I used a "add a circuit" connector to wire it in. It's basically a fuse shaped holder that holds two fuses and has a wire coming out of it. Crimp the power wire to the add a circuit wire and find an empty fuse spot to plug into. I used a 20A circuit which was number 21 (a "Spare" spot) and I used a 7.5A fuse.

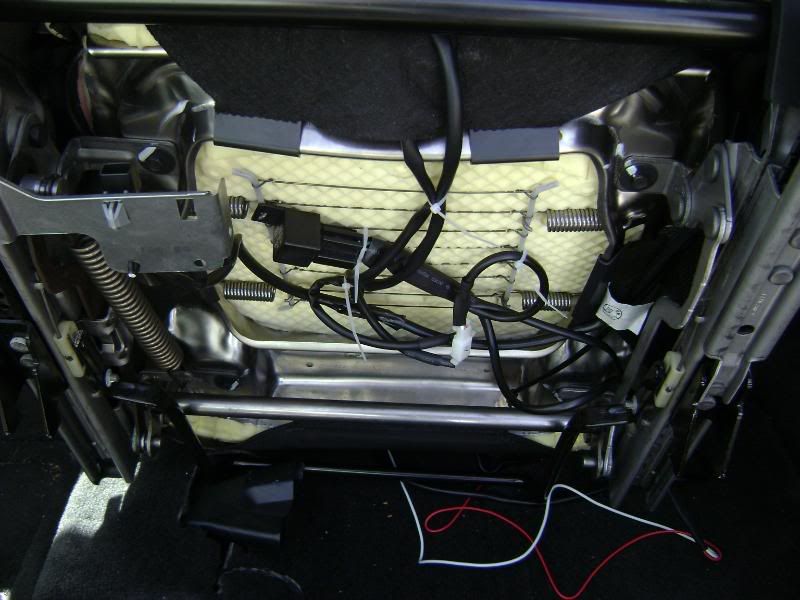
33. Now that everything is prewired, bring the chair back to the car. Reconnect all harnesses to the heater pad harnesses and affix the wires to the bottom of the chair using zip-ties. Make sure that the wires run in a way that will not affect the slider mechanism and make sure to leave enough slack in the wires that they will not be pulled in any position in the chair's movement.
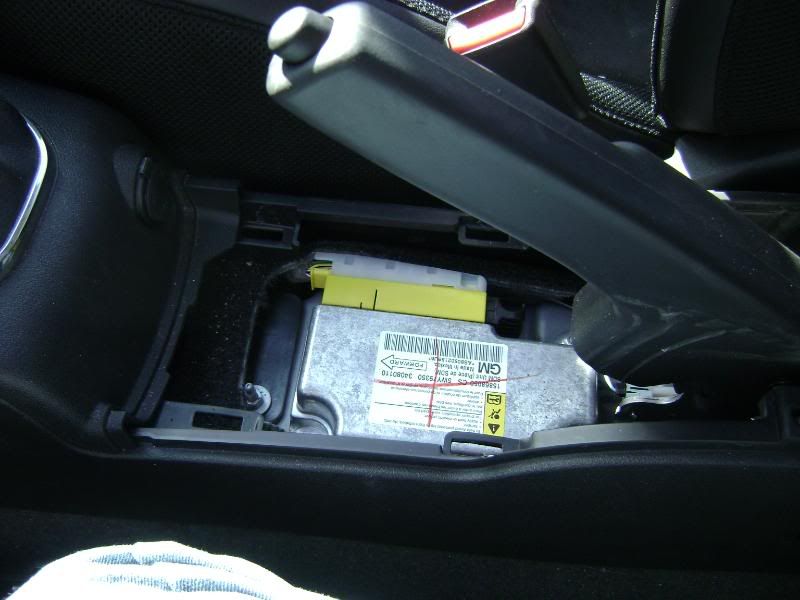
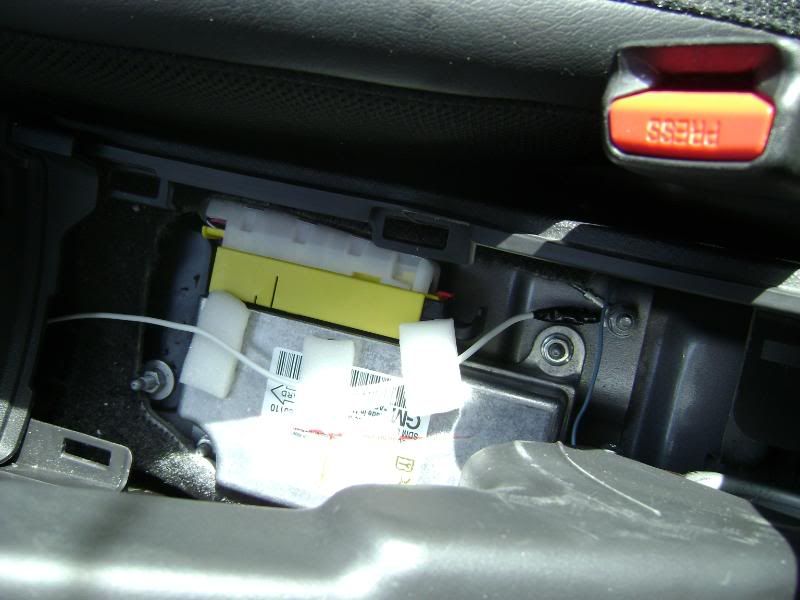
33. Reconnect your airbag harness to the connector on the bottom of the chair.
34. Reconnect the battery and test. If all's well, you should have warm seats and the install should look nice and clean like this:
19. Recline the seat back and pull the fabric and clip end through.
20. To easily do the back you can just undo all the velcro on the front side of seat and that will give you just enough room to work without removing the whole back seat cover. I do this because note in the picture in step 18 that the fabric is looped around the recline pivot and I did not want to take that apart.
21. Test fit the heating pad on the seat back.
22. Mark the seam as done on the bottom and cut as you did last time making sure to stay away from the edge.
23. Use whatever your sticky stuff was again on the seat back.
24. Pull the wire throught the space between the seat back and seat bottom and lead to the bottom. I cut a small hole in the fabric for a better fit because of that long clip.
25. Reattach the fabric as you did on the seat bottom, making sure to re-velcro everything all nice to keep the form. Run the clip between the seat back and bottom and clip it to the other piece. It should look like this now:
26. Evaluate the seat fabric and fix anything that does not look right or if the fabric is not fitting well. Re-install all the plastic sides you took off, screw the torx bolts back in and put the handles back on. A good SS seat will look like this when finished...as good as new.
That's everything as far as setting up the seats. The rest is wiring in the interior. FUN!
27. Remove the console pieces: Center where the ebrake is and unclip the part where the shifter is. These are all held by simple clips, so just PULL.
28. Remove the side where the fuses are while you are at it. This is on the passenger side just under the radio. Note I took this picture after I installed the power wire, that's the red wire hanging out...
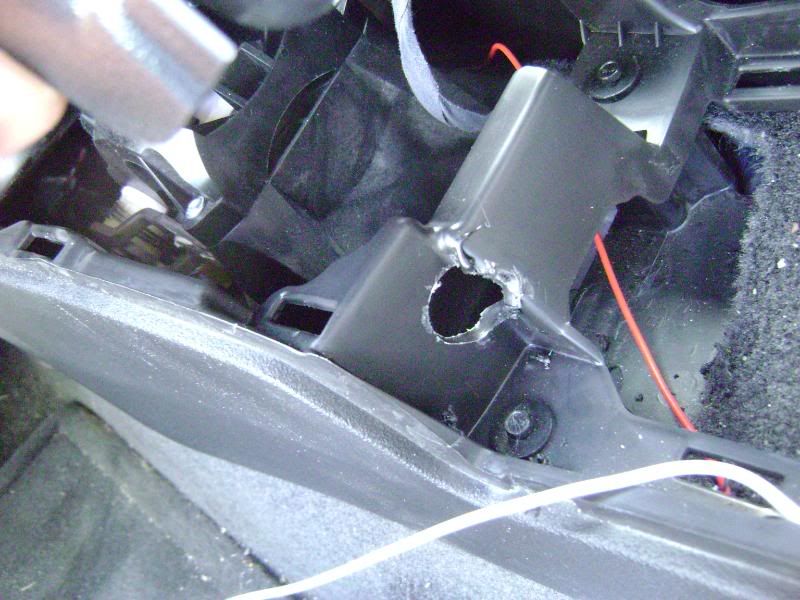
29. I noticed you can run the wires under the carpet where the front of the seat attaches, so run all of them under there and into the console. Run the power wire to the fuse area, the ground wire to the center of the console (near the ebrake). Run the switch wire to wherever you choose to mount the switch.
30. Drill a hole for your switch. I chose just across from the accessory power outlet, I think it looks clean. Use whatever you have to drill, a large drill bit, Dremel, whatever. I used a Dremel myself. Make sure the hole is just the right size to fit the switch. Too small and it won't fit all the way, too big and it'll fall through.
31. Ground the ground wire using the existing grounding screw in the center console. It's right beside the e-brake, I used a 18-22 gauge spade to connect it.
32. Tap in the power wire to your fuse box. I used a "add a circuit" connector to wire it in. It's basically a fuse shaped holder that holds two fuses and has a wire coming out of it. Crimp the power wire to the add a circuit wire and find an empty fuse spot to plug into. I used a 20A circuit which was number 21 (a "Spare" spot) and I used a 7.5A fuse.
33. Now that everything is prewired, bring the chair back to the car. Reconnect all harnesses to the heater pad harnesses and affix the wires to the bottom of the chair using zip-ties. Make sure that the wires run in a way that will not affect the slider mechanism and make sure to leave enough slack in the wires that they will not be pulled in any position in the chair's movement.
33. Reconnect your airbag harness to the connector on the bottom of the chair.
34. Reconnect the battery and test. If all's well, you should have warm seats and the install should look nice and clean like this:
Last edited by Highbeamz; 10-01-2009 at 08:28 PM.

 09-07-2009, 04:32 PM
#5
Senior Member
Thread Starter
Join Date: 01-02-09
Location: Edmonton
Posts: 677
Likes: 0
Received 0 Likes
on
0 Posts
It's really not very difficult either. I think I spent somewhere around 3 hours doing it, with little to no clue about how to do it. I bought hog rings and hog ring pliers before I started, only to realize they didn't use any! lol.
09-07-2009, 04:57 PM
#6
Senior Member
iTrader: (2)

Join Date: 06-23-09
Location: Chesterfield Missouri
Posts: 3,820
Likes: 0
Received 0 Likes
on
0 Posts
Good writeup. Though I would of used the switches from a stock Sport for a more stock appearance. I think almost all of the 2008 Sports came with heated seats for both sides. So the switches should be pretty easy to find from someone on here thats wrecked a car or parting one.
 09-07-2009, 06:23 PM
#8
Senior Member
Thread Starter
Join Date: 01-02-09
Location: Edmonton
Posts: 677
Likes: 0
Received 0 Likes
on
0 Posts
Good writeup. Though I would of used the switches from a stock Sport for a more stock appearance. I think almost all of the 2008 Sports came with heated seats for both sides. So the switches should be pretty easy to find from someone on here thats wrecked a car or parting one.
That would be the UAW for ya...lol.
 09-07-2009, 07:54 PM
#11
Senior Member
Thread Starter
Join Date: 01-02-09
Location: Edmonton
Posts: 677
Likes: 0
Received 0 Likes
on
0 Posts
Just for the one seat, about 3 hours. But that includes time to get a couple extra parts I forgot, finding tools, etc. If I were to do it again, I think 1-1.5 hours would be good. I was being very careful though, I've broken so many tabs on this car taking **** apart


 09-07-2009, 09:53 PM
#15
Senior Member
iTrader: (3)

Join Date: 12-02-07
Location: Edmonton
Posts: 8,977
Likes: 0
Received 0 Likes
on
0 Posts
This isn't necessary for cloth seats IMO as they don't really get that cold, but it looks like a clean install. I'm pretty sure the plug underneath the driver's seat is for the seatbelt, not airbag (passenger side has that).
09-07-2009, 10:22 PM
#16
Senior Member
Thread Starter
Join Date: 01-02-09
Location: Edmonton
Posts: 677
Likes: 0
Received 0 Likes
on
0 Posts
And no, you don't need a heater for cloth, but I had heated seats in my Grand Prix, and like a sunroof, I just can't go without anymore. It's a really nice thing to have.
I can't remember exactly how wide the SS/TC seat is, but I think the back part is somewhere around 12" wide by 20" long or so, and the bottom is about 12-14" wide and the length of the suede part is about 18" long or so, maybe a tad shorter. The kit I got was 11" x 18" I believe...
09-08-2009, 04:58 AM
#17
Senior Member
iTrader: (2)
Join Date: 06-23-09
Location: Chesterfield Missouri
Posts: 3,820
Likes: 0
Received 0 Likes
on
0 Posts
I thought of this, but I did not know if they were the push on/push off type (meaning it resets when you turn off the car). I assumed it was, which was why I used the rocker switch rather than the factory setup, plus I didn't have to rewire any of it then :P
That would be the UAW for ya...lol.
That would be the UAW for ya...lol.
09-11-2009, 08:47 PM
#20
Senior Member
iTrader: (1)
Join Date: 06-04-08
Location: New York
Posts: 1,060
Likes: 0
Received 0 Likes
on
0 Posts
huh, i have alot of people telling me that i can put the heating pads on the sensors if they are on top of the foam or you can set off the the sensors or the airbags
09-12-2009, 01:38 AM
#22
Senior Member

Join Date: 12-06-06
Location: Saskatoon, SK
Posts: 1,291
Likes: 0
Received 0 Likes
on
0 Posts
DO NOT use a 10 Amp fuse! I blew up the controllers for mine (I have the same kit as you), find 7.5 amp fuses! IF you blow the controllers, you will get a run around from this company to get new ones.
As for the heater on the passenger, they work fine on my car.
As for the heater on the passenger, they work fine on my car.
12-30-2010, 01:04 PM
#24
Member

Join Date: 06-16-05
Location: Newfoundland
Posts: 318
Likes: 0
Received 0 Likes
on
0 Posts
Link to the How To Thread for this:
https://www.cobaltss.net/forums/how-...-seats-187724/
and just for others who are looking for the stock heated seat part numbers, I found some here:
https://www.cobaltss.net/forums/gene...ml#post2880563
https://www.cobaltss.net/forums/how-...-seats-187724/
and just for others who are looking for the stock heated seat part numbers, I found some here:
https://www.cobaltss.net/forums/gene...ml#post2880563

Thread
Thread Starter
Forum
Replies
Last Post