
Subwoofer box Disected - make your stock steath box boom.


 06-23-2013, 05:33 PM
#77
I had a dash rattle, an a-pillar rattle by my gauges and a rattle in my glove compartment. I took them all apart and padded them with 1 inch wide door sealant tape in the areas that were vibrating against each other. Got rid of a lot of little things and that didnt even require dynomat. The steel body panels would need something heavier if they are rattling, that is when I would utilize a better product in the doors or in the trunk area.
06-23-2013, 11:00 PM
#79
New Member
iTrader: (2)

Join Date: 04-19-13
Location: IN
Posts: 64
Likes: 0
Received 0 Likes
on
0 Posts
Get my setup installed, I'll upload some pictures of the workings. OP you will be interested in my amp location & Mounting. Anyway, nice idea on the extended enclosure.
Anyone have any ideas to prevent the box from moving? I have tightened down the enclosure mounting screws way harder than needed, and my sub still makes the enclosure vibrate to all hell. Maybe I need some interior bracing and bracing between the car and enclosure, because It vibrates on more than just the surface the sub is mounted on, the whole damn enclosure moves close to a quarter of an inch. This sub is too brutal for the stock plastic
Anyone have any ideas to prevent the box from moving? I have tightened down the enclosure mounting screws way harder than needed, and my sub still makes the enclosure vibrate to all hell. Maybe I need some interior bracing and bracing between the car and enclosure, because It vibrates on more than just the surface the sub is mounted on, the whole damn enclosure moves close to a quarter of an inch. This sub is too brutal for the stock plastic
06-23-2013, 11:12 PM
#80
Yeah I have plans to reinforce it with MDF and bracing internally from front to back. Side to side the box is very thick and held together with screws. Its the front and rear panels that need bracing.
What sub did you run? Please post up pics. Thanks for the advice on the box movement. Now that I think about it my rear bump plates extending into the back of the box will help alleviate a lot of flex in the stock location with the stock 4 bolts. Did you use the stock bolt locations? They are plenty sturdy I feel.
What sub did you run? Please post up pics. Thanks for the advice on the box movement. Now that I think about it my rear bump plates extending into the back of the box will help alleviate a lot of flex in the stock location with the stock 4 bolts. Did you use the stock bolt locations? They are plenty sturdy I feel.
06-23-2013, 11:44 PM
#81
New Member
iTrader: (2)
Join Date: 04-19-13
Location: IN
Posts: 64
Likes: 0
Received 0 Likes
on
0 Posts
Yeah I have plans to reinforce it with MDF and bracing internally from front to back. Side to side the box is very thick and held together with screws. Its the front and rear panels that need bracing.
What sub did you run? Please post up pics. Thanks for the advice on the box movement. Now that I think about it my rear bump plates extending into the back of the box will help alleviate a lot of flex in the stock location with the stock 4 bolts. Did you use the stock bolt locations? They are plenty sturdy I feel.
What sub did you run? Please post up pics. Thanks for the advice on the box movement. Now that I think about it my rear bump plates extending into the back of the box will help alleviate a lot of flex in the stock location with the stock 4 bolts. Did you use the stock bolt locations? They are plenty sturdy I feel.
I'm running the Skar VVX-10, mated to an audiopipe 1500d at 2 ohms, on the stock deck.
Hopefully you won't run into the same problem!
06-24-2013, 10:21 PM
#83
New Member
iTrader: (2)
Join Date: 04-19-13
Location: IN
Posts: 64
Likes: 0
Received 0 Likes
on
0 Posts
Ask and Yee shall receive.
I chose to mount the amp here and have yet to relocate the trunk popper. You could always move it further back into the trunk, as mine unfortunately covers the trunk light..
I have yet to clean up the wires entering the amp, so don't judge me there!


Fabbed up some L-Brakets to the amp via the long black nuts, and a larger diameter bolt to the trunk lid. VERY sturdy, doesn't move the slightest surprisingly. The only way the amp moves is if the trunk lid bends, have yet to figure out how to strengthen that.
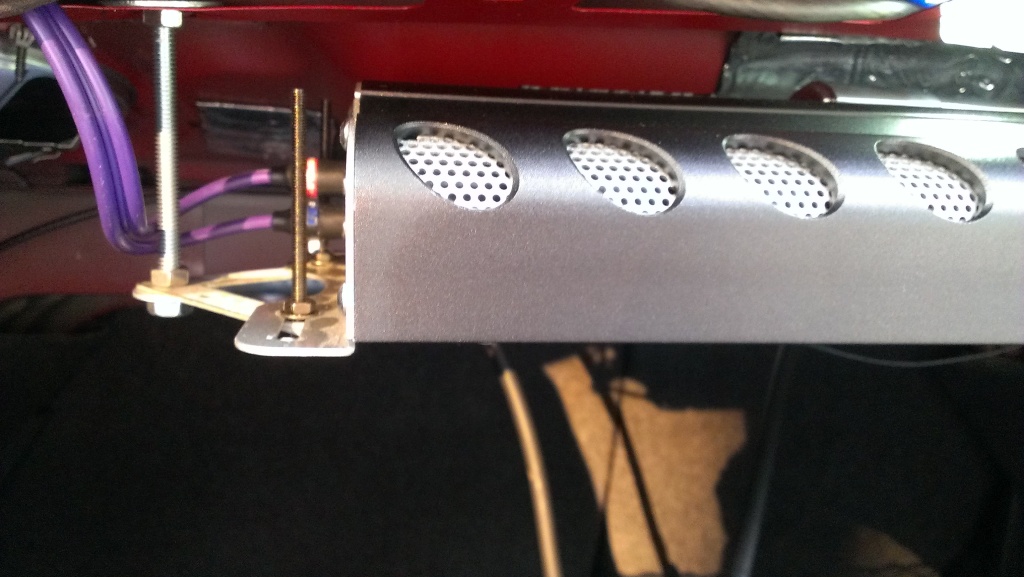

I don't have the Distribution block shown currently, but here is the 0 gauge, which runs to a distro block reducing to multiple 4 gauge leads, which run into the amp, and I have extras in case I would like to add something in the future.

 06-25-2013, 02:22 AM
#86
New Member
iTrader: (2)
Join Date: 04-19-13
Location: IN
Posts: 64
Likes: 0
Received 0 Likes
on
0 Posts
OP, lets see this sub choice!
06-25-2013, 10:58 PM
#89
Member

Join Date: 04-09-12
Location: New Jersey
Posts: 318
Likes: 0
Received 0 Likes
on
0 Posts
Decided on going this route with my system. Currently trying to locally sell my 12s sealed because I just feel trunk space is more important. Can't decide on either going with a comp rt or doing all the work to get a kicker cwr to fit. I like the idea of cutting the back of the box out... never would of thought of that. Already upgraded my battery with a big xs power 3100 in the factory location (; working on getting a kicker 5-channel. What do you guys recommend? Comp rts and have it wired up in a heart beat, or take the extra time to make baffles to fit a comp cwr (new cvr)? PS - I hate the idea of a big sub inverted, kinda ruins the point of saving space. no offence. Looks clean though!
06-26-2013, 12:52 AM
#93

mhend5 - Nice, I like that amp location. Post some pics when you got all the wiring and stuff cleaned up. Might suggest some rubber washers and lock nuts. Cut the threads to size to make it look cleaner.
c130aviator - So how deep is the sub your getting? 5.5" 6"? I'd hate for you to go through all this and leave no room for the air vent to flow making the sub heat up very fast. Might wanna make that back hole big as you can so it doesn't cup the sub magnet/motors heat.
c130aviator - So how deep is the sub your getting? 5.5" 6"? I'd hate for you to go through all this and leave no room for the air vent to flow making the sub heat up very fast. Might wanna make that back hole big as you can so it doesn't cup the sub magnet/motors heat.
06-26-2013, 12:32 PM
#96
New Member
iTrader: (2)
Join Date: 04-19-13
Location: IN
Posts: 64
Likes: 0
Received 0 Likes
on
0 Posts
06-26-2013, 08:14 PM
#97
New Member
iTrader: (4)

Join Date: 05-19-12
Location: Arkansas
Posts: 131
Likes: 0
Received 0 Likes
on
0 Posts
this is an awesome thread im glad i finally found it. i had been looking for a few days now for a how to on our factory sub box but the only one i had found was the one for the upgraded shallow mount. im currently modding my own factory box so it will have a mount depth of 6 1/2 to 7 1/2 inch to accommodate a much deeper and beefier sub so far about 1/2 way done and hopefully be done sometime Friday night have taken alot of pictures and have all the measurements and materials needed thinking about doing my first HOW TO THREAD. i have the sub amp and everything weird just waiting to finish up on Friday.
cant wait to see the final product on your box will differently keep an eye on it and same for the others on here that are currently doing there own thing
cant wait to see the final product on your box will differently keep an eye on it and same for the others on here that are currently doing there own thing


