
05 Cobalt LS "extreme" makeover(56k=death) not for the faint of heart
 11-13-2006, 02:54 PM
#26
Member
Thread Starter

Join Date: 10-25-06
Location: British-Columbia
Posts: 204
Likes: 0
Received 0 Likes
on
0 Posts
Heres a quick update i went in today to clean the mess i did. heres a couple pictures.
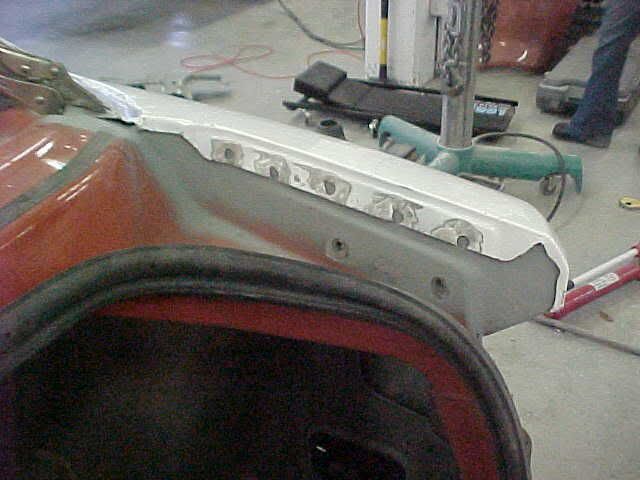
That is the remaining damage, nothing a little metal work wont fix. Shouldnt take more than half hour or so to put it back into place its just a flimsy peice of metal.
Look at all that ugly sealer! Theres gobs and gobs of it all over the interior seams. Thats one area GM doesnt seem to care much about. It almost makes me want to cut it all out and redo it. I've never seen such a disgusting sealing job in my life!
Heres another pic.
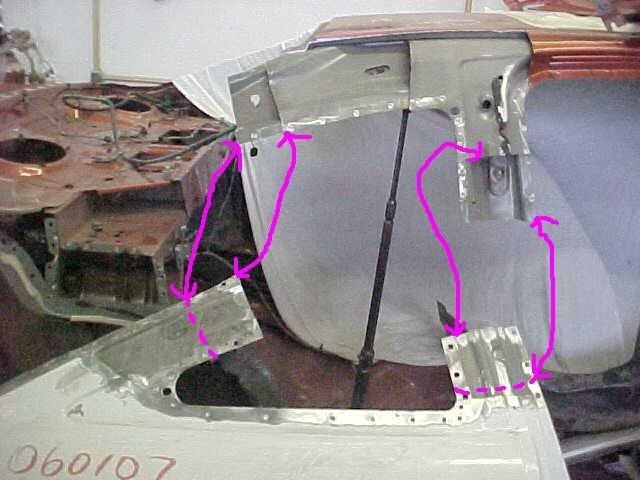
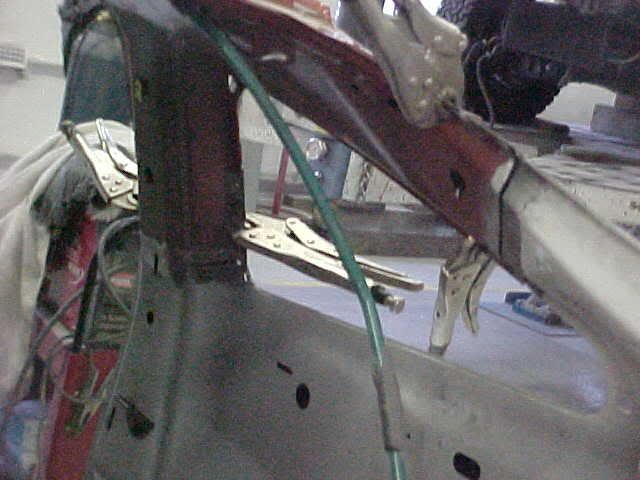
The quarter near the car, as you can see its starting to come togheter.
Heres a closer look at the sectioning.
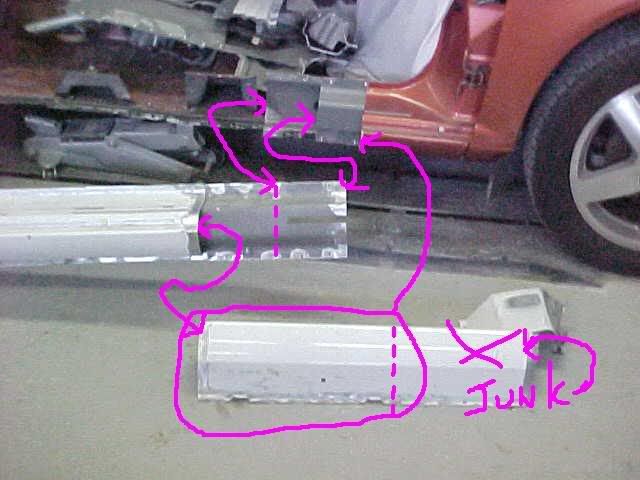
Just need to make those reinforment strips and weld them in and after straightening the flanges and cleaning the sealer on the car i'll be ready to put it on. Then the long part, the test fitting, welding/grinding. >< I wouldnt be supprized to take up one day for fitting and maybe a day and a half to weld it/grind it.
There you be. ;-)
I'll also post updates on the filler work and what not afterwards, how it should be done ect. Priming painting etc. Should be fun!
That is the remaining damage, nothing a little metal work wont fix. Shouldnt take more than half hour or so to put it back into place its just a flimsy peice of metal.
Look at all that ugly sealer! Theres gobs and gobs of it all over the interior seams. Thats one area GM doesnt seem to care much about. It almost makes me want to cut it all out and redo it. I've never seen such a disgusting sealing job in my life!
Heres another pic.
The quarter near the car, as you can see its starting to come togheter.
Heres a closer look at the sectioning.
Just need to make those reinforment strips and weld them in and after straightening the flanges and cleaning the sealer on the car i'll be ready to put it on. Then the long part, the test fitting, welding/grinding. >< I wouldnt be supprized to take up one day for fitting and maybe a day and a half to weld it/grind it.
There you be. ;-)
I'll also post updates on the filler work and what not afterwards, how it should be done ect. Priming painting etc. Should be fun!

 11-13-2006, 08:31 PM
#28
Member
Thread Starter
Join Date: 10-25-06
Location: British-Columbia
Posts: 204
Likes: 0
Received 0 Likes
on
0 Posts
Originally Posted by HunterKiller89
haha..you have a new subscriber to this thread...and the diagram helps a bit too....all those pink arrows do wonders
11-13-2006, 08:49 PM
#29
Banned

Join Date: 05-16-06
Location: STEELER COUNTRY
Posts: 911
Likes: 0
Received 0 Likes
on
0 Posts
Originally Posted by Grimsaviour
This is my brand "new" 05 cobalt LS:
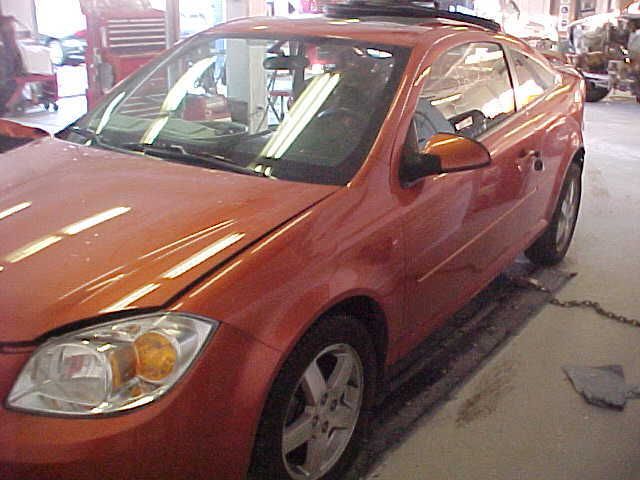
There's just one problem:
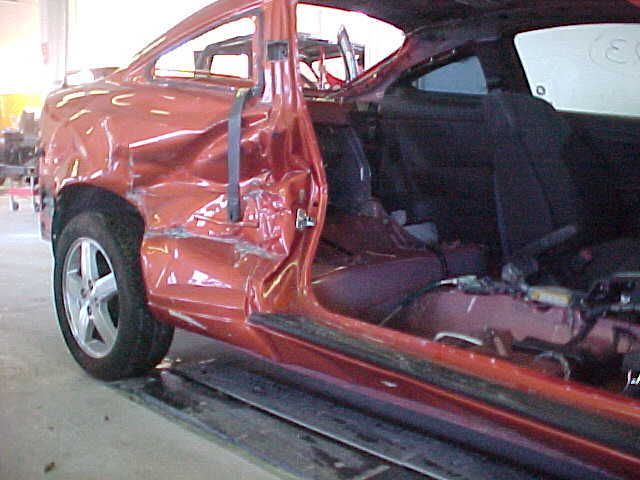
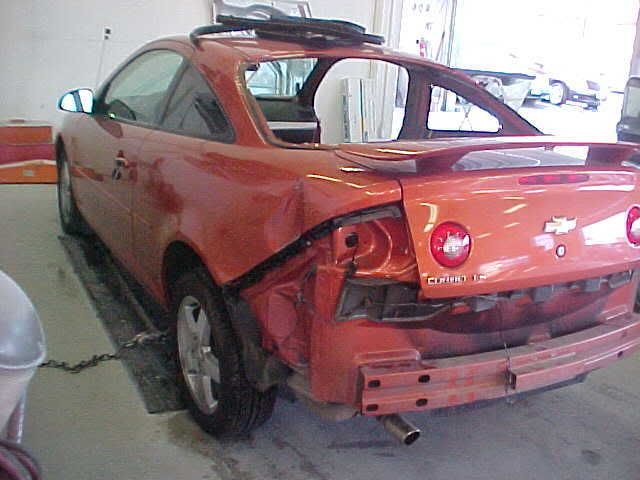
WHOOPS! Yea so heres the story, some of you might know from my few posts that i'm an automotive repair Technician. ;-) So i bought this baby from ICBC salvage and am planning to fix it up with these!
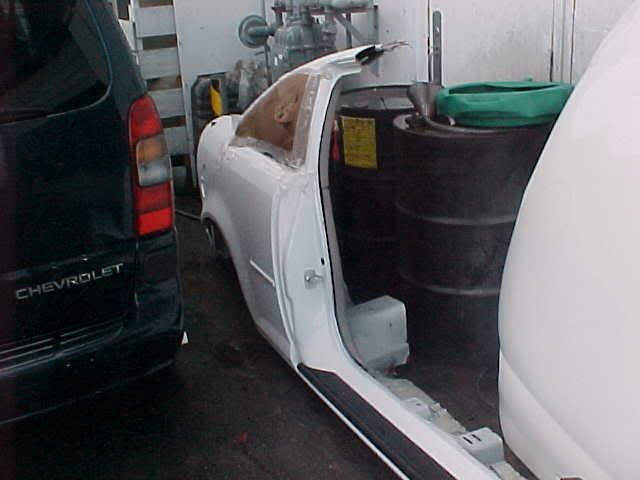
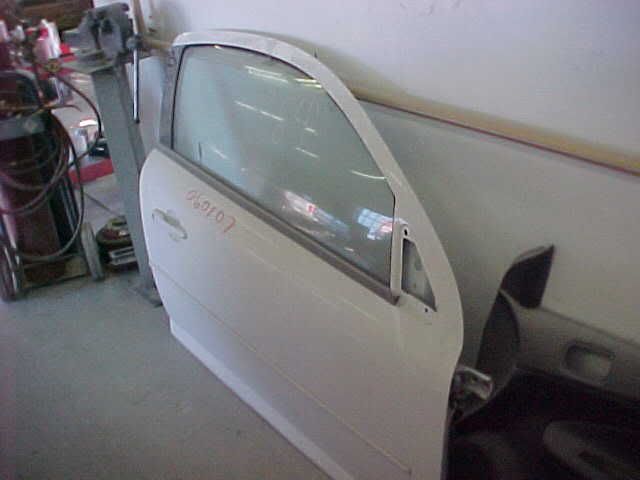
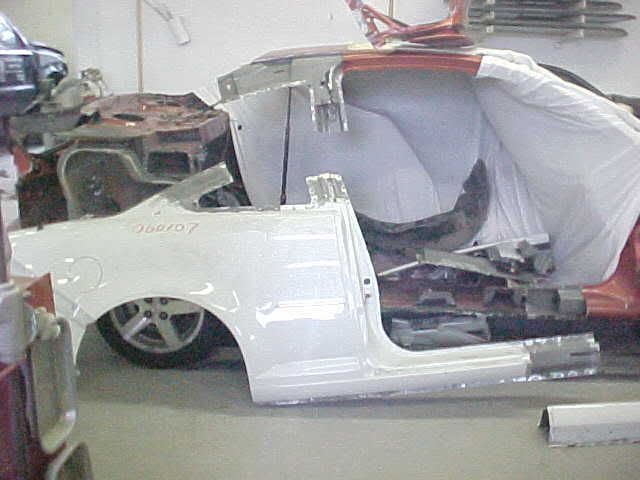
Nice premium used parts from another wrecked cobalt. Heres the rest of the car:
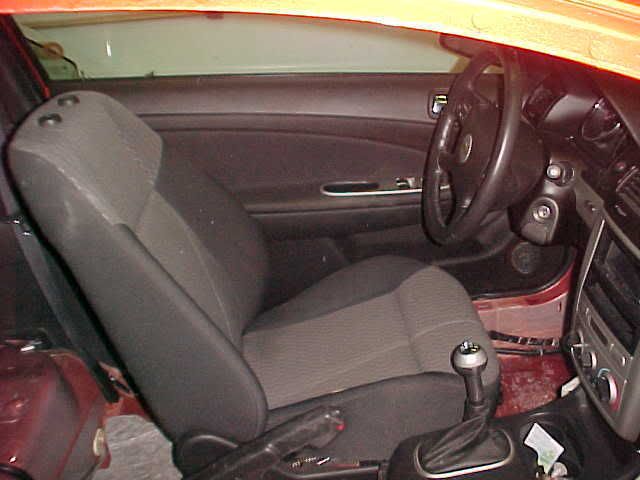
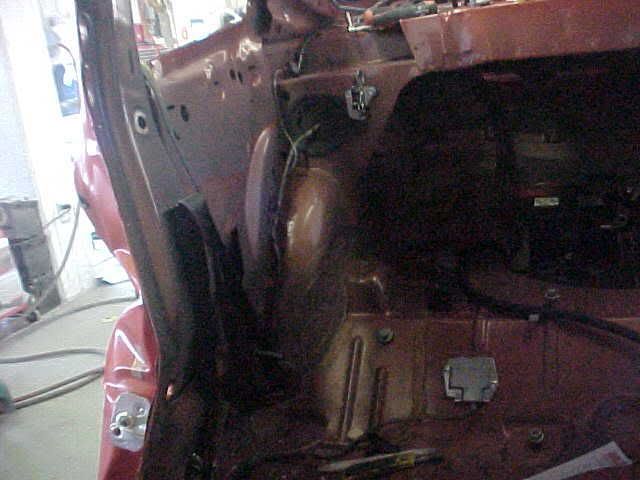
As you can see ive gutted most of the interior so i can see and replace all the damage and not burn anything welding/grinding etc.
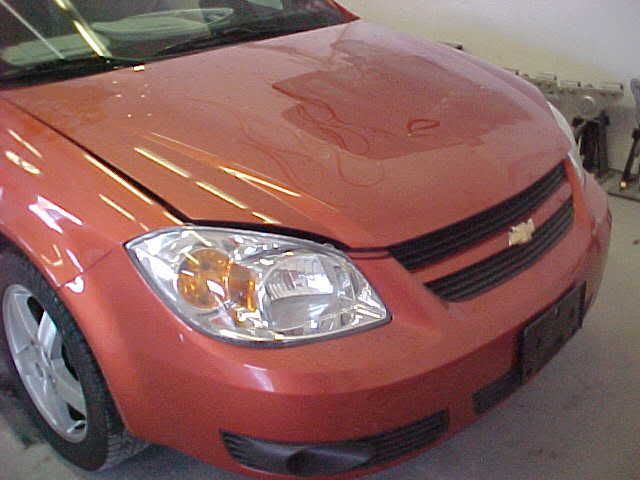
This is the left side little damage on the quarter panel no biggie.
Flame job maybe?
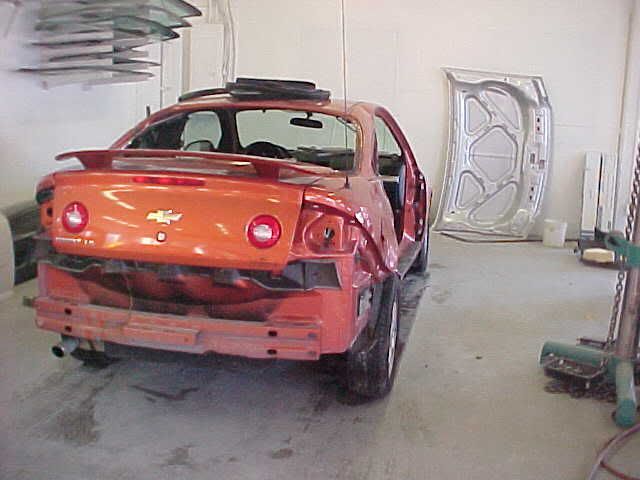

The wrecked door has already been thrown out. So yea a little cutting/grinding/sealing/rustproofing/painting and she'll be good as new. After its passed all the inspections. ;-) Started trimming the used part today and gutted the car yestruday, i love cars. ;-) Anyways i'll post updates on it and maybe for the fun of it make an "how to"
althought this isnt your average how to. lol
There's just one problem:
WHOOPS! Yea so heres the story, some of you might know from my few posts that i'm an automotive repair Technician. ;-) So i bought this baby from ICBC salvage and am planning to fix it up with these!
Nice premium used parts from another wrecked cobalt. Heres the rest of the car:
As you can see ive gutted most of the interior so i can see and replace all the damage and not burn anything welding/grinding etc.
This is the left side little damage on the quarter panel no biggie.
Flame job maybe?
The wrecked door has already been thrown out. So yea a little cutting/grinding/sealing/rustproofing/painting and she'll be good as new. After its passed all the inspections. ;-) Started trimming the used part today and gutted the car yestruday, i love cars. ;-) Anyways i'll post updates on it and maybe for the fun of it make an "how to"
althought this isnt your average how to. lol
11-13-2006, 09:16 PM
#30
Senior Member
Join Date: 03-30-06
Location: Exit 29, NY
Posts: 3,014
Likes: 0
Received 0 Likes
on
0 Posts
This is like the coolest thing I have ever seen. I couldnt imagine the amount of time to do that work... bondo takes enough work. U can add another subscriber. What happened to the car in the first place? I hope u put the doner vehical out of its misery.... poor thing...lol
later
later
11-13-2006, 09:25 PM
#31
Member
Thread Starter
Join Date: 10-25-06
Location: British-Columbia
Posts: 204
Likes: 0
Received 0 Likes
on
0 Posts
Originally Posted by RollOver360
This is like the coolest thing I have ever seen. I couldnt imagine the amount of time to do that work... bondo takes enough work. U can add another subscriber. What happened to the car in the first place? I hope u put the doner vehical out of its misery.... poor thing...lol
later
later
My car came from Nanaimo in BC and so did the parts off the donor car. i dont know what happened to it but it was obviously hit somewhere else. i'm just happy my parts are nice and clean with no dents, it saves alot of time, i hate getting crappy parts!
 11-13-2006, 10:56 PM
#33
Member
Thread Starter
Join Date: 10-25-06
Location: British-Columbia
Posts: 204
Likes: 0
Received 0 Likes
on
0 Posts
Originally Posted by shortyhend2004
damn body/ paint is next on my list of things to start learning, and you my friend are starting a cool as hell project and GOODLUCK
11-14-2006, 12:46 AM
#35
Member
Thread Starter
Join Date: 10-25-06
Location: British-Columbia
Posts: 204
Likes: 0
Received 0 Likes
on
0 Posts
I just had an idea lol, shave my door locks, trunk lock (maybe on the trunk lock, what if the celanoid in the latch fails ><) and shave the antenna to relocate it on the roof, or get an internal, anyone seen some nice roof antennas or some internal antennas for cheap? Let me know! I'll probably alter the front grille before its over to boot, might as well while i'm painting.
11-19-2006, 09:33 PM
#36
Banned

Join Date: 09-13-06
Location: USA
Posts: 1,696
Likes: 0
Received 0 Likes
on
0 Posts
Originally Posted by Grimsaviour
I just had an idea lol, shave my door locks, trunk lock (maybe on the trunk lock, what if the celanoid in the latch fails ><) and shave the antenna to relocate it on the roof, or get an internal, anyone seen some nice roof antennas or some internal antennas for cheap? Let me know! I'll probably alter the front grille before its over to boot, might as well while i'm painting.
 11-19-2006, 11:02 PM
#39
New Member

Join Date: 09-19-06
Location: New Westminster, BC
Posts: 169
Likes: 0
Received 0 Likes
on
0 Posts
Subscribing, awesome thread, the pictures make a big difference. Maybe if we have a meet in the summer, you can drive it to the mainland so we can see it in person 
11-21-2006, 01:03 AM
#41
Member
Thread Starter
Join Date: 10-25-06
Location: British-Columbia
Posts: 204
Likes: 0
Received 0 Likes
on
0 Posts
Originally Posted by HiSpdPursuit
thats pretty aggravating with those rust spots...i hope that isnt a problem with all cobalts
 12-04-2006, 02:21 AM
#44
Member
Thread Starter
Join Date: 10-25-06
Location: British-Columbia
Posts: 204
Likes: 0
Received 0 Likes
on
0 Posts
Originally Posted by JohnyNFullEffect
any updates?
Thanks for your interest.
12-30-2006, 01:51 AM
#45
New Member

Join Date: 12-30-06
Location: victoria
Posts: 1
Likes: 0
Received 0 Likes
on
0 Posts
it looks great sebastien, you explain everything very well.
My brother has been too busy eating dinners at my place, but im sure he'll update with new fresh pictures for you all soon. in fact hes going to be working on it on saturday, and you should see how its coming along soon.
enjoy!
My brother has been too busy eating dinners at my place, but im sure he'll update with new fresh pictures for you all soon. in fact hes going to be working on it on saturday, and you should see how its coming along soon.
enjoy!


 12-31-2006, 04:45 PM
#50
Member
Thread Starter
Join Date: 10-25-06
Location: British-Columbia
Posts: 204
Likes: 0
Received 0 Likes
on
0 Posts
So you want an update huh? hmmm.... OK!!! So i worked all saturday and half of today on it and its comming along. Check it out!
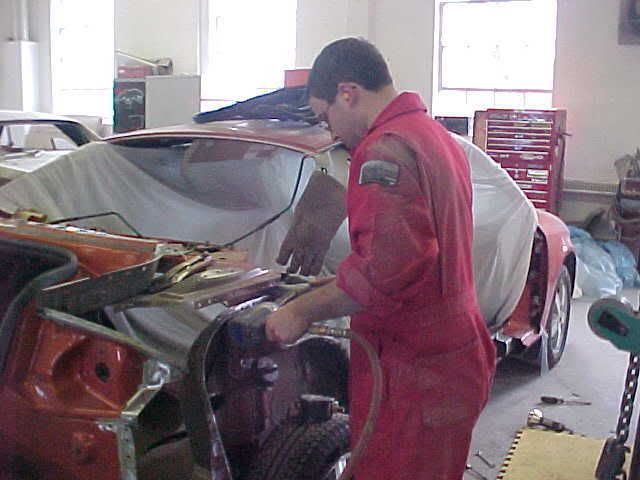
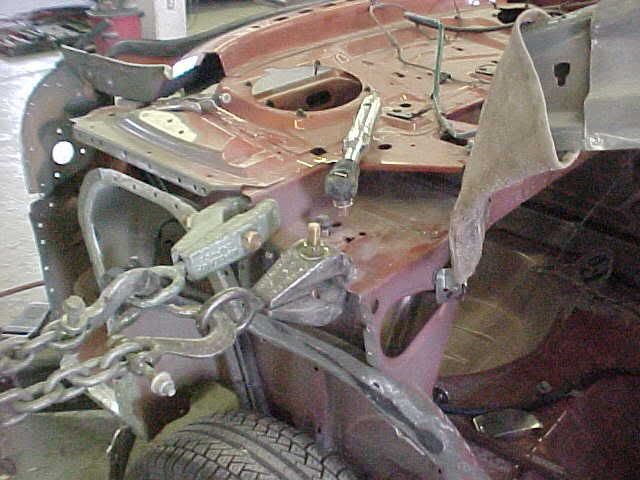
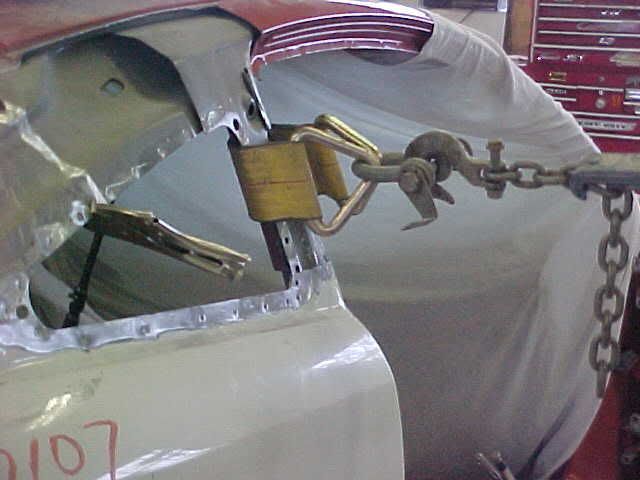
So i went in there early and decided to finish doing a couple pulls that i couldn't do while the wrecked quarter was on because the spot welds just wanted to rip off, too much work hardening caused by the impact made the steel much harder. so here i am putting on some frame clamps. If anyone is wondering why theres welding gloves over the joints, i put them there so i wouldnt slice my head or arms open on the sharp edges, safety first right?
I had to remove a little kink in the parcel shelf (the panel that holds your speakers).
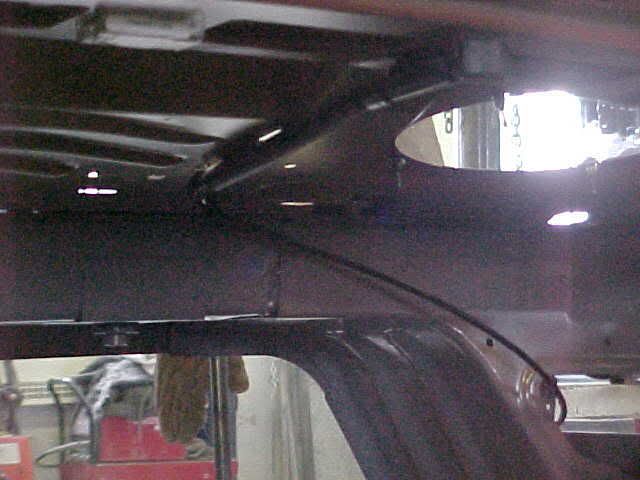
Then i had to remove some residual stress in the B-pillar from the impact as well.
It was sticking in a little. After some pulling and tapping (with a hammer) i managed to get her straight. as you can see i temporarily put the quarter on to get an idea of where it was supposed to go, unfortuneatly you can't get a measurment spec that high on the pillar, usually all you get is a spec from door striker to door striker which isnt quite high enough.
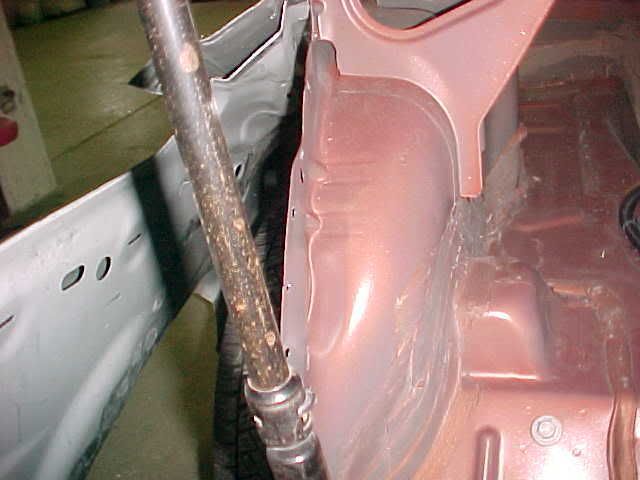
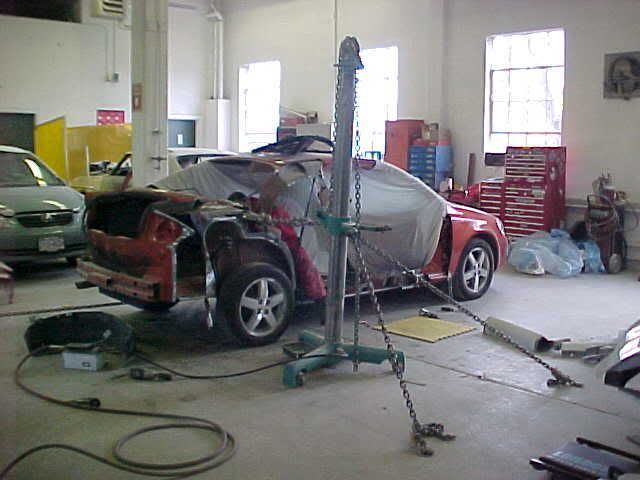
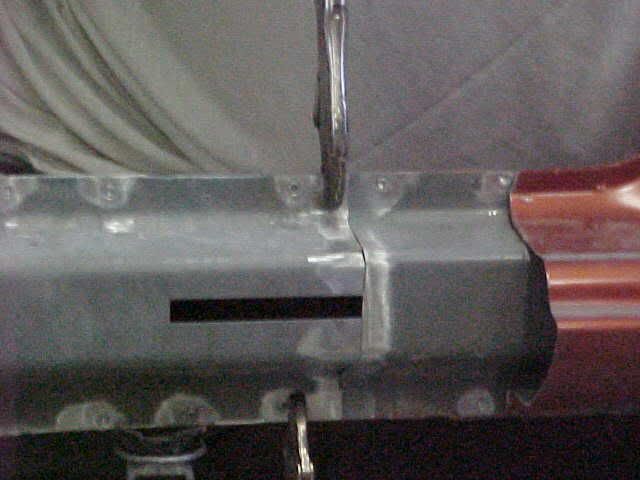
After that i took the quarter panel off to finish some hammer and dolly work to make the wheel well look pretty and sprayed on a healthy coat of Zinc weld-thru primer for rust proofing and put it back on and started fitting the joints.
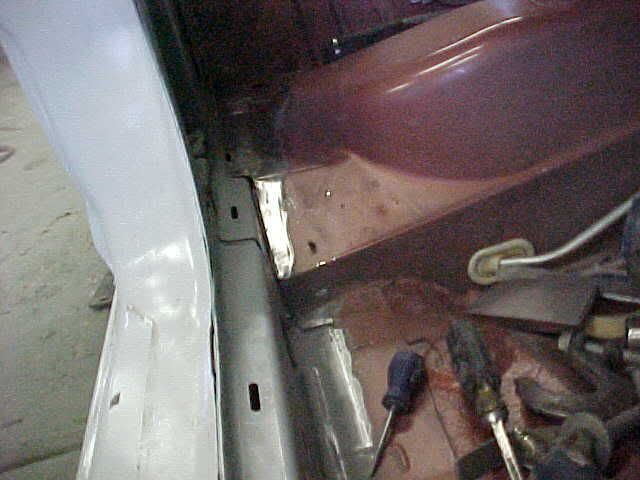
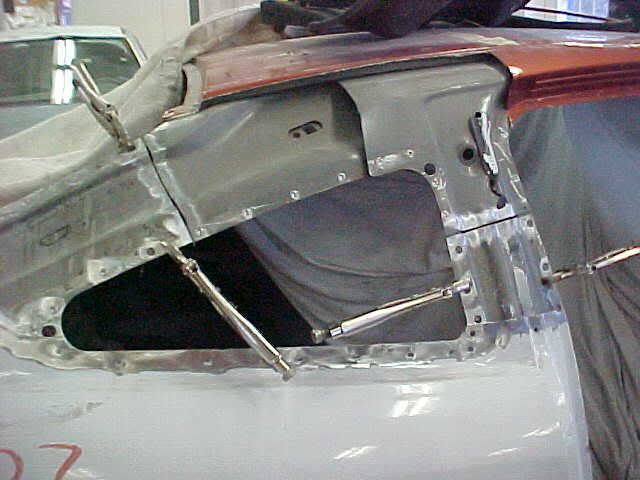
Heres a pic of it on the car, sorry about the mess, again you need a lot of tools to do this so stuff tends to get all over the place!
So after that i called it a day cleaned up and went home, on saturday. Reaching the limit of pics per post here so i'll continue this in the next post which i will be making right away! Stay tuned!
So i went in there early and decided to finish doing a couple pulls that i couldn't do while the wrecked quarter was on because the spot welds just wanted to rip off, too much work hardening caused by the impact made the steel much harder. so here i am putting on some frame clamps. If anyone is wondering why theres welding gloves over the joints, i put them there so i wouldnt slice my head or arms open on the sharp edges, safety first right?
I had to remove a little kink in the parcel shelf (the panel that holds your speakers).
Then i had to remove some residual stress in the B-pillar from the impact as well.
It was sticking in a little. After some pulling and tapping (with a hammer) i managed to get her straight. as you can see i temporarily put the quarter on to get an idea of where it was supposed to go, unfortuneatly you can't get a measurment spec that high on the pillar, usually all you get is a spec from door striker to door striker which isnt quite high enough.
After that i took the quarter panel off to finish some hammer and dolly work to make the wheel well look pretty and sprayed on a healthy coat of Zinc weld-thru primer for rust proofing and put it back on and started fitting the joints.
Heres a pic of it on the car, sorry about the mess, again you need a lot of tools to do this so stuff tends to get all over the place!
So after that i called it a day cleaned up and went home, on saturday. Reaching the limit of pics per post here so i'll continue this in the next post which i will be making right away! Stay tuned!