
05 Cobalt LS "extreme" makeover(56k=death) not for the faint of heart

 03-29-2007, 12:07 AM
#102
Member
Thread Starter

Join Date: 10-25-06
Location: British-Columbia
Posts: 204
Likes: 0
Received 0 Likes
on
0 Posts
Talking about your die grinder you are lucky i didnt take a slide hammer to your lock. You locked it in your box with my plastic cutting bit you ass! I ended up wedging your drawer open and reaching it with my magnet and then took the bit off with wrenches. I I <----- that close!
03-29-2007, 06:08 PM
#103
New Member

Join Date: 03-15-07
Location: Vancouver
Posts: 6
Likes: 0
Received 0 Likes
on
0 Posts
Talking about your die grinder you are lucky i didnt take a slide hammer to your lock. You locked it in your box with my plastic cutting bit you ass! I ended up wedging your drawer open and reaching it with my magnet and then took the bit off with wrenches. I I <----- that close!
 03-29-2007, 10:20 PM
#104
Member
Thread Starter
Join Date: 10-25-06
Location: British-Columbia
Posts: 204
Likes: 0
Received 0 Likes
on
0 Posts
 03-31-2007, 01:13 AM
#106
New Member
Join Date: 03-15-07
Location: Vancouver
Posts: 6
Likes: 0
Received 0 Likes
on
0 Posts
03-31-2007, 02:38 PM
#107
Member

Join Date: 01-09-07
Location: CA
Posts: 324
Likes: 0
Received 0 Likes
on
0 Posts
yo
hey man, youre doing an incredible job, I wish I could do something like that, just in case mine ever gets wrecked lol, any way keep up the good work and don't neglect the lady ;-)
I want to see pictures when the cobalt's done!
I want to see pictures when the cobalt's done!
03-31-2007, 03:14 PM
#108
Member

Join Date: 07-07-06
Location: Arizona
Posts: 311
Likes: 0
Received 0 Likes
on
0 Posts
I just read through these 6 pages and I have to say your work is fantastic. The car was a total mess and now you have turned it into something new again. Keep up the good work man. Update us lol. We are like kids in a candy shop waiting for new stuff lol
03-31-2007, 04:01 PM
#109
Senior Member
Join Date: 04-20-06
Location: Your Computer!
Posts: 2,031
Likes: 0
Received 0 Likes
on
0 Posts
I just read through all 6 pages as well
This work is rad, great stuff!
My dad owns a body shop, so I see this kinda thing all the time. Not to many people go this far into doing **** like this. My dad just rebuilt an S10 for resale last summer.
He's going to be doing my lock shaving work as well
This work is rad, great stuff!
My dad owns a body shop, so I see this kinda thing all the time. Not to many people go this far into doing **** like this. My dad just rebuilt an S10 for resale last summer.
He's going to be doing my lock shaving work as well
 04-01-2007, 08:49 PM
#111
Member
Thread Starter
Join Date: 10-25-06
Location: British-Columbia
Posts: 204
Likes: 0
Received 0 Likes
on
0 Posts
so is it done yet?
So then do you know of a GOOD BODYMAN to fix it?
I mean a non-french speaking bodyman?
I mean a non-french speaking bodyman?
hey man, youre doing an incredible job, I wish I could do something like that, just in case mine ever gets wrecked lol, any way keep up the good work and don't neglect the lady ;-)
I want to see pictures when the cobalt's done!
I want to see pictures when the cobalt's done!
I just read through these 6 pages and I have to say your work is fantastic. The car was a total mess and now you have turned it into something new again. Keep up the good work man. Update us lol. We are like kids in a candy shop waiting for new stuff lol
I just read through all 6 pages as well
This work is rad, great stuff!
My dad owns a body shop, so I see this kinda thing all the time. Not to many people go this far into doing **** like this. My dad just rebuilt an S10 for resale last summer.
He's going to be doing my lock shaving work as well
This work is rad, great stuff!
My dad owns a body shop, so I see this kinda thing all the time. Not to many people go this far into doing **** like this. My dad just rebuilt an S10 for resale last summer.
He's going to be doing my lock shaving work as well
Anyways thanks for all the support folks i'll be updating, i hope shortly. ;-) (yes i know thats a lie but it sounds good dont it? )
 04-02-2007, 01:02 AM
#113
Member
Thread Starter
Join Date: 10-25-06
Location: British-Columbia
Posts: 204
Likes: 0
Received 0 Likes
on
0 Posts
Tell you what JonyyB if you send me a free Hooded sweatshirt ill probably get it done a little quicker for you! ;-) Those look cool ;-) I'm a L or XL.  joking!
Its comming... you know when you already do something for a living sometimes dragging in your butt to do some more on your days off can be hard. But i'm shooting for August. Well lemme put it this way, its not exactly gaining in value sitting in a corner collecting dust lol. Thanks for posting by the way, i'm honored to know the head honcho is taking interest in my project!
Its comming... you know when you already do something for a living sometimes dragging in your butt to do some more on your days off can be hard. But i'm shooting for August. Well lemme put it this way, its not exactly gaining in value sitting in a corner collecting dust lol. Thanks for posting by the way, i'm honored to know the head honcho is taking interest in my project!
 04-02-2007, 10:50 AM
#115
New Member

Join Date: 03-01-07
Location: Nova Scotia
Posts: 29
Likes: 0
Received 0 Likes
on
0 Posts
It is cool seeing the progress of your work, thanks for the awesome pics. What color are you going to paint the car when you are done with the bodywork?
I have an 07 SOM LS, and was thinking of dropping in a sunroof. If you still have your headliner off... would you mind telling me if I would be cutting any major structural components? Thanks.
I have an 07 SOM LS, and was thinking of dropping in a sunroof. If you still have your headliner off... would you mind telling me if I would be cutting any major structural components? Thanks.
04-02-2007, 10:55 AM
#116
Senior Member
Join Date: 12-23-06
Location: York, PA
Posts: 1,500
Likes: 0
Received 0 Likes
on
0 Posts
wow, this was a good read. having done my own share of rebuilding a car i sort of know what your going through. at least you have another one to drive though. lol
keep up the posts, cant wait to see it finished!
keep up the posts, cant wait to see it finished!
04-02-2007, 11:03 AM
#117
New Member

Join Date: 03-07-07
Location: regina sask CANADA
Posts: 48
Likes: 0
Received 0 Likes
on
0 Posts
don't rush on our account. i don't know about the rest of family here, but i'm feeling like a fat kid waiting for the candy store to open!!! but seriously, can u feel us tugging at you cover alls?
04-03-2007, 11:57 PM
#118
Member
Thread Starter
Join Date: 10-25-06
Location: British-Columbia
Posts: 204
Likes: 0
Received 0 Likes
on
0 Posts
don't rush on our account. i don't know about the rest of family here, but i'm feeling like a fat kid waiting for the candy store to open!!! but seriously, can u feel us tugging at you cover alls?
wow, this was a good read. having done my own share of rebuilding a car i sort of know what your going through. at least you have another one to drive though. lol
keep up the posts, cant wait to see it finished!
keep up the posts, cant wait to see it finished!
It is cool seeing the progress of your work, thanks for the awesome pics. What color are you going to paint the car when you are done with the bodywork?
I have an 07 SOM LS, and was thinking of dropping in a sunroof. If you still have your headliner off... would you mind telling me if I would be cutting any major structural components? Thanks
I have an 07 SOM LS, and was thinking of dropping in a sunroof. If you still have your headliner off... would you mind telling me if I would be cutting any major structural components? Thanks
You should do a targa top covrion that souldnt be to hard
So yeah, thanks again guys for all the interest, oh yea i forgot, i'm keeping the color stock, and maybe, just maybe if i have time some painted graphics. But that will depend on my painter, if hes up to it.

 04-04-2007, 03:30 PM
#121
Member
Thread Starter
Join Date: 10-25-06
Location: British-Columbia
Posts: 204
Likes: 0
Received 0 Likes
on
0 Posts
Shaving the locks is removing the lock cylinder and filling the hole left from that with some kind of material. Steel or plastic repair. Some people "shave" door handles, locks, antenna holes, Spoilers etc. Anything that is removed and leaves a hole and then plugged is called "shaving".
04-04-2007, 03:37 PM
#122
Senior Member

Join Date: 02-05-07
Location: buffalo/ny
Posts: 1,745
Likes: 0
Received 0 Likes
on
0 Posts
x2 i asked them at the dealership how much would it be for the ss interior swap, n they said estimated 5000!!! i was like...wow. I wanted the SS but they sold the last one 5 mins before i got there. Oh well...no regrets. 2.2 is a fun learning experience. Woot for Manual!
-ryan
-ryan
04-09-2007, 10:00 PM
#123
Senior Member

Join Date: 02-25-07
Location: Portland, OR
Posts: 817
Likes: 0
Received 0 Likes
on
0 Posts
Shaving the locks is removing the lock cylinder and filling the hole left from that with some kind of material. Steel or plastic repair. Some people "shave" door handles, locks, antenna holes, Spoilers etc. Anything that is removed and leaves a hole and then plugged is called "shaving".
04-09-2007, 10:56 PM
#124
Member
Thread Starter
Join Date: 10-25-06
Location: British-Columbia
Posts: 204
Likes: 0
Received 0 Likes
on
0 Posts
Alrighty, its time for the almighty update.... So i worked on my car on Friday (stat) and today. I got quite a lot done. Pretty happy about it but as usual its nowhere near done. ;-)
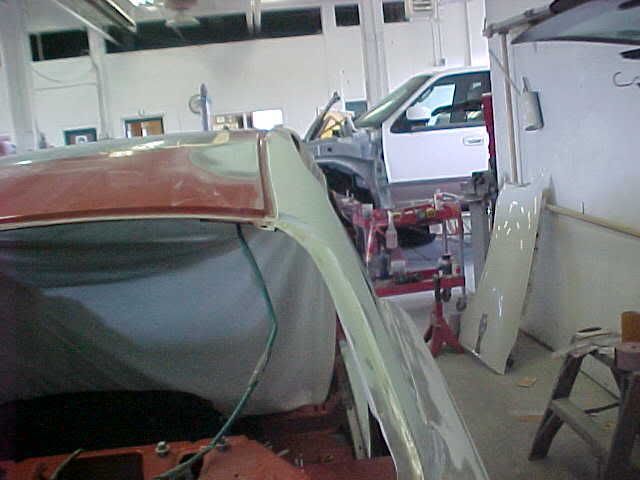
So lets start with the stuff i did on friday. I decided i would attack the left side quarter panel finally. heres what it looked like.
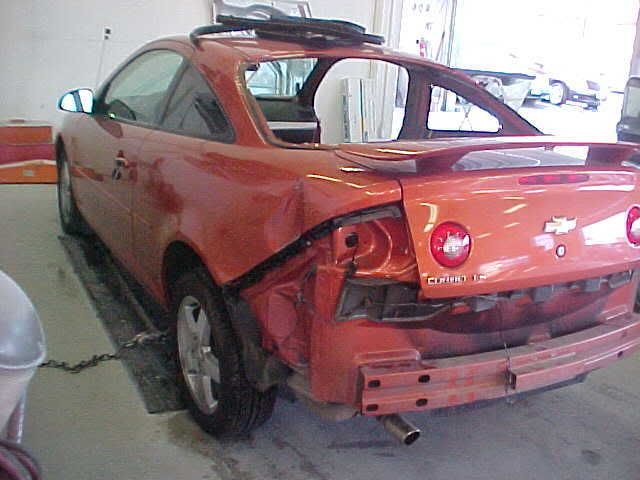
Pretty beat up, crappy pic i know. So i decided i would try to pull it out first using tabs that i welded on the body lines to try and re-establish them but it wasnt quite working out. so i decided to remove the totally screwed up peice so i could pull the inner structure.
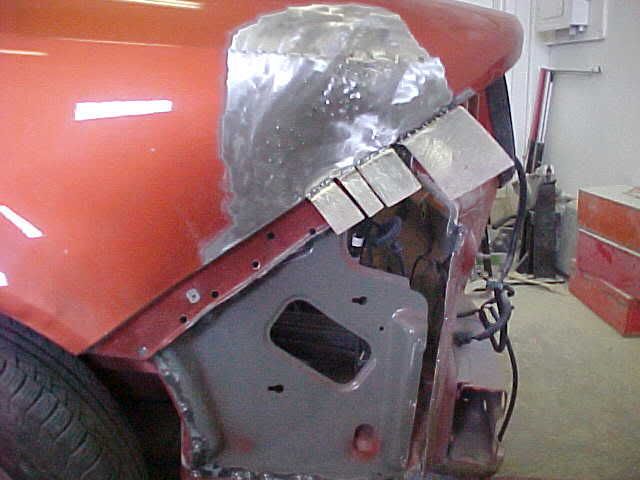
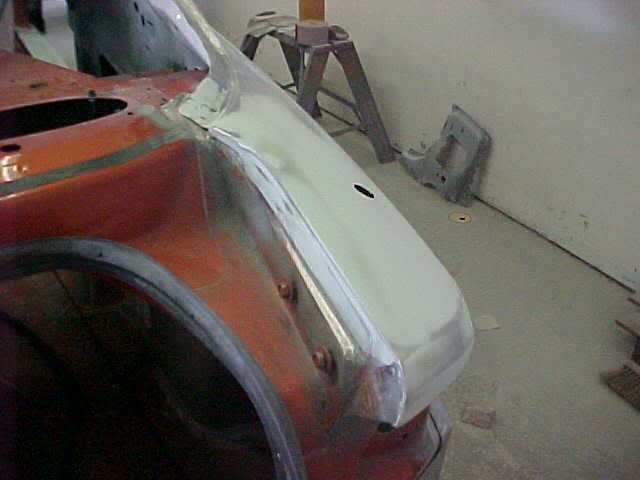
There you can see the pulling tabs. ALso you can see little black dots, from our dent pulling machine which i forgot to take a picture of. heres a closer look at the peice removed:
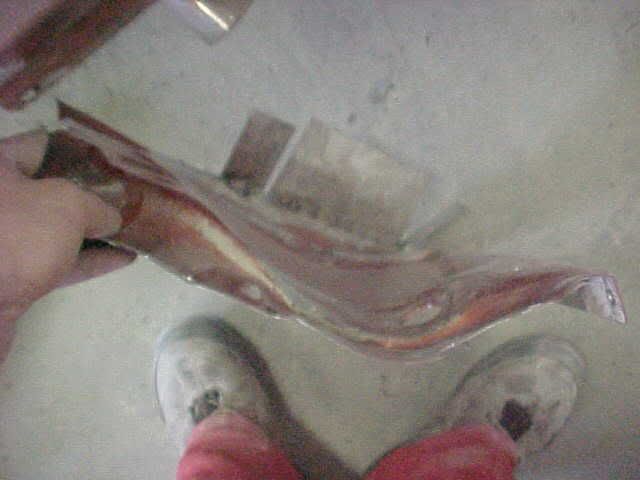
Yea its pretty bad. So bad i ordered a brand new OEM peice from the dealer. It will show up wednesday this week. Once i have that i'll be able to finish the repair there. It just didnt wanna come back to shape with that peice in there. The floor was pushed and the exhaust is in my way ><. Not a good day friday, i was pretty frustrated.
Now lets talk about the stuff i did all day today. I completely finished all the body work on the right side of the car. Its almost ready for primer, just need to prep it and mask it now.
I didnt have much time to take pictures today so i stole some from another web site to give an explanation of how to use body filler and polyester putty.
Heres our "bondo" mixing bench and the tools you need to do the job:
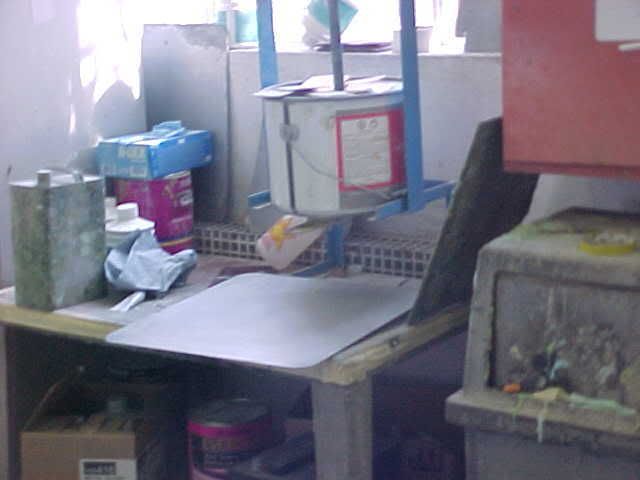
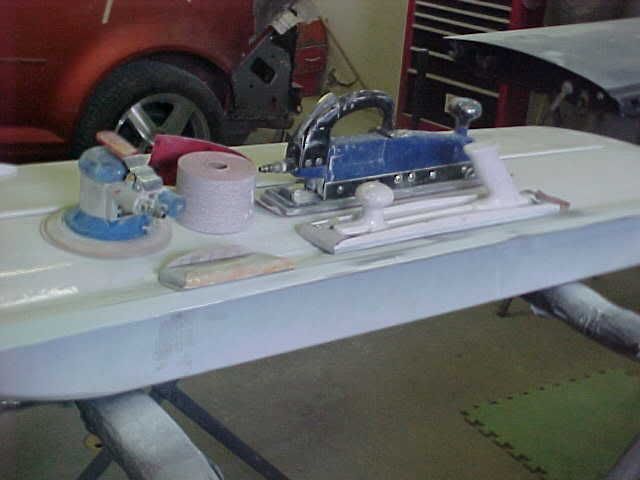
Just basic sanding equipment with my 8" grinder with a soft pad missing in the pic. I have more blocks, or body files they are called in my tool box but those there are the basic ones. You need sand paper too: 40, 80, 100, and 180 grit to do body work. It comes in sheets with a sticky back side so it sticks to your equipment.
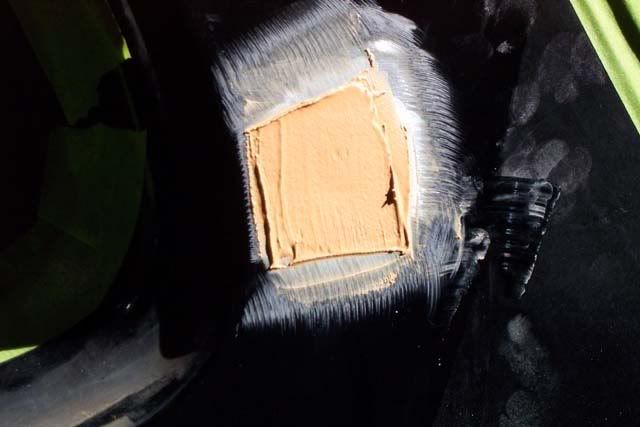
First thing you do is of course work the dent back out to about 98% or what the body contour is supposed to be with a body hammer and a dolly(lump of steel, comes in many different shapes) and then you grind the paint of with a 40 grit soft pad grinder:
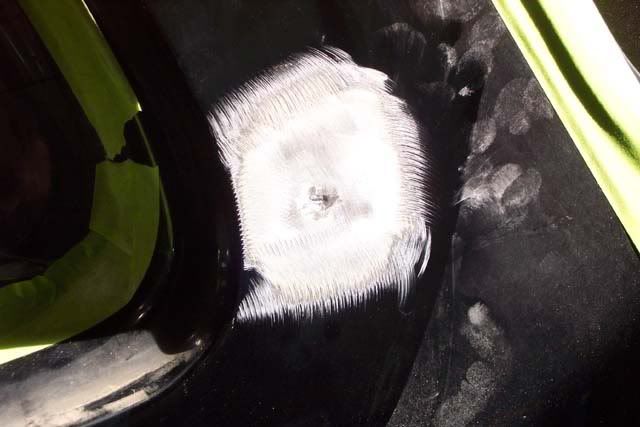
In this pic i stole the guy used a 36 grit hard pad(old school way) but you get the idea.
Then you are supposed to feather the paint back with 100 grit on a random orbital sander. Basically smooth out the sharp edge on the paint from grinding. (which he also didnt do)
then you get your mixing board out and pour out some bondo, as much as you think you will need and mix it up with a spreader:
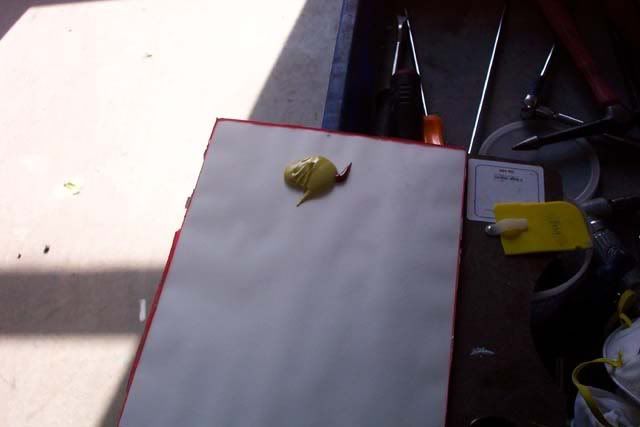
its very important to make sure that your spreader and board are clean and free of debris.
Otherwise when you go to spread your filler you will have chunks of stuff all in it. The rule of thumb is always ALWAYS spread from side to side, NEVER up and down. The reason for this is that when you spread bondo over an area large enough to have to do two pases, the spreader mark left in the middle is somewhat harder to level off Because theres more material there. so if you spread up and down, those speader marks will show and make the body look wavy once painted. make sense? Yea i know i dont have a pic to show. i'll try and do that when i fix the left side quarter panel. ;-)
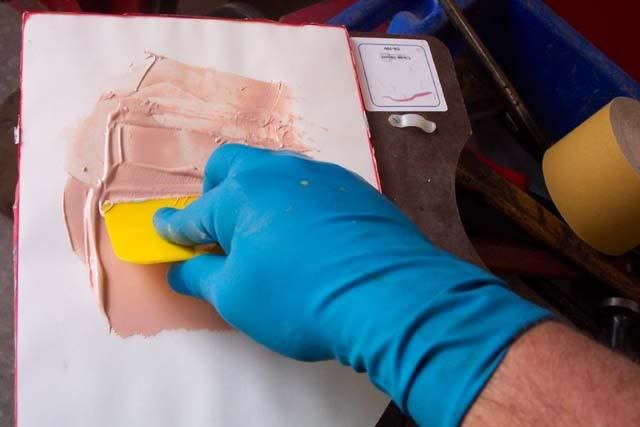
Heres a look at a spread, again stolen pic:
another thing too is you must always try to get as nice looking a spread as possible. Its then easier to level and requires less sanding and also prevents having to recoat. You should only need 1 thin coat of filler if you repaired the steel properly.
Now. how hard is it to sand the stuff? well its pretty easy, with 40 grit it cuts quick and sands down fast. But sanding it isnt the hard part, its getting it straight thats a challenge.There is nothing harder to learn in this trade than this bodywork. Me cutting the car to peices and stripping the interior, or pulling the frame on a full size truck is a peice of cake compared to doing bodywork. It takes at least 3 years of constant practice to get consistant results and even some days after my 5th year now, i can still have a hard time with some cars. Theres 2 basic rules. Cover the whole area sanding. And use an x motion. Heres a pic:

Follow the arrows. ;-) and use the apropriate size block of course. ;-) You should not be putting pressure on the block at all until you are more experienced. Once you become experienced you constantly adjust where and how hard you are pushing on the block. or not pushing on the block. Now sanding in an X motion will not guarantee you results. But like i said, its the basic rule. After that, its all trial and error and lots and lots of practice.
Once you are done applying bondo you need to use polyester putty over it. Bondo is quite porous so it leaves "pin holes" or air bubbles all over it. Polyester putting is more dense so it fills those holes. Again only a thin skim is required, the stuff we use is blue. Its made by evercoat.
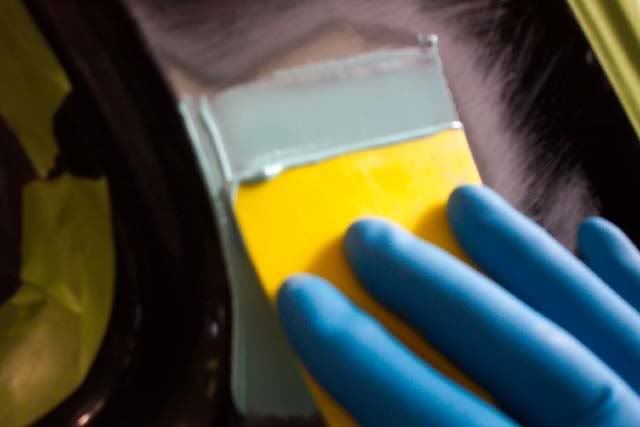
You sand bondo with 40 grit, and 80 to make it smoother, then you sand putty with 100 and 180 and thats it! Feather back the paint nicely with 180 and you are ready to prep for primer. heres pics of the work i did:
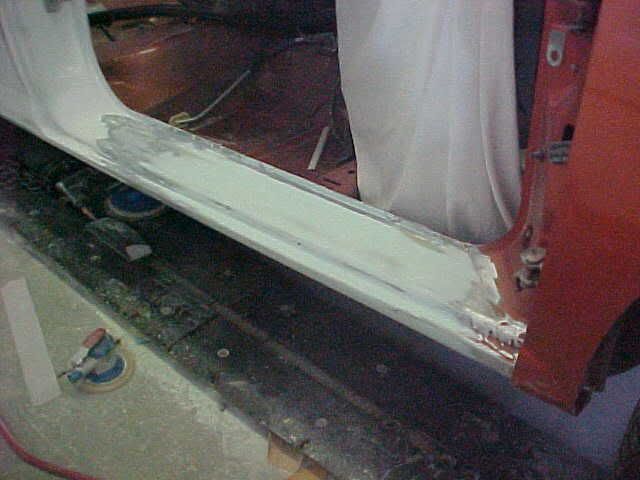
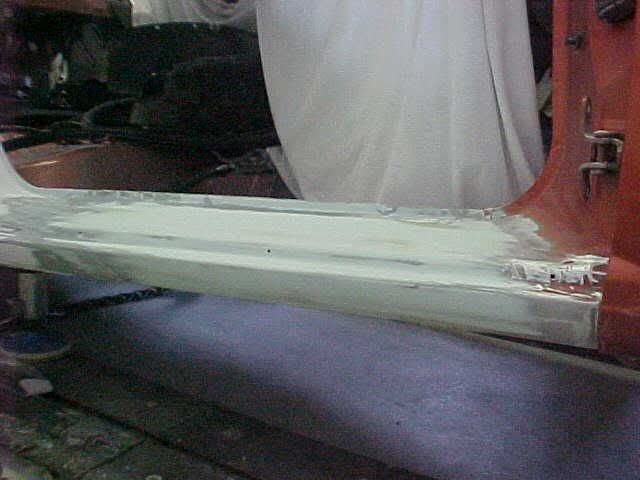
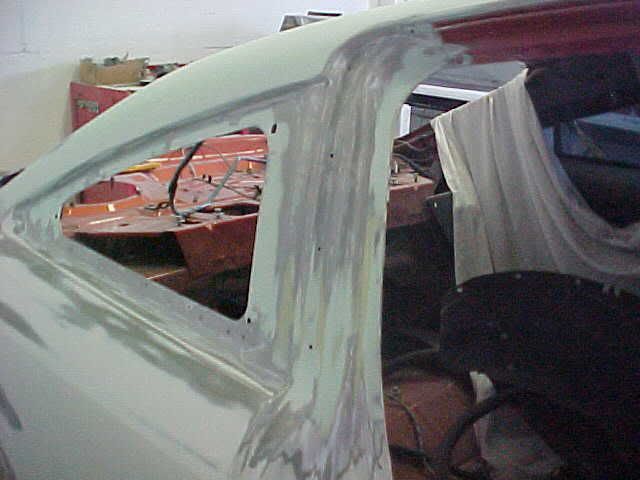
Thats 8 hours of work there, non stop. but its all ready to be preped! Ill be getting into that later this week! ENjoy!
So lets start with the stuff i did on friday. I decided i would attack the left side quarter panel finally. heres what it looked like.
Pretty beat up, crappy pic i know. So i decided i would try to pull it out first using tabs that i welded on the body lines to try and re-establish them but it wasnt quite working out. so i decided to remove the totally screwed up peice so i could pull the inner structure.
There you can see the pulling tabs. ALso you can see little black dots, from our dent pulling machine which i forgot to take a picture of. heres a closer look at the peice removed:
Yea its pretty bad. So bad i ordered a brand new OEM peice from the dealer. It will show up wednesday this week. Once i have that i'll be able to finish the repair there. It just didnt wanna come back to shape with that peice in there. The floor was pushed and the exhaust is in my way ><. Not a good day friday, i was pretty frustrated.
Now lets talk about the stuff i did all day today. I completely finished all the body work on the right side of the car. Its almost ready for primer, just need to prep it and mask it now.
I didnt have much time to take pictures today so i stole some from another web site to give an explanation of how to use body filler and polyester putty.
Heres our "bondo" mixing bench and the tools you need to do the job:
Just basic sanding equipment with my 8" grinder with a soft pad missing in the pic. I have more blocks, or body files they are called in my tool box but those there are the basic ones. You need sand paper too: 40, 80, 100, and 180 grit to do body work. It comes in sheets with a sticky back side so it sticks to your equipment.
First thing you do is of course work the dent back out to about 98% or what the body contour is supposed to be with a body hammer and a dolly(lump of steel, comes in many different shapes) and then you grind the paint of with a 40 grit soft pad grinder:
In this pic i stole the guy used a 36 grit hard pad(old school way) but you get the idea.
Then you are supposed to feather the paint back with 100 grit on a random orbital sander. Basically smooth out the sharp edge on the paint from grinding. (which he also didnt do)
then you get your mixing board out and pour out some bondo, as much as you think you will need and mix it up with a spreader:
its very important to make sure that your spreader and board are clean and free of debris.
Otherwise when you go to spread your filler you will have chunks of stuff all in it. The rule of thumb is always ALWAYS spread from side to side, NEVER up and down. The reason for this is that when you spread bondo over an area large enough to have to do two pases, the spreader mark left in the middle is somewhat harder to level off Because theres more material there. so if you spread up and down, those speader marks will show and make the body look wavy once painted. make sense? Yea i know i dont have a pic to show. i'll try and do that when i fix the left side quarter panel. ;-)
Heres a look at a spread, again stolen pic:
another thing too is you must always try to get as nice looking a spread as possible. Its then easier to level and requires less sanding and also prevents having to recoat. You should only need 1 thin coat of filler if you repaired the steel properly.
Now. how hard is it to sand the stuff? well its pretty easy, with 40 grit it cuts quick and sands down fast. But sanding it isnt the hard part, its getting it straight thats a challenge.There is nothing harder to learn in this trade than this bodywork. Me cutting the car to peices and stripping the interior, or pulling the frame on a full size truck is a peice of cake compared to doing bodywork. It takes at least 3 years of constant practice to get consistant results and even some days after my 5th year now, i can still have a hard time with some cars. Theres 2 basic rules. Cover the whole area sanding. And use an x motion. Heres a pic:
Follow the arrows. ;-) and use the apropriate size block of course. ;-) You should not be putting pressure on the block at all until you are more experienced. Once you become experienced you constantly adjust where and how hard you are pushing on the block. or not pushing on the block. Now sanding in an X motion will not guarantee you results. But like i said, its the basic rule. After that, its all trial and error and lots and lots of practice.
Once you are done applying bondo you need to use polyester putty over it. Bondo is quite porous so it leaves "pin holes" or air bubbles all over it. Polyester putting is more dense so it fills those holes. Again only a thin skim is required, the stuff we use is blue. Its made by evercoat.
You sand bondo with 40 grit, and 80 to make it smoother, then you sand putty with 100 and 180 and thats it! Feather back the paint nicely with 180 and you are ready to prep for primer. heres pics of the work i did:
Thats 8 hours of work there, non stop. but its all ready to be preped! Ill be getting into that later this week! ENjoy!
04-10-2007, 07:08 AM
#125
Member

Join Date: 11-10-05
Location: Northern Illinois
Posts: 381
Likes: 0
Received 0 Likes
on
0 Posts
Looking good, but I have a question. I am wondering why you have filler on the glass mounting flanges. Since the glass is structural, we are not supposed to have any filler where it is urethaned to the vehicle because the filler could de-laminate in another collision.
Dennis
Dennis