
Carbon Fiber Parts - With picssss
 05-11-2014, 07:14 PM
#1

So I've been on a real CF craze lately. Always wanted to get my carbon fiber dash in... even bought a spare set to send out... but that ended up falling through horribly as many of you may know. Figured I take on a new project.
I'm doing the dash and some engine bay accessories (spark plug cover and injector cover.)
Enough of the talking, people like pics
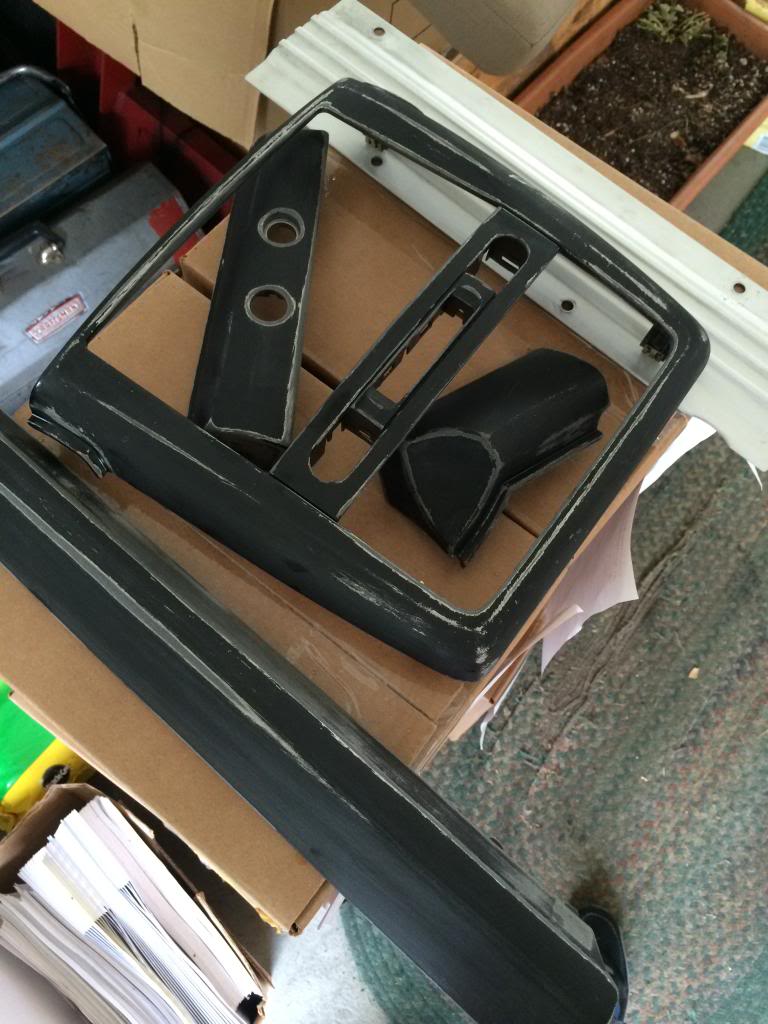
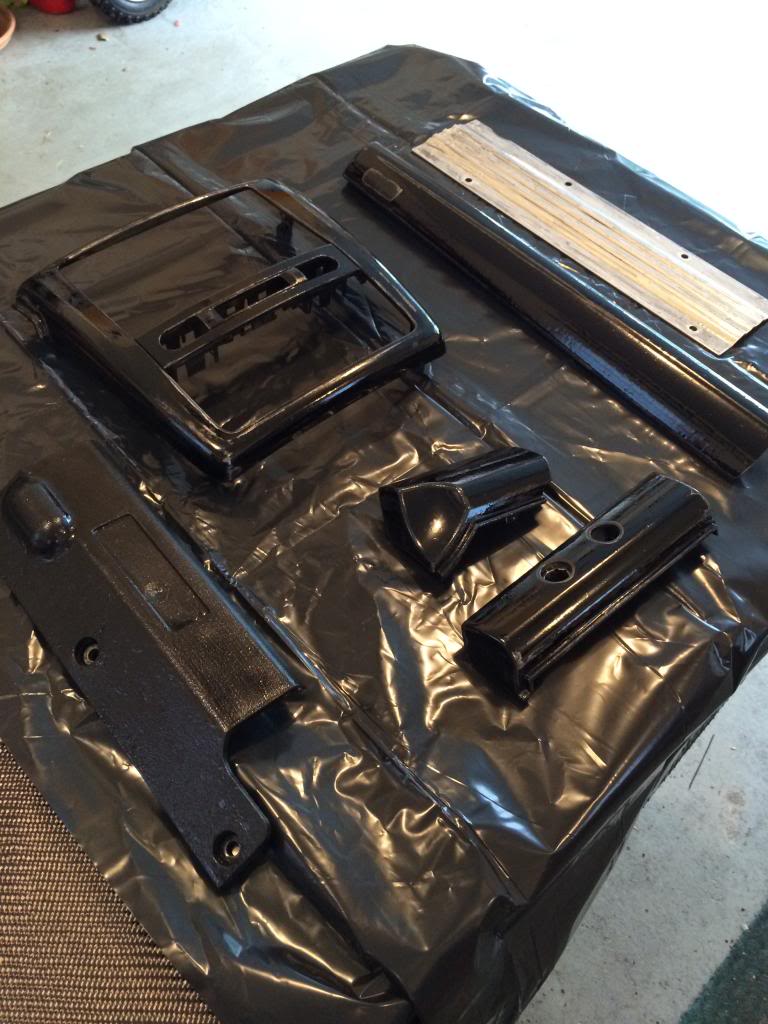
Started with the respective pieces and cleaned, prepped and sanded... I used a low grit (80) to roughen it up real good and give the base coat something to stick to without any issues. Previous person I bought the dash from painted it black, though thats not going to make a difference at the end... he didn't prepare it well so I had to correct it a bit. Took off the badges and switches and they are ready to go.
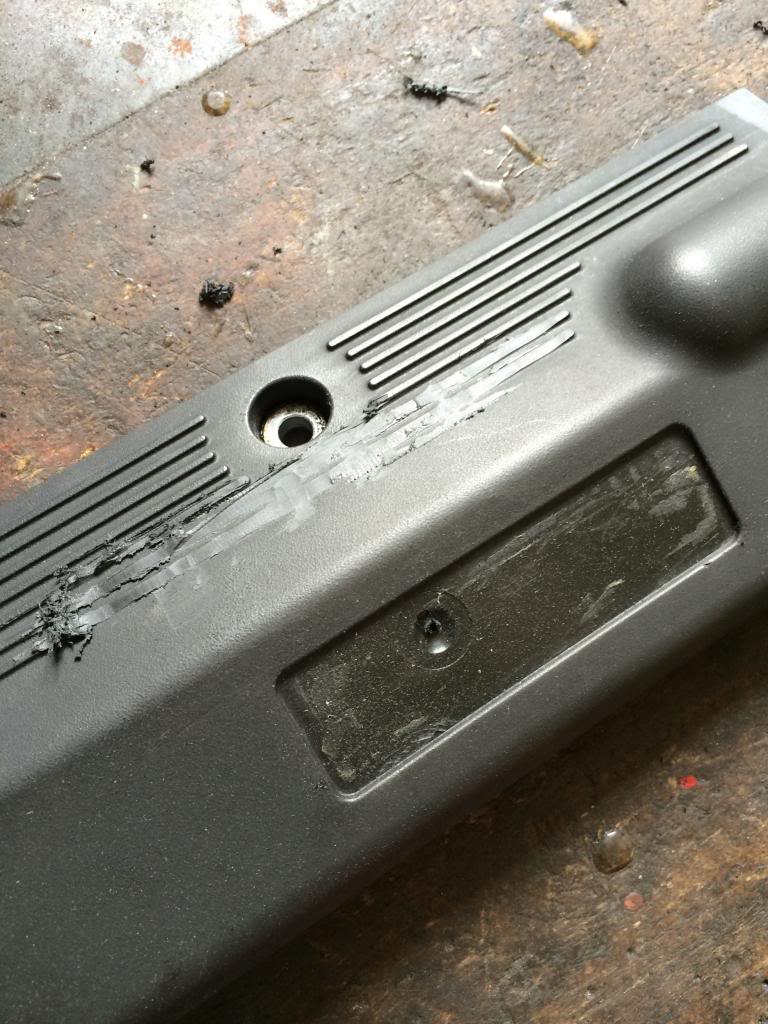
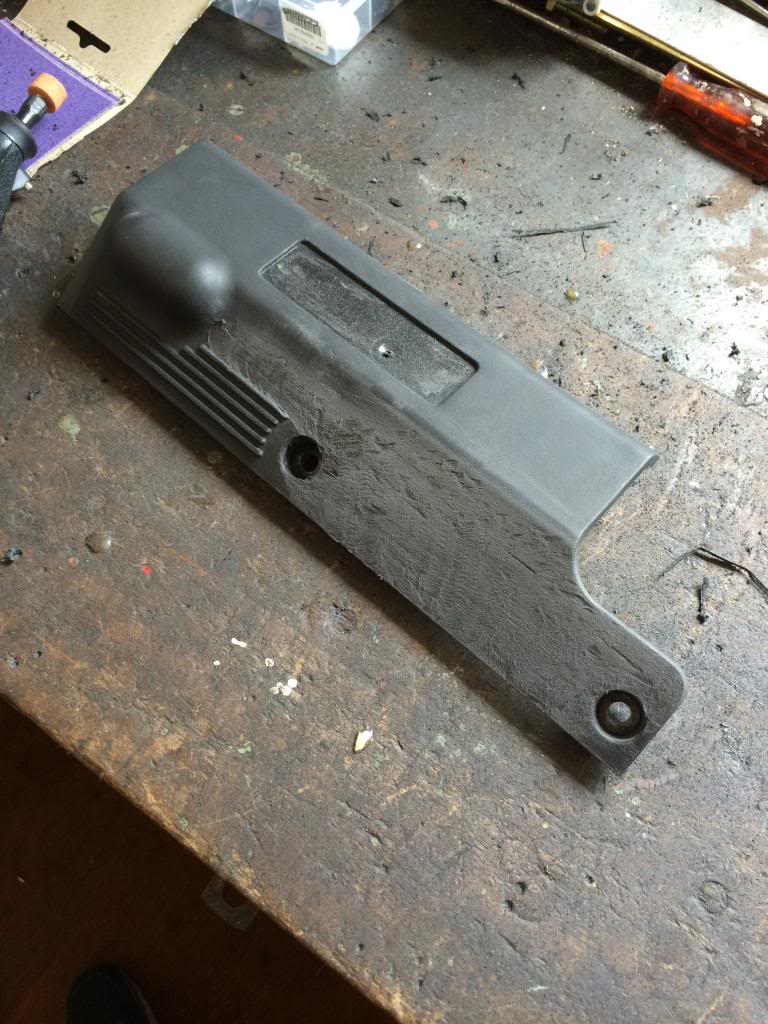
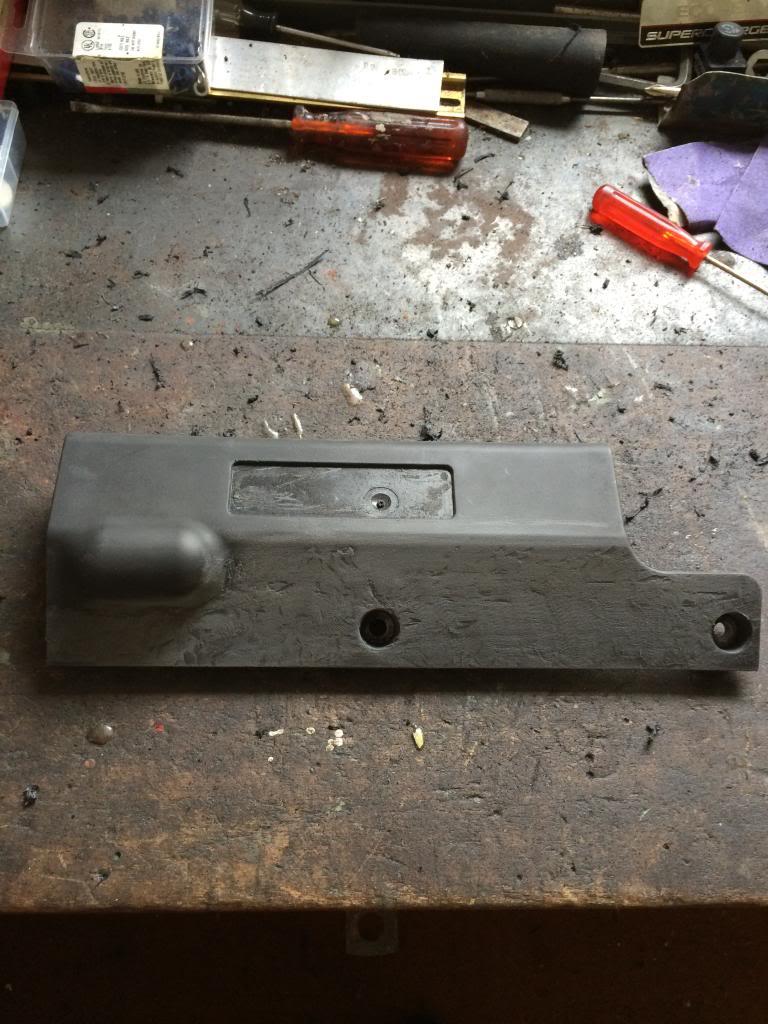
Injector Cover... didn't like the little rivets on there (also figured the carbon may not look as clean with all that detail) so I grinded them off.
Half way done
Finished
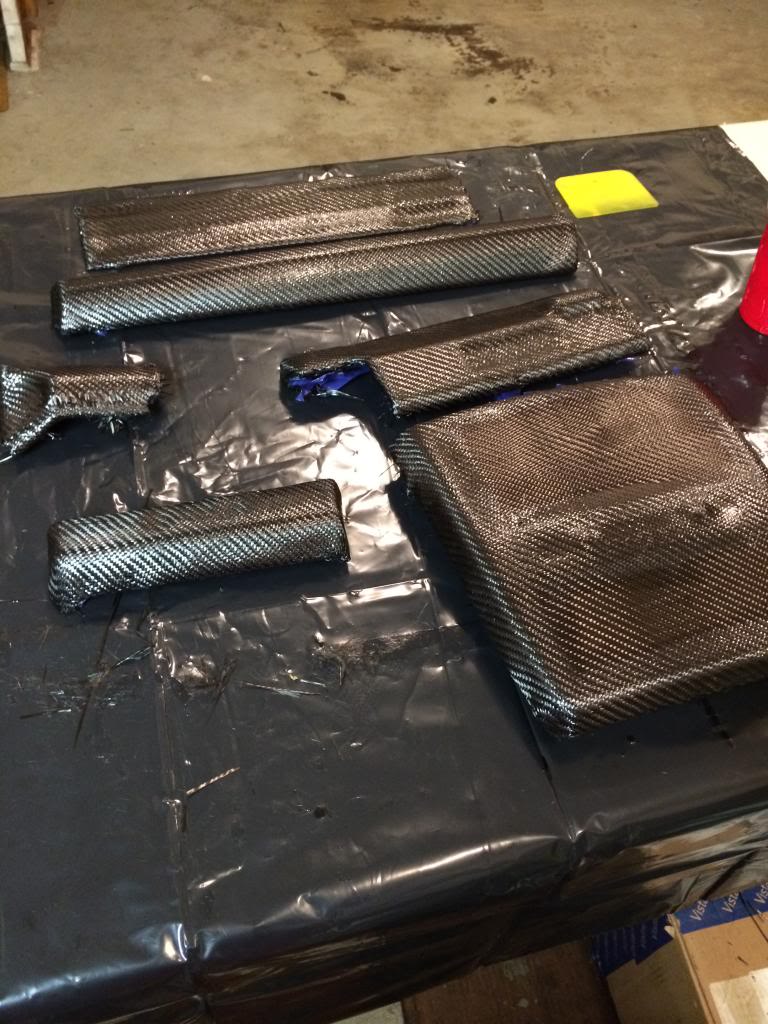
The base resin was layed down... for this first base coat a black pigment was added, manly to cover the items in black incase there is some spaces showing through the carbon... you won't be able to tell. after a few hours, the resin gets tacky to the touch and you can proceed.
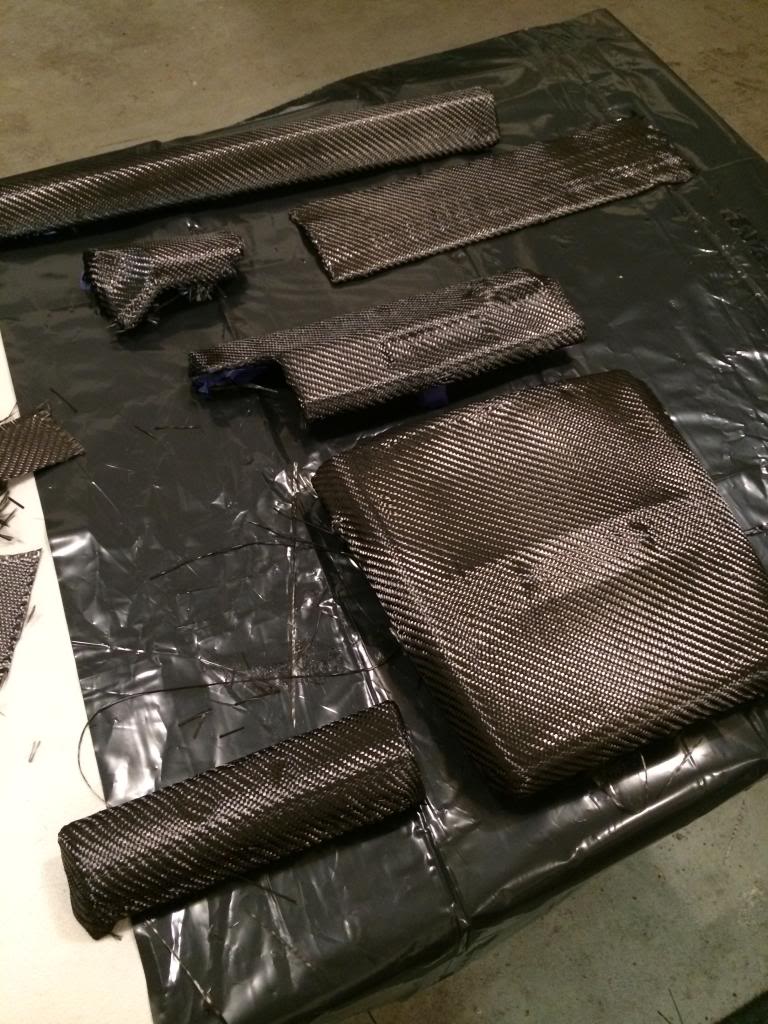
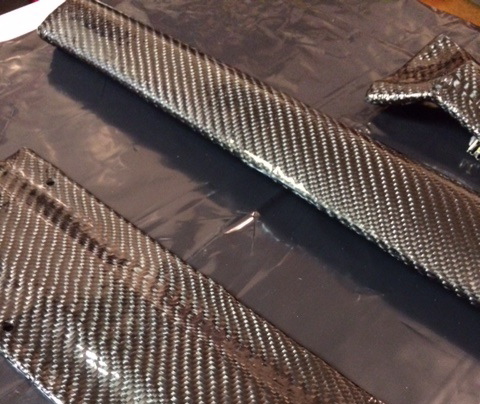
carbon laid out
First resin coat applied.. starting to come together.
I'll be waiting for the resin to fully cure, then sanding it down to find out any imperfections... then will be hitting it with a couple more coats of the resin with sanding in between each coat. I'll need to trim all the excess carbon by the radio and hvac, as well as the backside. Then clearcoat and polish to shine. I'll be doing this a little by little whenever I have some time. Hope to be done soon though. Enjoy!
more pics to come
I'm doing the dash and some engine bay accessories (spark plug cover and injector cover.)
Enough of the talking, people like pics
Started with the respective pieces and cleaned, prepped and sanded... I used a low grit (80) to roughen it up real good and give the base coat something to stick to without any issues. Previous person I bought the dash from painted it black, though thats not going to make a difference at the end... he didn't prepare it well so I had to correct it a bit. Took off the badges and switches and they are ready to go.
Injector Cover... didn't like the little rivets on there (also figured the carbon may not look as clean with all that detail) so I grinded them off.
Half way done
Finished
The base resin was layed down... for this first base coat a black pigment was added, manly to cover the items in black incase there is some spaces showing through the carbon... you won't be able to tell. after a few hours, the resin gets tacky to the touch and you can proceed.
carbon laid out
First resin coat applied.. starting to come together.
I'll be waiting for the resin to fully cure, then sanding it down to find out any imperfections... then will be hitting it with a couple more coats of the resin with sanding in between each coat. I'll need to trim all the excess carbon by the radio and hvac, as well as the backside. Then clearcoat and polish to shine. I'll be doing this a little by little whenever I have some time. Hope to be done soon though. Enjoy!
more pics to come
Last edited by CobaltSS 16; 05-11-2014 at 07:22 PM.


 05-14-2014, 11:13 PM
#13
Oh noesss!! I ruined it....
Just kidding
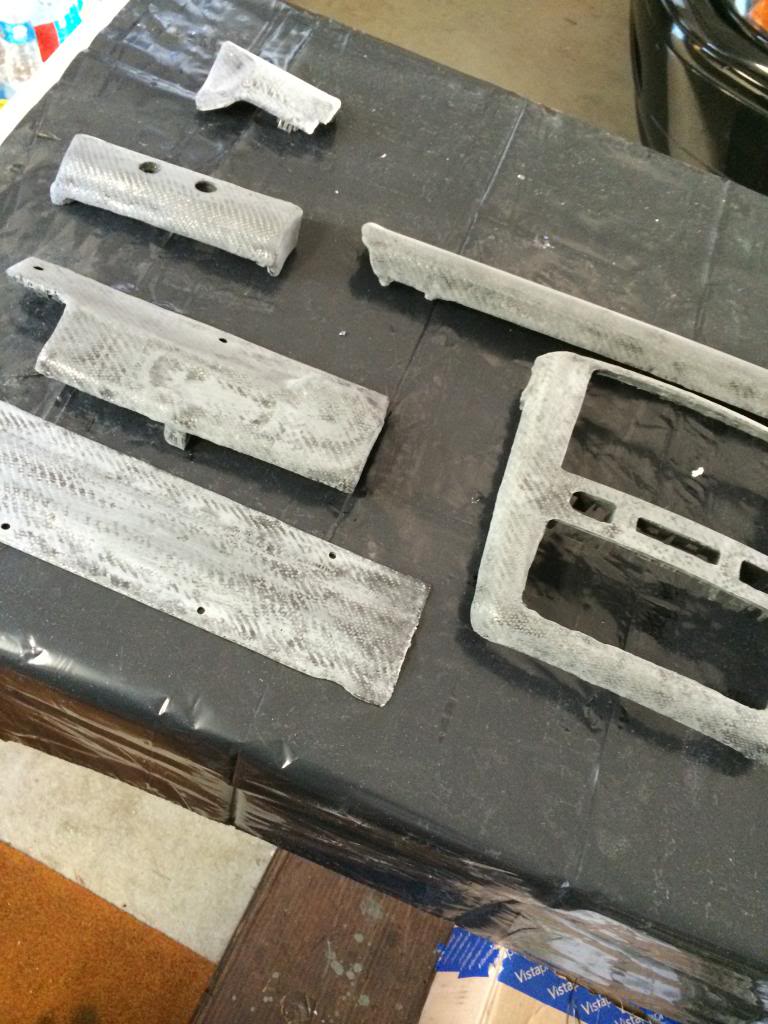
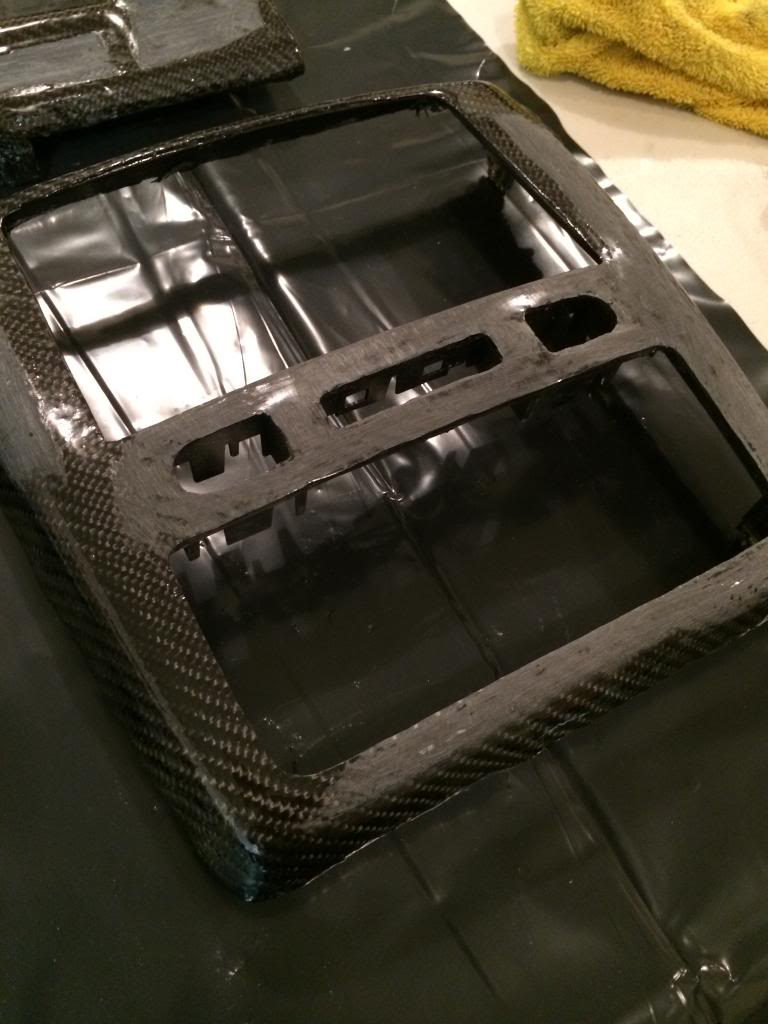
Current progress - this is after 2 coats of resin... the pieces were left to fully cure and then I spent about 3 hours trimming everything. All the holes for the engine spark plug cover and injector cover are completely flush (I started by drilling a small hole from the back, then hit it will a very tiny grinder/sander on my dremel... they came out perfectly round and flush.)
@07MetallicSC - I cut the middle parts of the dash where the indash and hvac go from the backside FIRST and left a touch of room (maybe 1-2mm around) then I grinded them more from the backside to where it was almost flush... then AFTER I grinded and sanded the front end... the end result is completely flush. It took a little bit more time, but definitely worth it. You have to be very careful around those little spots by the seat heater switches and seat belt light.
Here is a pic during the sanding process. I ended up cleaning up the edges more on the main dash piece after this was taken. I used an air compressor to get all the dust remains off the pieces and just cleaned them up with a wet rag...
current progress looks nice... no bubbles and barely any low spots, not bad for only 2 coats. They are now ready for 2 more coats of resin... hopefully I can do them on Saturday.
Just kidding
Current progress - this is after 2 coats of resin... the pieces were left to fully cure and then I spent about 3 hours trimming everything. All the holes for the engine spark plug cover and injector cover are completely flush (I started by drilling a small hole from the back, then hit it will a very tiny grinder/sander on my dremel... they came out perfectly round and flush.)
@07MetallicSC - I cut the middle parts of the dash where the indash and hvac go from the backside FIRST and left a touch of room (maybe 1-2mm around) then I grinded them more from the backside to where it was almost flush... then AFTER I grinded and sanded the front end... the end result is completely flush. It took a little bit more time, but definitely worth it. You have to be very careful around those little spots by the seat heater switches and seat belt light.
Here is a pic during the sanding process. I ended up cleaning up the edges more on the main dash piece after this was taken. I used an air compressor to get all the dust remains off the pieces and just cleaned them up with a wet rag...
current progress looks nice... no bubbles and barely any low spots, not bad for only 2 coats. They are now ready for 2 more coats of resin... hopefully I can do them on Saturday.


 05-15-2014, 10:21 PM
#19
Yup... I did a bunch of body work on my old car.. so I kinda adapted some of the techniques from that, but don't be discouraged... just make sure to have a ton of patience... everything takes a while as CAD says.
I looked into that, but wasn't worth it for me based on my application... it's come out well so far... though I really spent a ton of time molding that first layer of resin that could have been avoided if I had the vac bag though.
I looked into that, but wasn't worth it for me based on my application... it's come out well so far... though I really spent a ton of time molding that first layer of resin that could have been avoided if I had the vac bag though.
Last edited by CobaltSS 16; 05-15-2014 at 10:22 PM. Reason: Automerged Doublepost
 05-21-2014, 04:35 PM
#22
UPDATE... so i finally finished. Thank God
After 4 coats of resin, I had a couple low spots after sanding, so I ended up hitting a couple spots up that needed it.
Sanded that all down smooth. started with 120 grit to 220, then wetsanded with 400, 800, 1000 (changing the water everytime as I moved up in grits)
Cleaned that off good and let it dry... it was ready for clearcoat shown below.

After the clearcoat dried, I wetsanded with 2000 grit sandpaper, then polished that bish up
I actually had some fitment problems because I left some slack behind and around the edges... so I ended up trimming and sanding some more until i got them in. Theres a little bit of orange peel on the top here and there.. I will try and correct that later on but I just wanted to get them in.
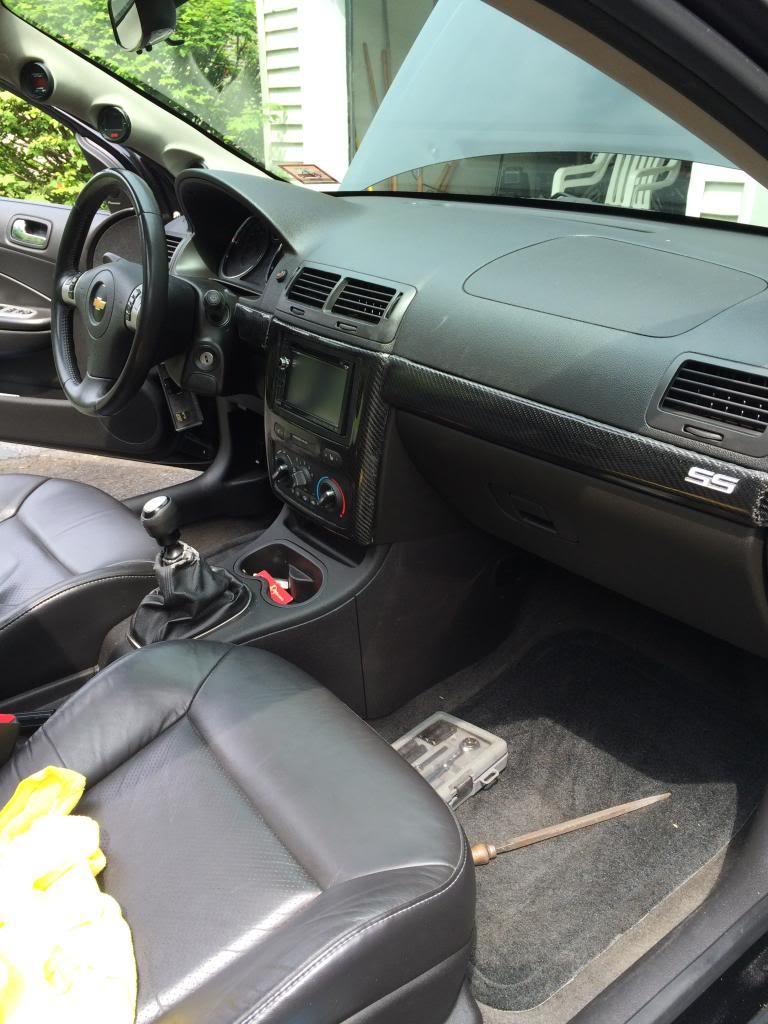
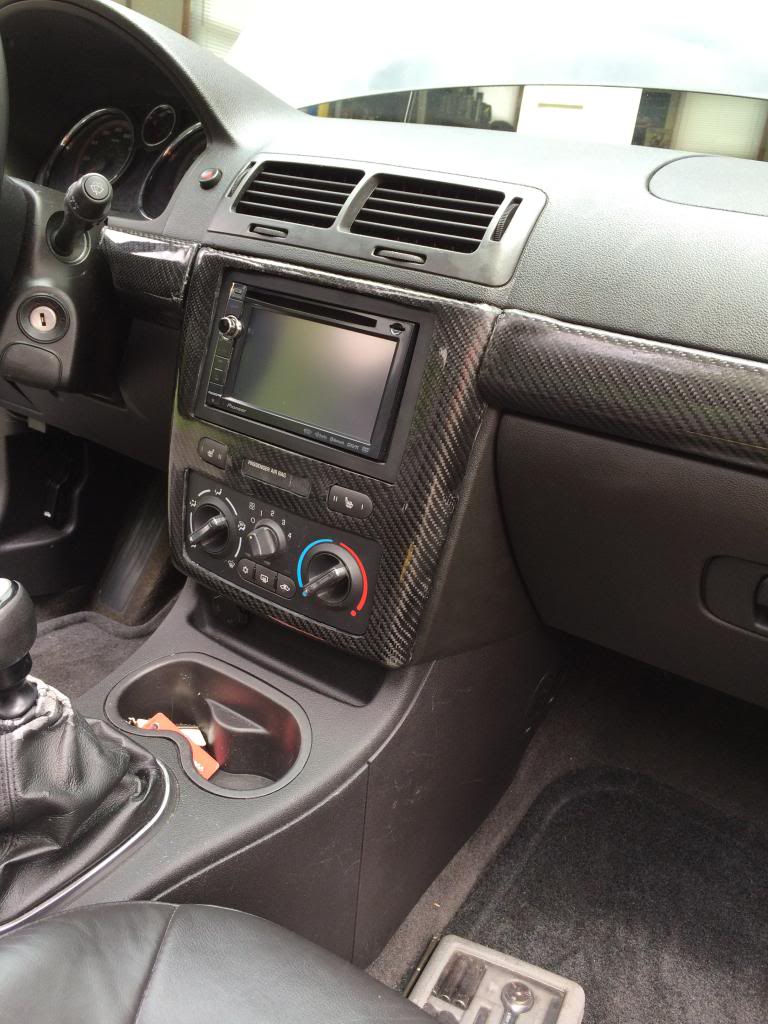
They came out pretty good! Just need to adjust the pieces a little more, but for now... good to go. I also added a black HVAC
INSTALLED PICS
After 4 coats of resin, I had a couple low spots after sanding, so I ended up hitting a couple spots up that needed it.
Sanded that all down smooth. started with 120 grit to 220, then wetsanded with 400, 800, 1000 (changing the water everytime as I moved up in grits)
Cleaned that off good and let it dry... it was ready for clearcoat shown below.
After the clearcoat dried, I wetsanded with 2000 grit sandpaper, then polished that bish up
I actually had some fitment problems because I left some slack behind and around the edges... so I ended up trimming and sanding some more until i got them in. Theres a little bit of orange peel on the top here and there.. I will try and correct that later on but I just wanted to get them in.
They came out pretty good! Just need to adjust the pieces a little more, but for now... good to go. I also added a black HVAC
INSTALLED PICS

