
Appearance: How To: Change interior to LED. *UPDATED INFO*
 09-15-2011, 07:54 PM
#1
Senior Member
Thread Starter
iTrader: (5)

Join Date: 09-15-09
Location: Rochester, NY
Posts: 753
Likes: 0
Received 0 Likes
on
0 Posts
How To: Change interior to LED. *UPDATED INFO*
In this write up you will learn how to switch various interior pieces to LED's. For these projects all you need is basic tools to dissasemble car. A good soldering iron, fine solder( I use .032"), 12 volt leds or normal if you know what resistors to use ( 11-14 for IP cluster, 4-14 for HVAC control, 1 for each window or lock switch. The amount of leds you will use depends on the color. You will also need time and some decent soldering skills.
You will first need to remove the piece you will be swapping. It's all really simple to pull any piece out but if in doubt run a search on here there is plenty of help.
Leds only operate in one direction of power there for you will need to find out the positive and negative sides of each bulb on each piece. You can replug piece into vehicle to measure or use the pins I state and power them up outside the car. If you don't know how to read the pins on a piece, its best to replug into car.
The door lock, mirror, window switches, and HVAC are all the same through out the years. clusters and radios are different.
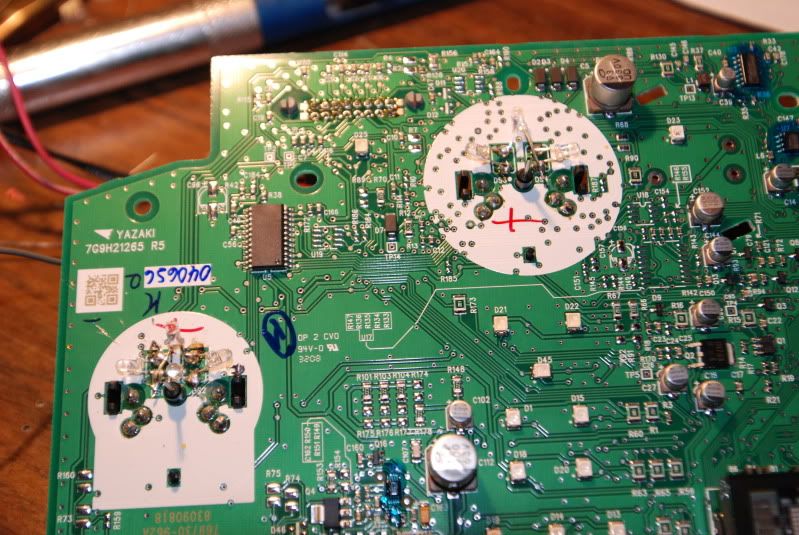
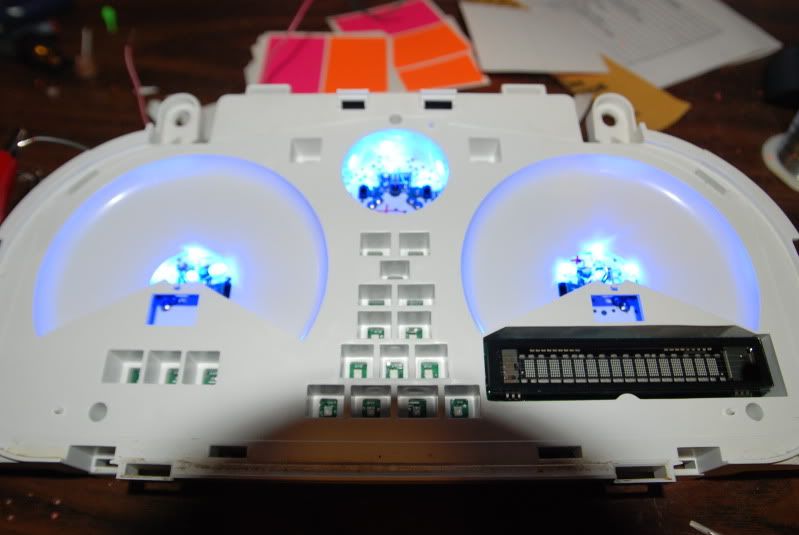
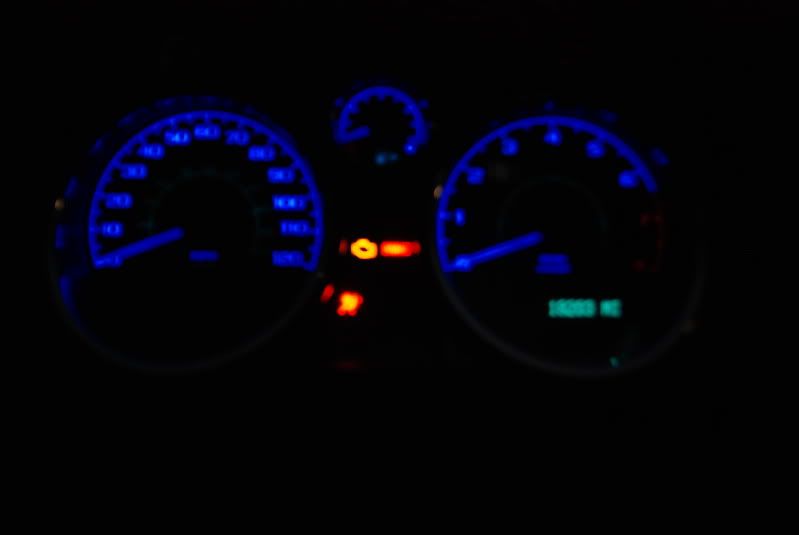
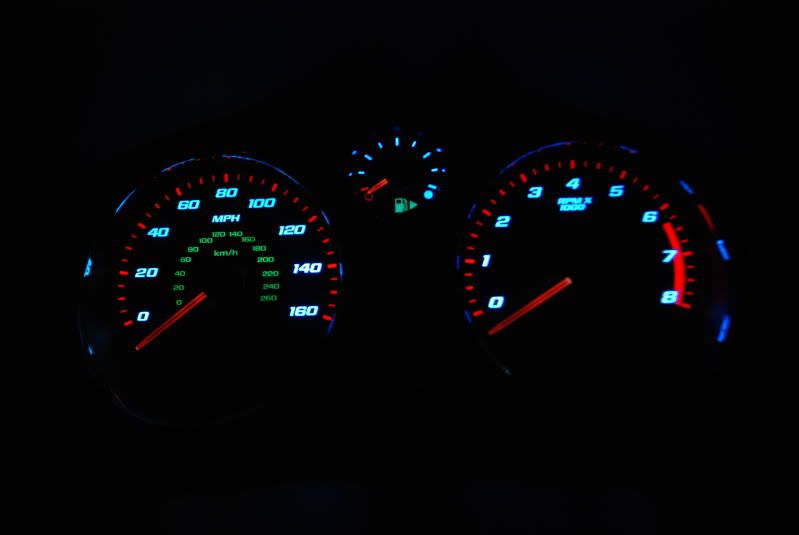
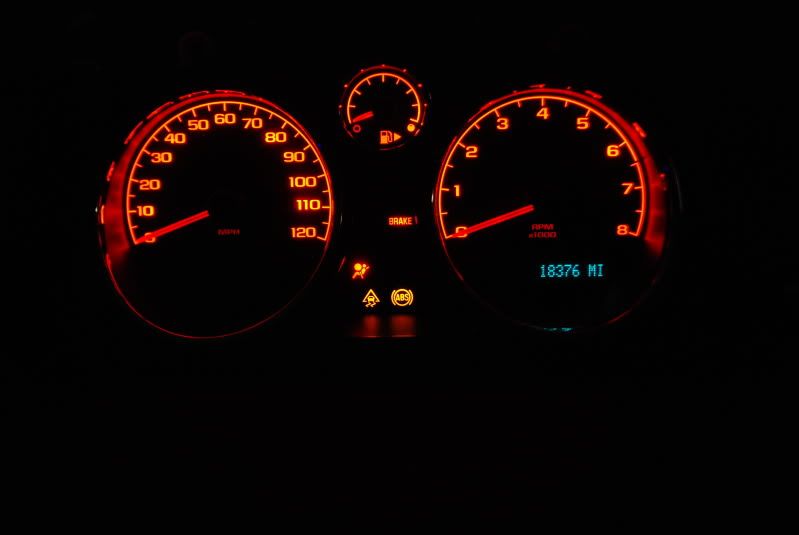
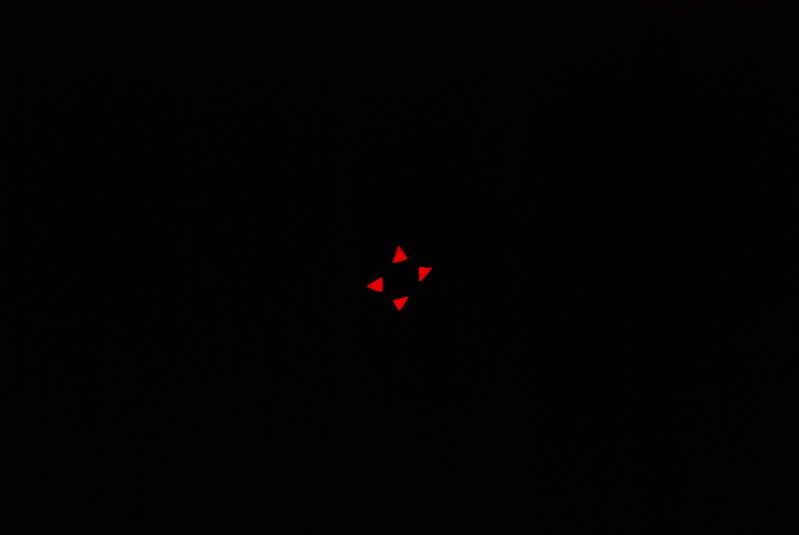
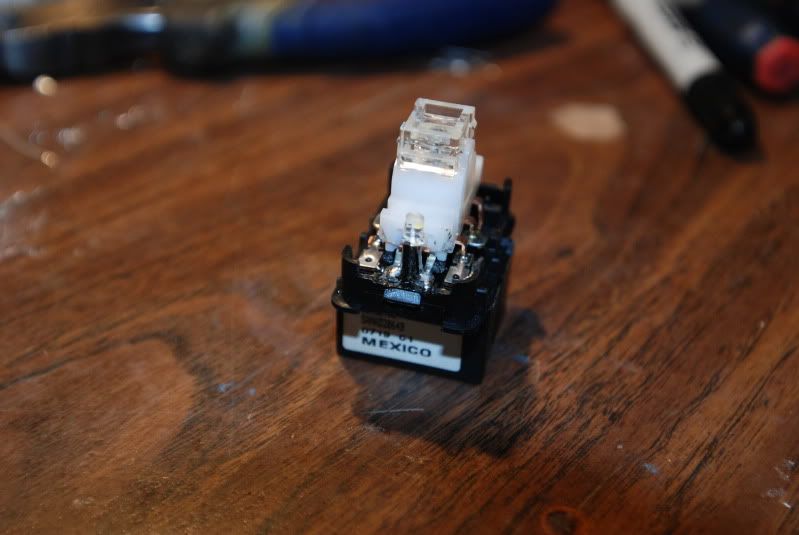
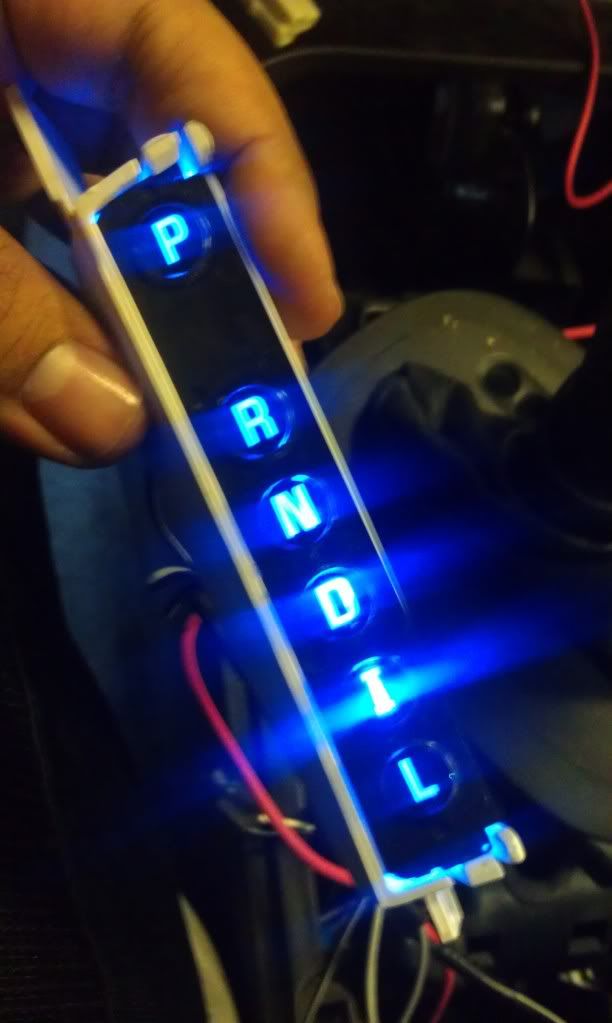
I will start with the cluster. Disassembly is very straight forward to get apart. Only difficult part is getting needles off. I use a pair of bent tweezers. To remove bulbs grab with needle nose pliers and twist off. Test for power polarity in car or ground to pins 15,16 power to pin 8. Review the pictures to see where I placed my leds. The simplest way is the basic triangle one led at each point of a triangle and one pointing to the needle. You can change the needle to any color you want with a simple paint scrape and repaint. Use an orange sticker over red areas to retain color. To rezero cluster: if your doing this in vehicle put full tank of fuel in first so your can set the guage to full. On key on engine off the tach and speedo should be set at zero(Crazy huh?) and fuel to full. Start car shut off and recheck for zero. To rezero out of vehicle aplply ground to pins 15,16 and touch power to pin 13 for ten seconds and release the gauges will sit at zero(you'll get the hang real quick). Once all set reassemble and enjoy.


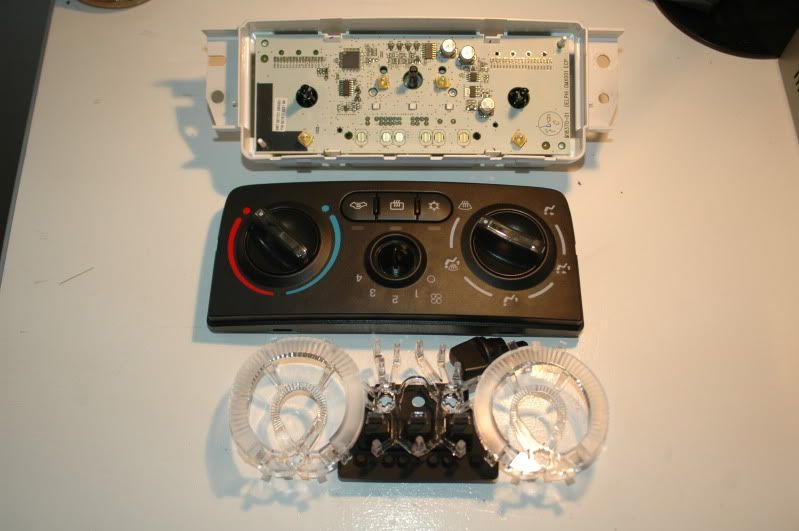
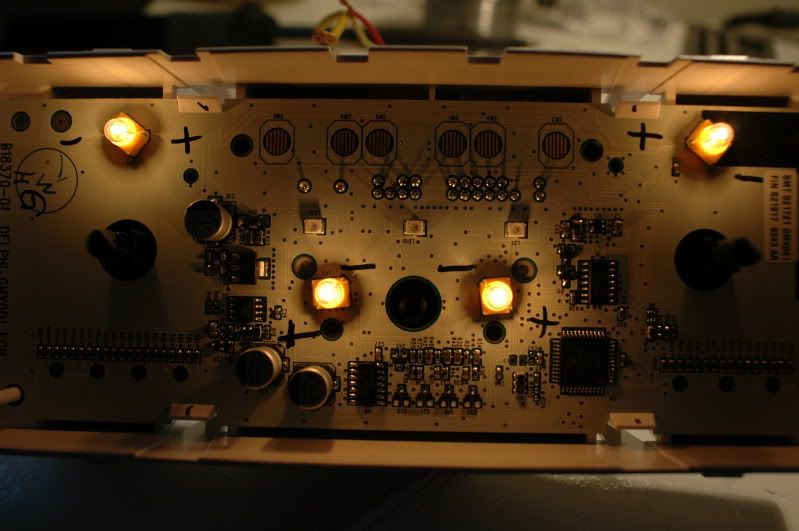
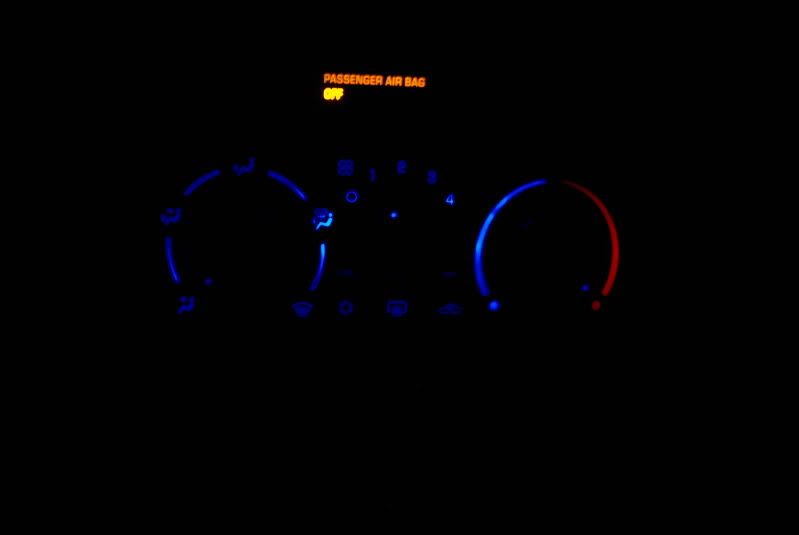
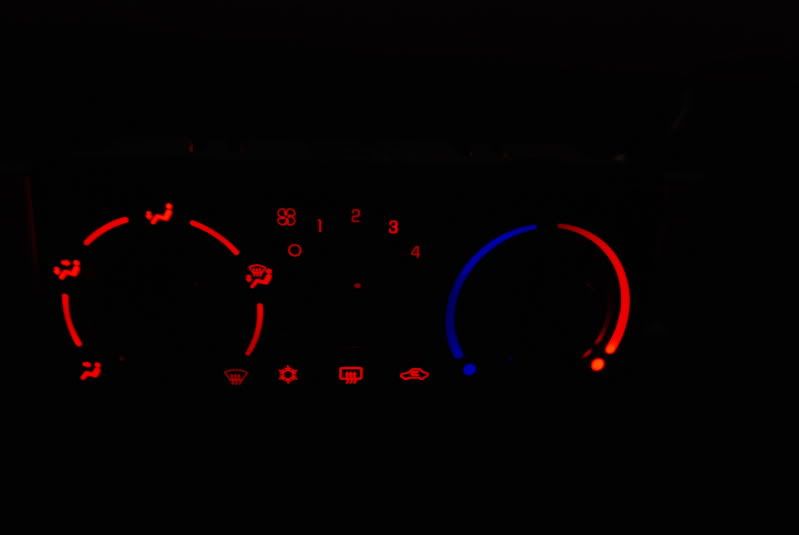
The HVAC is jusy as easy to take apart. Pull the fan speed knob off and pry faceplate off at the four lock tabs. Remove stock bulbs in the same manner. Again test for power and ground polarity. On the 8-pin plug pin 5 is ground and pin 2 is lamp supply. Solder in leds 'till your happy with results and use the same orange sticker as seen on guage face above to retain your red.

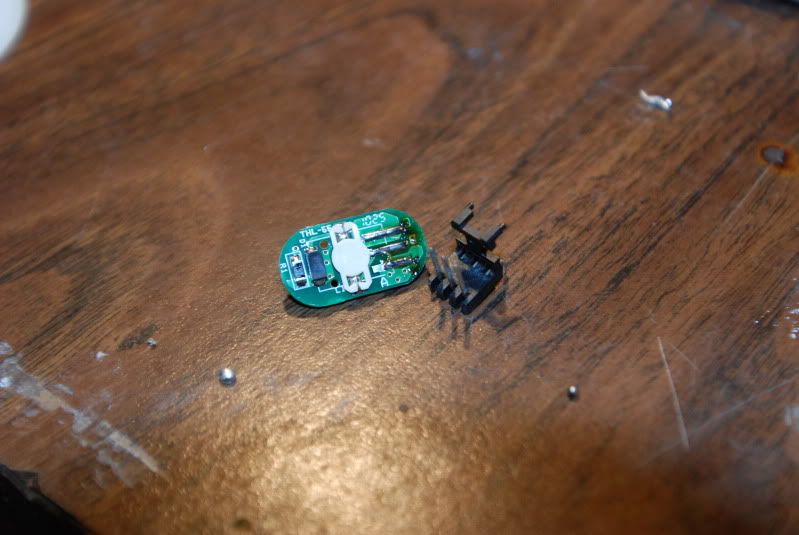
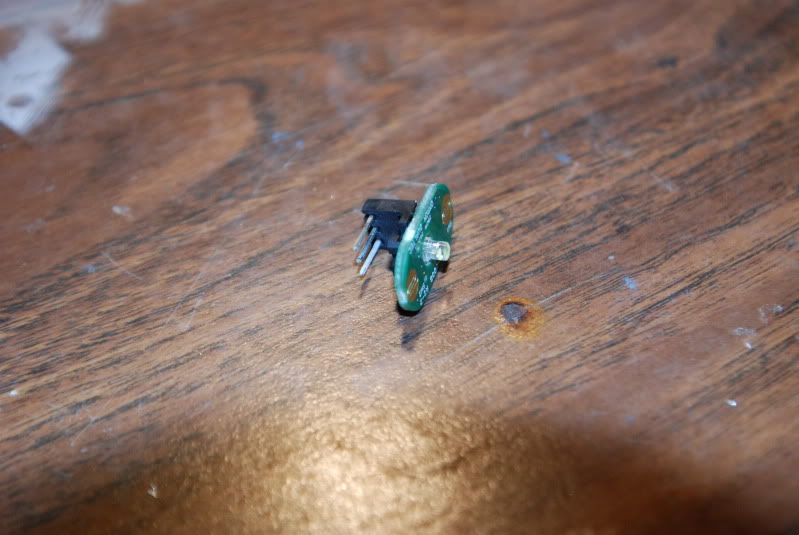
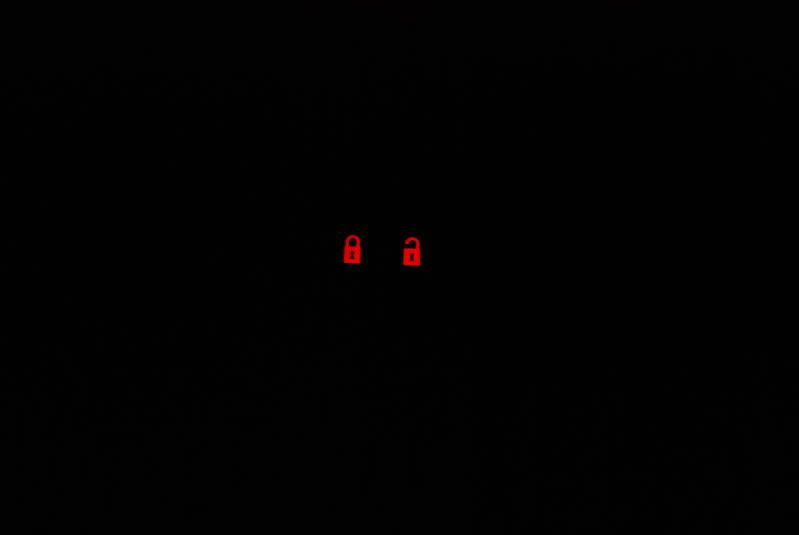
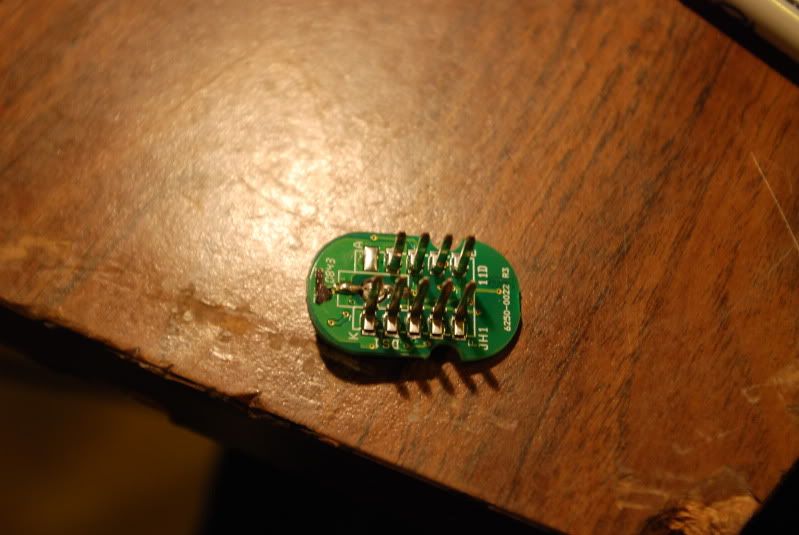
Door locks are fairly simple not much to write up on it. Again self explanitary to open. Once open you will need to desolder the plug and then the stock bulb. The board is marked for the pins so no testing will need to be done in car. Pin A is the ground pin B is the lamp B+. Solder in led and reassemble.


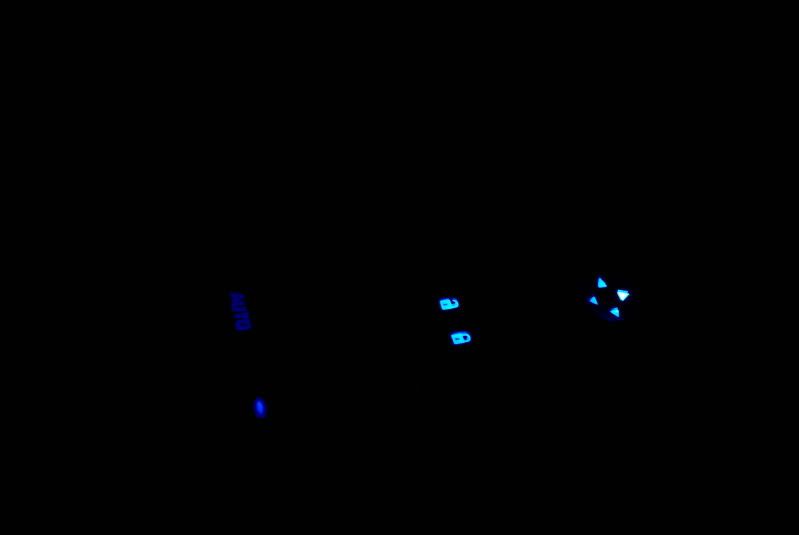
Mirror switch comes apart same as window. You will need to carefully pry off the pin retainer. Remove bulb and solder in led. Pin B is ground and Pin E is lamp B+. reassemble. Blue and white seen above.
Window switches come apart same as above. Remove stock bulbs and again test for polarity like you have in every other piece. On Driver switch Pin B is lamp B+ and ground is Pin F. On passenger switch Pin B is lamp B+ and Pin C is ground. Colored shots seen above.

I will Add for steering wheel controls when redo mine but the leds are 0805 leds in size.

Any questions or comments on what to change POST UP!! Thanks everyone for your support.
You will first need to remove the piece you will be swapping. It's all really simple to pull any piece out but if in doubt run a search on here there is plenty of help.
Leds only operate in one direction of power there for you will need to find out the positive and negative sides of each bulb on each piece. You can replug piece into vehicle to measure or use the pins I state and power them up outside the car. If you don't know how to read the pins on a piece, its best to replug into car.
The door lock, mirror, window switches, and HVAC are all the same through out the years. clusters and radios are different.
I will start with the cluster. Disassembly is very straight forward to get apart. Only difficult part is getting needles off. I use a pair of bent tweezers. To remove bulbs grab with needle nose pliers and twist off. Test for power polarity in car or ground to pins 15,16 power to pin 8. Review the pictures to see where I placed my leds. The simplest way is the basic triangle one led at each point of a triangle and one pointing to the needle. You can change the needle to any color you want with a simple paint scrape and repaint. Use an orange sticker over red areas to retain color. To rezero cluster: if your doing this in vehicle put full tank of fuel in first so your can set the guage to full. On key on engine off the tach and speedo should be set at zero(Crazy huh?) and fuel to full. Start car shut off and recheck for zero. To rezero out of vehicle aplply ground to pins 15,16 and touch power to pin 13 for ten seconds and release the gauges will sit at zero(you'll get the hang real quick). Once all set reassemble and enjoy.
The HVAC is jusy as easy to take apart. Pull the fan speed knob off and pry faceplate off at the four lock tabs. Remove stock bulbs in the same manner. Again test for power and ground polarity. On the 8-pin plug pin 5 is ground and pin 2 is lamp supply. Solder in leds 'till your happy with results and use the same orange sticker as seen on guage face above to retain your red.
Door locks are fairly simple not much to write up on it. Again self explanitary to open. Once open you will need to desolder the plug and then the stock bulb. The board is marked for the pins so no testing will need to be done in car. Pin A is the ground pin B is the lamp B+. Solder in led and reassemble.
Mirror switch comes apart same as window. You will need to carefully pry off the pin retainer. Remove bulb and solder in led. Pin B is ground and Pin E is lamp B+. reassemble. Blue and white seen above.
Window switches come apart same as above. Remove stock bulbs and again test for polarity like you have in every other piece. On Driver switch Pin B is lamp B+ and ground is Pin F. On passenger switch Pin B is lamp B+ and Pin C is ground. Colored shots seen above.
I will Add for steering wheel controls when redo mine but the leds are 0805 leds in size.
Any questions or comments on what to change POST UP!! Thanks everyone for your support.
 09-16-2011, 01:08 AM
#2
Junior Member
iTrader: (1)

Join Date: 03-25-11
Location: Langley BC
Posts: 482
Likes: 0
Received 0 Likes
on
0 Posts
Gotta say the white dash looks great, good job, great pics. And thanks for the inspiration, I've changed my lights to blue too, and the only PITA was the steering wheel controls, just cause the surface mount leds are stupid small.

 09-18-2011, 05:06 PM
#5
Senior Member

I got er done tho , few beers and a bunch of cursing and swearing lol
 09-22-2011, 10:52 PM
#7
Member

Join Date: 08-11-10
Location: Mission, BC
Posts: 264
Likes: 0
Received 0 Likes
on
0 Posts
just did this in blue with most of my interior, looks sweet gonna do the steering wheel tomorrow, but what are the orange stickers u used and were did u buy them? cuz the red on my hvac controlles is very dim.
Last edited by cuebalt; 09-23-2011 at 04:00 AM.
 09-28-2011, 07:57 AM
#10
Junior Member

Join Date: 02-04-11
Location: Pittsburgh
Posts: 456
Likes: 0
Received 0 Likes
on
0 Posts
ok i dont know which one ill get an answer but ill ask on both. Has anyone done the boost gauge? such as changing the LED and face. I have blackkat customs designing me one for my cluster and was looking to see if it can also be done to the boost gauge so they will match.
09-28-2011, 08:56 AM
#11

ok i dont know which one ill get an answer but ill ask on both. Has anyone done the boost gauge? such as changing the LED and face. I have blackkat customs designing me one for my cluster and was looking to see if it can also be done to the boost gauge so they will match.

 10-01-2011, 05:23 PM
#15
Senior Member

Join Date: 04-13-11
Location: Chattanooga, TN
Posts: 670
Likes: 0
Received 0 Likes
on
0 Posts
This is an awesome write up man, hopefully I'll get to do this to my Balt soon. I just want everything to be bright white. Gonna be some work but this write up is gonna help soooo much when I finally get around to it, lol.
10-02-2011, 10:01 AM
#17
Senior Member
Thread Starter
iTrader: (5)
Join Date: 09-15-09
Location: Rochester, NY
Posts: 753
Likes: 0
Received 0 Likes
on
0 Posts
depends on setup and color. but mine with all 12v leds dim almost the same as factory. they are a little brighter at full dim but then again they start out brighter at max brightness. its to hard to picture or video of what your really seeing.
10-07-2011, 07:38 AM
#19
Junior Member
Join Date: 02-04-11
Location: Pittsburgh
Posts: 456
Likes: 0
Received 0 Likes
on
0 Posts
alot of my LEDS came in...all i gotta say the surface mount ones for the steering wheel controls holy shyt are those small how in gods name do those go on! i bought 20 of the and they came in a gaint strip...
10-08-2011, 04:15 AM
#20
I don't know how many versions of the steering wheel there are, but mine doesn't look like this and I had PLENTY of room for a 5mm LED. I ground them down anyway, but after checking it out it all worked fine with no modification. If you want I could get some pics to include "other" steering wheel controls.
10-09-2011, 08:35 PM
#21
Junior Member
Join Date: 02-04-11
Location: Pittsburgh
Posts: 456
Likes: 0
Received 0 Likes
on
0 Posts
well i contacted OP and he told me to use the 0805 surface mount ones for steering wheel controls. i have yet to take anything apart im waiting for my blackkat cutom cluster and boost guage to come in. but if you can get another pics that would be kool. i have a 2008 cobalt ss
10-10-2011, 09:42 AM
#23
hey OP, when i swapped my cluster i was reading directions that you needed to screw the needles counterclockwise a good few times and then pull out while you're still screwing... said the part could be damaged if not done that way, just my .02 otherwise i'm in on this
10-10-2011, 01:41 PM
#25

Rather than worrying about resetting the gauges just use a piece of tape to mark where they come to rest and put them on back in the same spot. Also a normal fork works great for pulling the needles off. Don't turn them to take them off unless you want to recalibrate them afterwards