2.0 LSJ Engine: How To Install Oil Pressure Gauge Into 2.0L LSJ
#1
How To Install Oil Pressure Gauge Into 2.0L LSJ
How To Install Oil Pressure Gauge Into 2.0L LSJ
WARNING: (fine print) When following these directions, you will be removing the factory oil pressure sending unit. If you don't want to mess around with your warranty, then I wouldn't recommend this for you. I am not responsible for anything that happens to you, your car or your warranty.

Also I want to thank member MrCleanY0 for all his help with this. He was the first to do this, I just wanted to write a nice how-to for everyone to use.
With that out of the way, let's get the ball rolling...
First off, you will need the following items:
- Oil Pressure Gauge
- Autometer (or equivalent) Metric Adapter - Part #2278
- *Recommended - 16mm Copper Crush Washer
You will need the following tools:
- 2 Cresent Wrenches (or fixed size wrench, but I'm not sure on the size..I didn't have a large enough one)
- Shop light (really helps)
- Oil pan
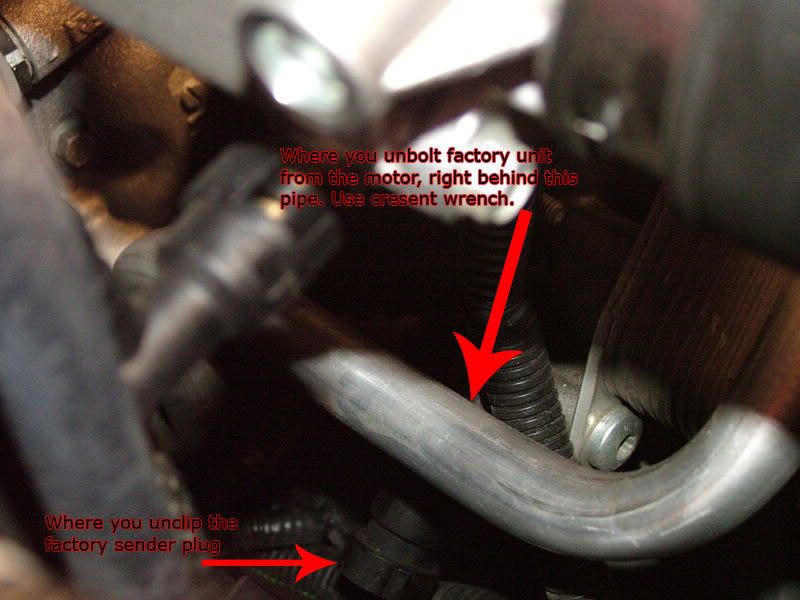
1. First off, locate the factory oil pressure sending unit. It is located below and to the right of the oil filter. It is pointing out at about a 45 degree angle down, pointing toward the radiator. It can be a little tricky to find, as there is a tube running right in front of it.

2. Place an oil pan below the car to catch the oil that will fall out when you remove the sending unit.
3. Unclip the sending unit harness from the sending unit.
4. Now we want to remove the factory sending unit. Use your shop light here to help you see!!! To do this, use a cresent wrench (or fixed wrench) and loosen the sending unit. It took a good amount of force to break it free, but once I got past that, you can just unscrew it with your hand. When you get it off, be careful and save the crush washer that is on the end of the factory unit. If you can't find a new crush washer at a local store (I couldn't) then you will need to reuse this washer!!!
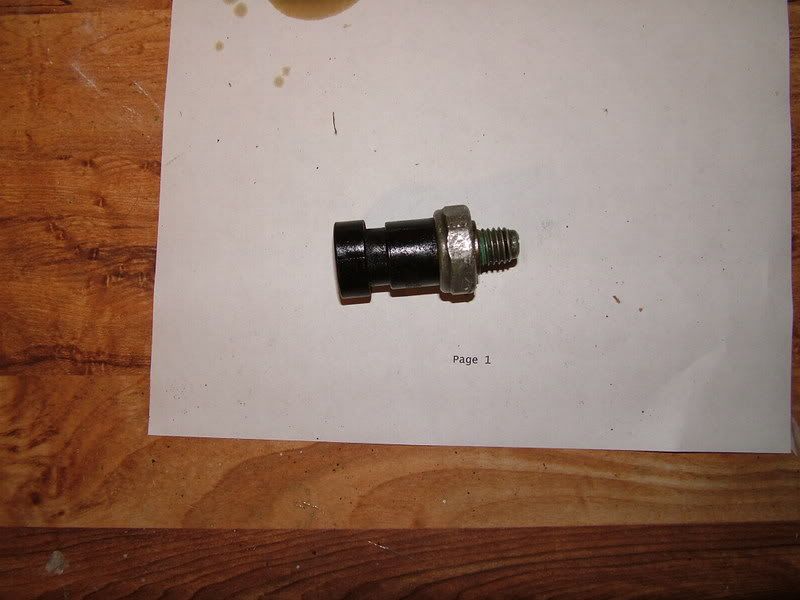
5. When you get the unit out, check to make sure there are two pieces. There should be the sending unit itself and an adapter which is what screws into the motor. Remove the adapter from the factory sending unit. This is what the factory sensor looks like with the adapter off of it:

6. Now we need to assemble the new sending unit. Take your new sending unit and wrap the threads in thread sealant to protect from leaks. Then take the Autometer metric adapter and screw it onto the new sending unit. Make sure to get this nice and tight. Next, put a copper crush washer on the end of the metric adapter and wrap the threads in thread sealant. Screw the factory adapter into the metric adapter. This shouldn't have to get as tight, just watch the crush washer and tighten it until it's flat. This is what you should have now:

7. Now would be a good time to hook up your signal wire to the end of the sending unit as it can be tricky to get to once you've installed it.
8. Place either your new crush washer you bought or the old crush washer onto the end of the factory adapter. Screw the new sending unit assembly into the motor and make sure to tighten it up really good with your wrench. You should feel the crush washer getting crushed as you tighten it up.
9. Run your signal wire to your gauge inside. I powered my gauge from the harness where the factory boost gauge plugs in.
10. I would throw a piece of cardboard on the floor now and start up the engine and watch the gauge in all it's glory. Check for any big leaks immediately on the cardboard. If everything looks good take it around the block and try and get the pressure built up a little to help check for leaks. If you are leaking, you probably just need to tighten it up a bit more...
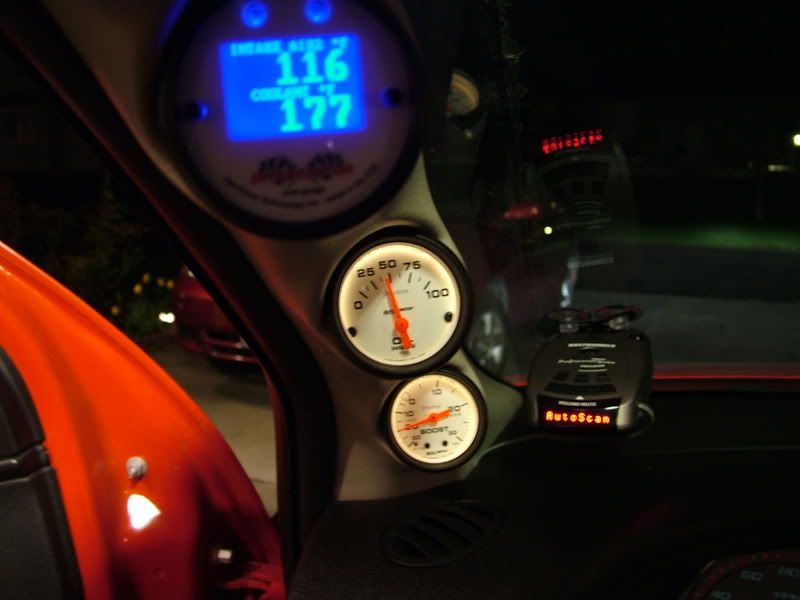
11. Here is the finished product!


I hope this helps everyone. Again, thanks to MrCleanY0 for all his help with this!!
ALSO I have had no negative effects from removing the stock sending unit. No CELs, no issues. Just thought I would make that clear.
Last edited by 06_SS_S/C; 05-04-2007 at 12:04 AM.
#5
On a 2.2 or 2.4, the sender is very hard to reach from the top. Jack the car up and remove the starter (very easy) and you have WAY more room to work. I would think the 2.0 would be the same, but have not verified that.
Dennis
Dennis
#10
what will happen if you leave the factory plug unplugged? will it not let you know about your oil example how long is left or is that sender for the supercharged?
Thank you and awesome write up.
Thank you and awesome write up.
#13
I have an interceptor and just checked after I installed it to see if it threw one, and it just happened to do so.
Yeah it is in the front, near where the oil filter is.
Yeah it is in the front, near where the oil filter is.
#14
This may not apply to the cobalt, I've never looked at the sending unit on mine so please correct me if you know that I'm wrong... but I'm going to throw this out there anyway. Many GM oil pressure sending units have a safety feature that will cut power to the fuel pump if the pressure drops below a certain value, so that the car will lose fuel pressure and die out before the engine gets ruined. If our cars don't have an oil pressure gauge, then why is there a sending unit at all other than as a safety precaution?
#20
Just got done with installing mine tonight. If you remove that vacuum line it makes it a lot easier. Buying a 24mm open ended box wrench will help as the stock adapter is that size. Definitely attach the sending wire before you screw the assembly into the block. It's a pain in the ass to attach after if you don't.
#24


