
2.0 LSJ Engine: Install Powell F35 Stage2 Mounts
 04-18-2009, 01:25 AM
#1

Install Powell F35 Stage2 Mounts
For detailed pictures to go along with these instructions refer to John's install thread in the drivetrain section. https://www.cobaltss.net/forums/driv...sj-lnf-253153/
I do not reccomend these instructions for impatient people. This needs to be done very carefully as the THREE mounts will be loosened/uninstalled at one point. thanks to recklessactn for the use of his "before install" pictures as i didn't think about taking any untill i already had installed them.
Use a 2x4 inbetween the jacks and engine.
By the way, don't complain about not having a lift or anything, i did all this with the car just up on ramps. I also had the downpipe and catback removed so i could install the hahn exhaust, but having the downpipe removed gave me an ungodly amount of space to move around in, if you can remove the downpipe for this, i strongly reccomend it.
"tighten(ed) down" means....no play at all.
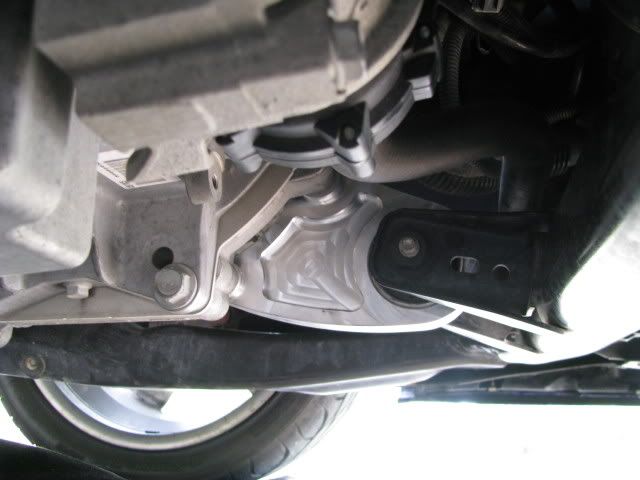
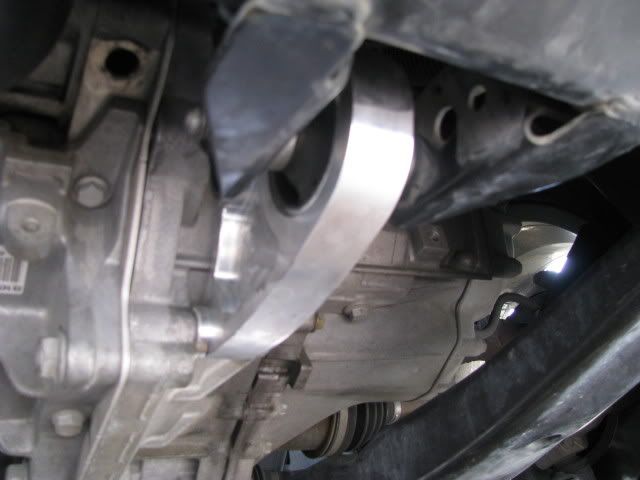
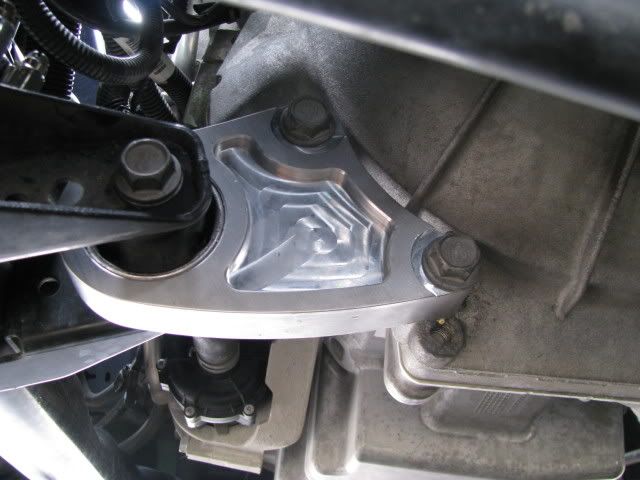
"rear trans bracket(18mm)"VVVV

"REAR THREE MOUNT TO SUBFRAME BOLTS(15mm)"VVVV

FRONT TRANS MOUNT BOLTS(18mm). LEFT=MOUNT TO SUBFRAME. MIDDLE&RIGHT=MOUNT TO TRANS

step1: Place hydrolic jack under trans.
step2: Place floor jack under oil pan(as close to pass. side as possible)
step3: Loosen the three bolts on the top of the passenger side upper engine mount BUT DO NOT TAKE THEM OUT!!!! LEAVE THEM THREADED!!!! ...just loosen them to allow a little movement(about .250")
step4: Remove front transmission mount via the three bolts
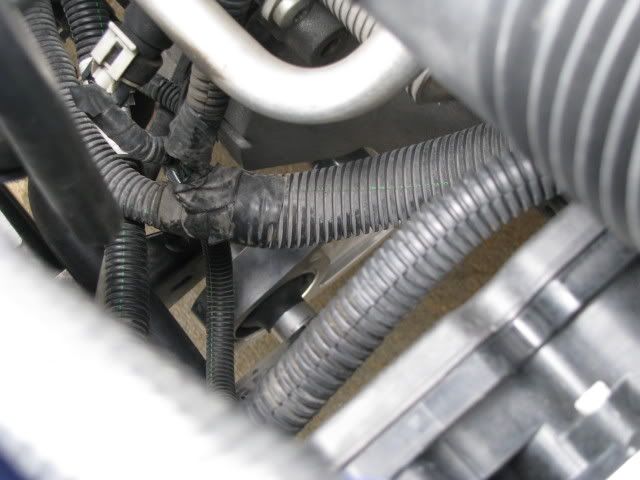
step5: Remove the WHOLE rear transmission mount assembly(mount, heatshield/bracket) via the three bolts on the bottom of the mount and the three bolts on the mount to trans bracket. LEAVE THE BOLT THAT GOES THROUGH THE MOUNT UNTIL IT IS ALL OFF THE CAR!!!! (it will all come out in one piece.....if it doesnt, you screwed up). once you can move it around, pull out the 02 electrical connections. its got a "christmastree type connection into the mount.
step6: Seperate the mount and bracket via the main bolt through the mount
step7: Reinstall bracket via the three bolts (WITHOUT THE MOUNT!!!) and tighten down.
step8: Install rear trans mount via the three mount to subframe bolts and tighten down.
step9: Install front trans mount via the two mount to trans bolts and leave loose. Install main bolt through the mount and start the thread it slightly, leave it loose as well.
AT THIS POINT, BOTH OTTP MOUNTS SHOULD BE ON THE CAR. FRONT SHOULD HAVE ALL THREE BOLTS LOSSELY IN. REAR SHOULD HAVE THE BRACKET ATTATCHED TO THE TRANS AND THE MOUNT ATTACHED TO THE FRAME, BOTH OF WHICH SHOULD BE TIGHTENED DOWN.step10: (Extra set of hands is useful here) Using the hydrolic jack under the transmission, start to jack it upwards untill the bolt that connects the rear trans mount to the bracket will go through(this is a fairly good amount in terms of engine movement)
AT THIS POINT, ALL BOLTS SHOULD BE ON THE CAR AND ALL THE WAY OR LOOSELY TIGHTENED
step11: Tighten the three bolts on the upper motor mount back down all the way and remove the jack from under the oil pan
step12: Tighten up ALL BOLTS on the front and rear trans mounts and remove the hydrolic jack SLOWLY, this is when everything will settle back down.
step13: Go for a LIGHT!!! (DO NOT HIT BOOST, DO NOT HIT MORE THAN 3K RPMS) drive around the block and pull back up the ramps. Yhis will allow the bolts/mounts to do any final movement
step14: Give everything a final tightening to trq specs.

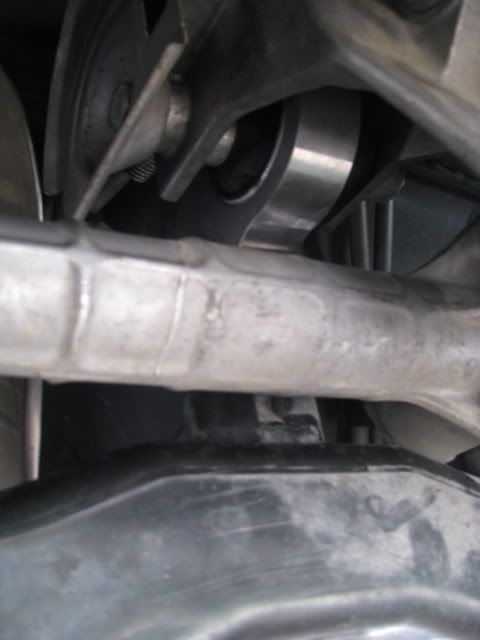
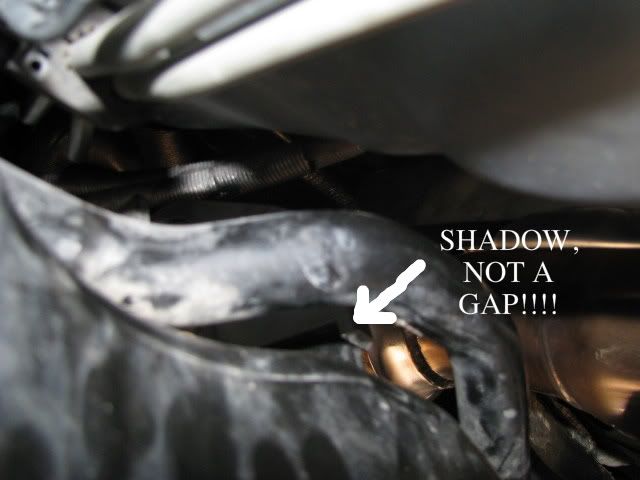
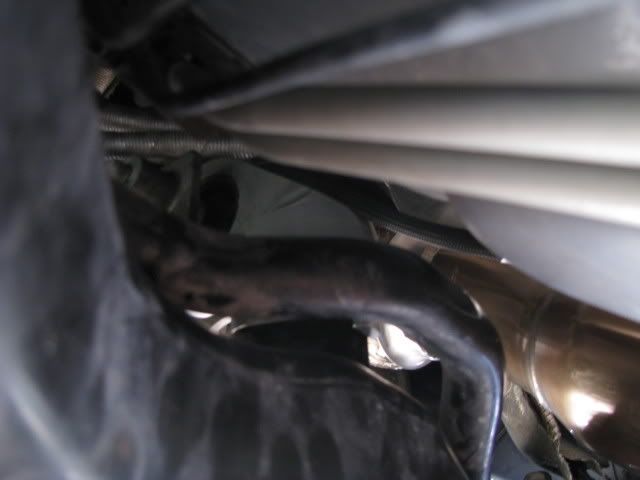
INSTALLED PICTURES

I do not reccomend these instructions for impatient people. This needs to be done very carefully as the THREE mounts will be loosened/uninstalled at one point. thanks to recklessactn for the use of his "before install" pictures as i didn't think about taking any untill i already had installed them.
Use a 2x4 inbetween the jacks and engine.
By the way, don't complain about not having a lift or anything, i did all this with the car just up on ramps. I also had the downpipe and catback removed so i could install the hahn exhaust, but having the downpipe removed gave me an ungodly amount of space to move around in, if you can remove the downpipe for this, i strongly reccomend it.
"tighten(ed) down" means....no play at all.
"rear trans bracket(18mm)"VVVV
"REAR THREE MOUNT TO SUBFRAME BOLTS(15mm)"VVVV
FRONT TRANS MOUNT BOLTS(18mm). LEFT=MOUNT TO SUBFRAME. MIDDLE&RIGHT=MOUNT TO TRANS
step1: Place hydrolic jack under trans.
step2: Place floor jack under oil pan(as close to pass. side as possible)
step3: Loosen the three bolts on the top of the passenger side upper engine mount BUT DO NOT TAKE THEM OUT!!!! LEAVE THEM THREADED!!!! ...just loosen them to allow a little movement(about .250")
step4: Remove front transmission mount via the three bolts
step5: Remove the WHOLE rear transmission mount assembly(mount, heatshield/bracket) via the three bolts on the bottom of the mount and the three bolts on the mount to trans bracket. LEAVE THE BOLT THAT GOES THROUGH THE MOUNT UNTIL IT IS ALL OFF THE CAR!!!! (it will all come out in one piece.....if it doesnt, you screwed up). once you can move it around, pull out the 02 electrical connections. its got a "christmastree type connection into the mount.
step6: Seperate the mount and bracket via the main bolt through the mount
step7: Reinstall bracket via the three bolts (WITHOUT THE MOUNT!!!) and tighten down.
step8: Install rear trans mount via the three mount to subframe bolts and tighten down.
step9: Install front trans mount via the two mount to trans bolts and leave loose. Install main bolt through the mount and start the thread it slightly, leave it loose as well.
AT THIS POINT, BOTH OTTP MOUNTS SHOULD BE ON THE CAR. FRONT SHOULD HAVE ALL THREE BOLTS LOSSELY IN. REAR SHOULD HAVE THE BRACKET ATTATCHED TO THE TRANS AND THE MOUNT ATTACHED TO THE FRAME, BOTH OF WHICH SHOULD BE TIGHTENED DOWN.step10: (Extra set of hands is useful here) Using the hydrolic jack under the transmission, start to jack it upwards untill the bolt that connects the rear trans mount to the bracket will go through(this is a fairly good amount in terms of engine movement)
AT THIS POINT, ALL BOLTS SHOULD BE ON THE CAR AND ALL THE WAY OR LOOSELY TIGHTENED
step11: Tighten the three bolts on the upper motor mount back down all the way and remove the jack from under the oil pan
step12: Tighten up ALL BOLTS on the front and rear trans mounts and remove the hydrolic jack SLOWLY, this is when everything will settle back down.
step13: Go for a LIGHT!!! (DO NOT HIT BOOST, DO NOT HIT MORE THAN 3K RPMS) drive around the block and pull back up the ramps. Yhis will allow the bolts/mounts to do any final movement
step14: Give everything a final tightening to trq specs.
INSTALLED PICTURES
Last edited by EXsoccer1921; 11-29-2012 at 02:36 PM.
 04-18-2009, 01:48 PM
#4
Premium Member
iTrader: (4)
Join Date: 12-09-06
Location: Sinton TX.
Posts: 2,683
Likes: 0
Received 0 Likes
on
0 Posts
I put my stage1 mount and rear spacer in yesterday,took me 30min to do.When i start putting more power down,i will get the rear mount.I highly recommend them !
!
!
 04-18-2009, 02:16 PM
#7
Senior Member
Join Date: 12-26-07
Location: Tempe, Arizona
Posts: 1,515
Likes: 0
Received 0 Likes
on
0 Posts
for the rear mount, i didnt loosen the bracket, i just left the bottom 3 bolts really loose and put the bolt through the bushing first and used the 3 to line it back up.
04-18-2009, 05:09 PM
#8
sorry totally forgot to take some, i just had it on the ramps. i got a couple of the front. the rear is a bit harder to see without being able to get under the car. ah **** it i'll go pull it back up hahah
pictures uploading. i took more of the rear one cause its a lot easier to get good angles of the front so i don't need as many for that
EDIT: pictures moved to first post
so i post up pictures and everyone leaves....
pictures uploading. i took more of the rear one cause its a lot easier to get good angles of the front so i don't need as many for that
EDIT: pictures moved to first post
so i post up pictures and everyone leaves....
Last edited by EXsoccer1921; 04-18-2009 at 05:27 PM. Reason: Automerged Doublepost

 04-18-2009, 05:28 PM
#11
i think the ones youre talking about are the older ones. or the stage1 mounts
no its not really a pain in the ass. i just wanted to make this as detailed as possible. its really not that hard once you start on it. just be careful moving around with the jacks, or whatever you have supporting the engine.
i'll do them for you if you want me to. you can pay me with the tvs ya got there
i'll do them for you if you want me to. you can pay me with the tvs ya got there
Last edited by EXsoccer1921; 04-18-2009 at 05:28 PM. Reason: Automerged Doublepost
04-19-2009, 11:21 AM
#13
I installed mine in about an hour (on ground with jack stands) and I'd say its about a 2 out of 10 on the difficulty scale. Not a single cuss word used! No swearing= easy! in my book.
04-19-2009, 02:49 PM
#15
Senior Member
Join Date: 03-15-08
Location: Chicago...Land
Posts: 3,651
Likes: 0
Received 0 Likes
on
0 Posts
quick question as mine vibrate bad because i did'nt let them settle and instead just torqued them to spec but when you say "tightened" then took them for a drive do you have an approximate ft lbs you tightened them 2?
04-19-2009, 03:31 PM
#16
i just tightened them enough to where they wouldn't fall out. but were still about to be "vibrated" so to speak, into place. but by no means should you leave any threads exposed hahah
yeah like i said, its really not that hard. you just have to be carefull
yeah like i said, its really not that hard. you just have to be carefull
Last edited by EXsoccer1921; 04-19-2009 at 03:31 PM. Reason: Automerged Doublepost
 06-21-2009, 01:18 AM
#18
Senior Member
iTrader: (1)

Join Date: 08-08-07
Location: Calgary, Alberta
Posts: 1,641
Likes: 0
Received 0 Likes
on
0 Posts
I have a pair of questions in regards to this install. Keep in mind, I am applying these instructions simply to installing just the stock mounts right now.
1) Would doing the install with the car up on jackstands make these instructions differ from having it up on ramps?
2) Does anyone think that improperly installing these mounts, or any tranny mounts for that matter create an excessive amount of false knock?
Thanks in Advance.
Torque specs for the 18 mill bolts is 100 N-M. I believe torque specs for the 15 mill bolts on the rear tranny mount is 50 N-M. I may have to double check that...
Last edited by Pickles; 06-21-2009 at 01:18 AM. Reason: Automerged Doublepost
08-21-2009, 12:27 PM
#19
Member
iTrader: (1)

Join Date: 07-25-09
Location: suffolk,UK
Posts: 263
Likes: 0
Received 0 Likes
on
0 Posts
so a couple of questiond for me. did anyone ever find the correct torque specs for the mounts. and i ordered the ttr engine mount and tranny bushing. will i be following the same procedure as you did hear? i think i would, but didn't think it would hurt to ask either.but if anyone knows, what do i have to do to press out the bearings.? i would think just press one out and press one in. but im not sure and would like advice from a person who has done this before.


 03-04-2010, 05:54 PM
#25
Senior Member
Join Date: 08-17-08
Location: Illinois
Posts: 1,605
Likes: 0
Received 0 Likes
on
0 Posts
Installation question

Ok so i ordered Hypersingle and Stage 2 rotated mounts
One of the mounts has spacers/bushings zip tied to them
There were two others in a plastic ziploc bag. Are these for the front trans mount?
woa, sorry for the large cameraphone pic
Last edited by MaxVQ35DE; 03-04-2010 at 05:54 PM. Reason: Automerged Doublepost