Carbon Fiber
#1
Carbon Fiber
Okay so....I bought carbon fiber wrap off of ebay. I tried putting it on myself, but I was not successful! Can anyone help me out or may know someone who can install the carbon fiber for me??? Thanks! 

#5
#6
when you say carbon Fiber Wrap.. do you mean carbon fiber twill or matt or just the carbon fiber vinyl that has glue on the back ... cause if thats the case i have a how to on it cause i have it in my car
#10
the box says rvinyl and it has a sticky back. yeah thats exactly what parts i want to do to my car as per your picture below.
Last edited by CobaltGal05; 05-26-2007 at 11:37 AM. Reason: Automerged Doublepost
#11
Tools you will need
-Vinyl (whatever color or style you want)
- razor
- screwdriver
- blow dryer
First remove the trim piece you want to cover use a screw driver to remove the clips holding it on, tug hard on in
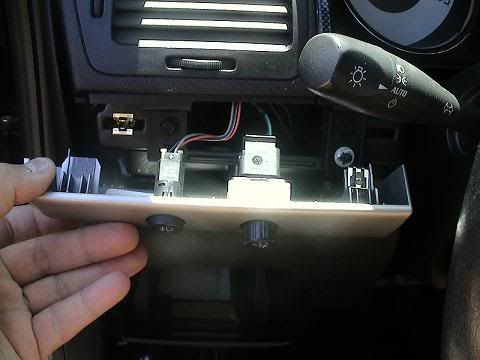
Disconnect all the wiring and remove the buttons
Next cut out a piece of vinyl larger than the piece that you are covering

Place it loosely on top of the piece you are going to cover
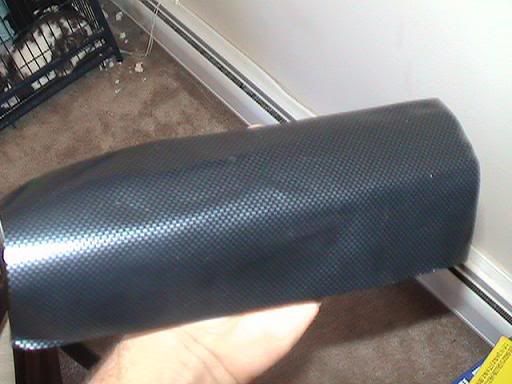
Using a blow dryer shrink the vinyl around the piece. Keep moving the blow dryer as to not melt the vinyl

It will look like this.. Push out any air bubbles that may be under the vinyl. Also smooth it out over the surface by heating the piece up with the blow dryer
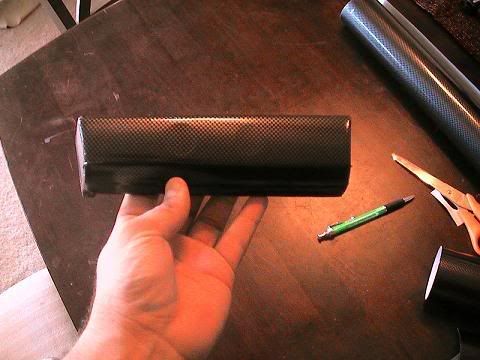
Now trim off any extra you may have remember to wrap it behind the back of the piece first so that all ends are covered.. Heat the ends up to stretch it over so it doesnít bind up
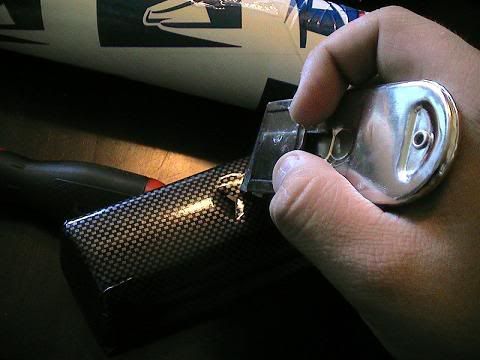
Using a razor cut slits into the holes where the buttons were and using the blow dryer push the flaps inside

Install the buttons and heat the vinyl back up to shrink the vinyl around the edges of the buttons
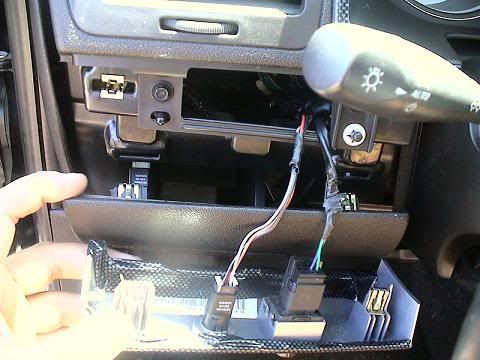
Rein tall the trim piece, just push hard to get the clips back in..I pulled out the bottom trim piece so that it will fit better
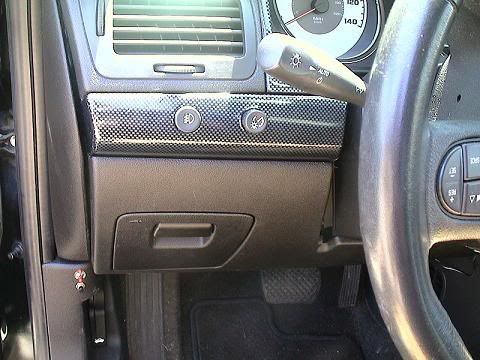


Here is the finial product . If you see any more air bubbles use a pin and poke a small hole in the vinyl and push out the air.. Next I will be clear coating it. Also the radio trim pieces will take a long time took me about 45min to and hour wrapping and trimming all the buttons
I like it and thatís all that matters so please donít bash I think it looks a lot better than my old CF trim kit that I bought online that only covered parts of the trim pieces..
thats should be the answer right there
-drew
-Vinyl (whatever color or style you want)
- razor
- screwdriver
- blow dryer
First remove the trim piece you want to cover use a screw driver to remove the clips holding it on, tug hard on in

Disconnect all the wiring and remove the buttons
Next cut out a piece of vinyl larger than the piece that you are covering

Place it loosely on top of the piece you are going to cover

Using a blow dryer shrink the vinyl around the piece. Keep moving the blow dryer as to not melt the vinyl

It will look like this.. Push out any air bubbles that may be under the vinyl. Also smooth it out over the surface by heating the piece up with the blow dryer

Now trim off any extra you may have remember to wrap it behind the back of the piece first so that all ends are covered.. Heat the ends up to stretch it over so it doesnít bind up

Using a razor cut slits into the holes where the buttons were and using the blow dryer push the flaps inside

Install the buttons and heat the vinyl back up to shrink the vinyl around the edges of the buttons

Rein tall the trim piece, just push hard to get the clips back in..I pulled out the bottom trim piece so that it will fit better


Here is the finial product . If you see any more air bubbles use a pin and poke a small hole in the vinyl and push out the air.. Next I will be clear coating it. Also the radio trim pieces will take a long time took me about 45min to and hour wrapping and trimming all the buttons
I like it and thatís all that matters so please donít bash I think it looks a lot better than my old CF trim kit that I bought online that only covered parts of the trim pieces..
thats should be the answer right there
-drew
Last edited by c0baltic; 05-26-2007 at 08:13 PM. Reason: Automerged Doublepost
#16
#17
#18
Tools you will need
-Vinyl (whatever color or style you want)
- razor
- screwdriver
- blow dryer
First remove the trim piece you want to cover use a screw driver to remove the clips holding it on, tug hard on in

Disconnect all the wiring and remove the buttons
Next cut out a piece of vinyl larger than the piece that you are covering

Place it loosely on top of the piece you are going to cover

Using a blow dryer shrink the vinyl around the piece. Keep moving the blow dryer as to not melt the vinyl

It will look like this.. Push out any air bubbles that may be under the vinyl. Also smooth it out over the surface by heating the piece up with the blow dryer

Now trim off any extra you may have remember to wrap it behind the back of the piece first so that all ends are covered.. Heat the ends up to stretch it over so it doesnít bind up

Using a razor cut slits into the holes where the buttons were and using the blow dryer push the flaps inside

Install the buttons and heat the vinyl back up to shrink the vinyl around the edges of the buttons

Rein tall the trim piece, just push hard to get the clips back in..I pulled out the bottom trim piece so that it will fit better


Here is the finial product . If you see any more air bubbles use a pin and poke a small hole in the vinyl and push out the air.. Next I will be clear coating it. Also the radio trim pieces will take a long time took me about 45min to and hour wrapping and trimming all the buttons
I like it and thatís all that matters so please donít bash I think it looks a lot better than my old CF trim kit that I bought online that only covered parts of the trim pieces..
thats should be the answer right there
-drew
-Vinyl (whatever color or style you want)
- razor
- screwdriver
- blow dryer
First remove the trim piece you want to cover use a screw driver to remove the clips holding it on, tug hard on in

Disconnect all the wiring and remove the buttons
Next cut out a piece of vinyl larger than the piece that you are covering

Place it loosely on top of the piece you are going to cover

Using a blow dryer shrink the vinyl around the piece. Keep moving the blow dryer as to not melt the vinyl

It will look like this.. Push out any air bubbles that may be under the vinyl. Also smooth it out over the surface by heating the piece up with the blow dryer

Now trim off any extra you may have remember to wrap it behind the back of the piece first so that all ends are covered.. Heat the ends up to stretch it over so it doesnít bind up

Using a razor cut slits into the holes where the buttons were and using the blow dryer push the flaps inside

Install the buttons and heat the vinyl back up to shrink the vinyl around the edges of the buttons

Rein tall the trim piece, just push hard to get the clips back in..I pulled out the bottom trim piece so that it will fit better


Here is the finial product . If you see any more air bubbles use a pin and poke a small hole in the vinyl and push out the air.. Next I will be clear coating it. Also the radio trim pieces will take a long time took me about 45min to and hour wrapping and trimming all the buttons
I like it and thatís all that matters so please donít bash I think it looks a lot better than my old CF trim kit that I bought online that only covered parts of the trim pieces..
thats should be the answer right there
-drew
Good write up, what are your gauges for.
#23
Man I tried doing that a few weeks ago and failed miserably. Didn't think about using the blow dryer to get it more managable, cause mine was just stiff and it would not wrap around it well enough. I lack patience as well. I still have roll of it I may have to give it a try again.
Thread
Thread Starter
Forum
Replies
Last Post


